__NUXT_JSONP__("/courses/intro-to-vue-3/creating-the-vue-app-vue3", (function(a,b,c,d,e,f,g,h,i,j,k,l,m,n,o,p,q,r,s,t,u,v,w,x,y,z,A,B,C,D,E,F,G,H,I,J,K,L,M,N,O,P,Q,R,S,T,U,V,W,X,Y,Z,_,$,aa,ab,ac,ad,ae,af,ag,ah,ai,aj,ak,al,am,an,ao,ap,aq,ar,as,at,au,av,aw,ax,ay,az,aA,aB,aC,aD,aE,aF,aG,aH,aI,aJ,aK,aL,aM,aN,aO,aP,aQ){
return {
data:[{
_img:{
"/_ipx/s_240x41/images/vuemastery.svg":"/_nuxt/image/f8143e.svg","/_ipx/s_240x41/images/vuemastery-white.svg":"/_nuxt/image/d26370.svg","/_ipx/s_284x50/images/lgo-vue-mastery-green.webp":"/_nuxt/image/1ce72d.webp"
}
}
],fetch:{
}
,mutations:[["courses/RECEIVE_COURSE",{
course:{
_source:"server",lessonsCount:11,slug:"intro-to-vue-3",lessons:[{
title:aJ,slug:"intro-to-vue3",image:[{
__meta__:{
createdBy:c,createdDate:"2022-11-08T23:02:33.716Z"
}
,contentType:E,file:"Intro to Vue 3 704.jpg",folderId:M,id:1667948547269,sizes:[{
height:a,path:d,quality:b,width:e
}
,{
height:a,path:f,quality:b,width:g
}
,{
height:a,path:h,quality:b,width:i
}
,{
height:a,path:j,quality:b,width:k
}
,{
height:a,path:l,quality:b,width:m
}
,{
height:a,path:n,quality:b,width:o
}
,{
height:a,path:p,quality:b,width:q
}
,{
height:a,path:r,quality:b,width:s
}
,{
height:a,path:t,quality:b,width:u
}
,{
height:a,path:v,quality:b,width:w
}
,{
height:a,path:x,quality:b,width:y
}
,{
height:a,path:z,quality:b,width:A
}
,{
height:a,path:B,quality:b,width:C
}
],type:D,url:"https://storage.googleapis.com/vue-mastery.appspot.com/flamelink/media/Intro%20to%20Vue%203%20704.jpg?GoogleAccessId=firebase-adminsdk-jyioc%40vue-mastery.iam.gserviceaccount.com&Expires=16725225600&Signature=hCCUcy3JtZduEM0eYTiaUjZO%2Fb78AuEcxEDMcymEELqxbvAtVj4D9tzOXgYDy0LDgSQbDdRu6bnCzbdCekaAC0Nid8pQFNEf3inRqRCOYlwDznVlIVX9hrr2%2B%2BMWGLAcWDS%2FWZ9GiM2jWMzfljMiFsNuw%2FnfAmLpUJRrLOwO1lxakX9cBem%2FX4%2BO%2B5X2cQ%2Fs6fAdsNH6zOCjwh1TaU3a78EGRiNWD8O4Bh0K8TLcCnuZWLMZxRZ39Oe6EIJsA2cDesNsApnOd2ehAcbcRUC82TaKQh4Ihgoyp5%2B1Nj2UqZh0VJQ61VLxY%2B57rQ3KYsQubtf1gZfYCl9npP2uQvCKWA%3D%3D"
}
],description:"Brand new to Vue? Start learning the basics in this lesson that explores the essential syntax.",markdown:"Welcome to Vue Mastery's Intro to Vue 3 course. We're going to take a journey through the Vue universe to explore the technology and build a solid foundation of new skills, so we can build upon that to head towards Vue mastery. This course is your first step along the way, and on our platform you'll find a whole <a href=\"https://www.vuemastery.com/courses\" target=\"_blank\">library of courses</a> you can take to level-up your skills.\n\nThroughout this course, we'll learn the fundamentals of Vue.js and build an app to put these concepts in practice. \n\n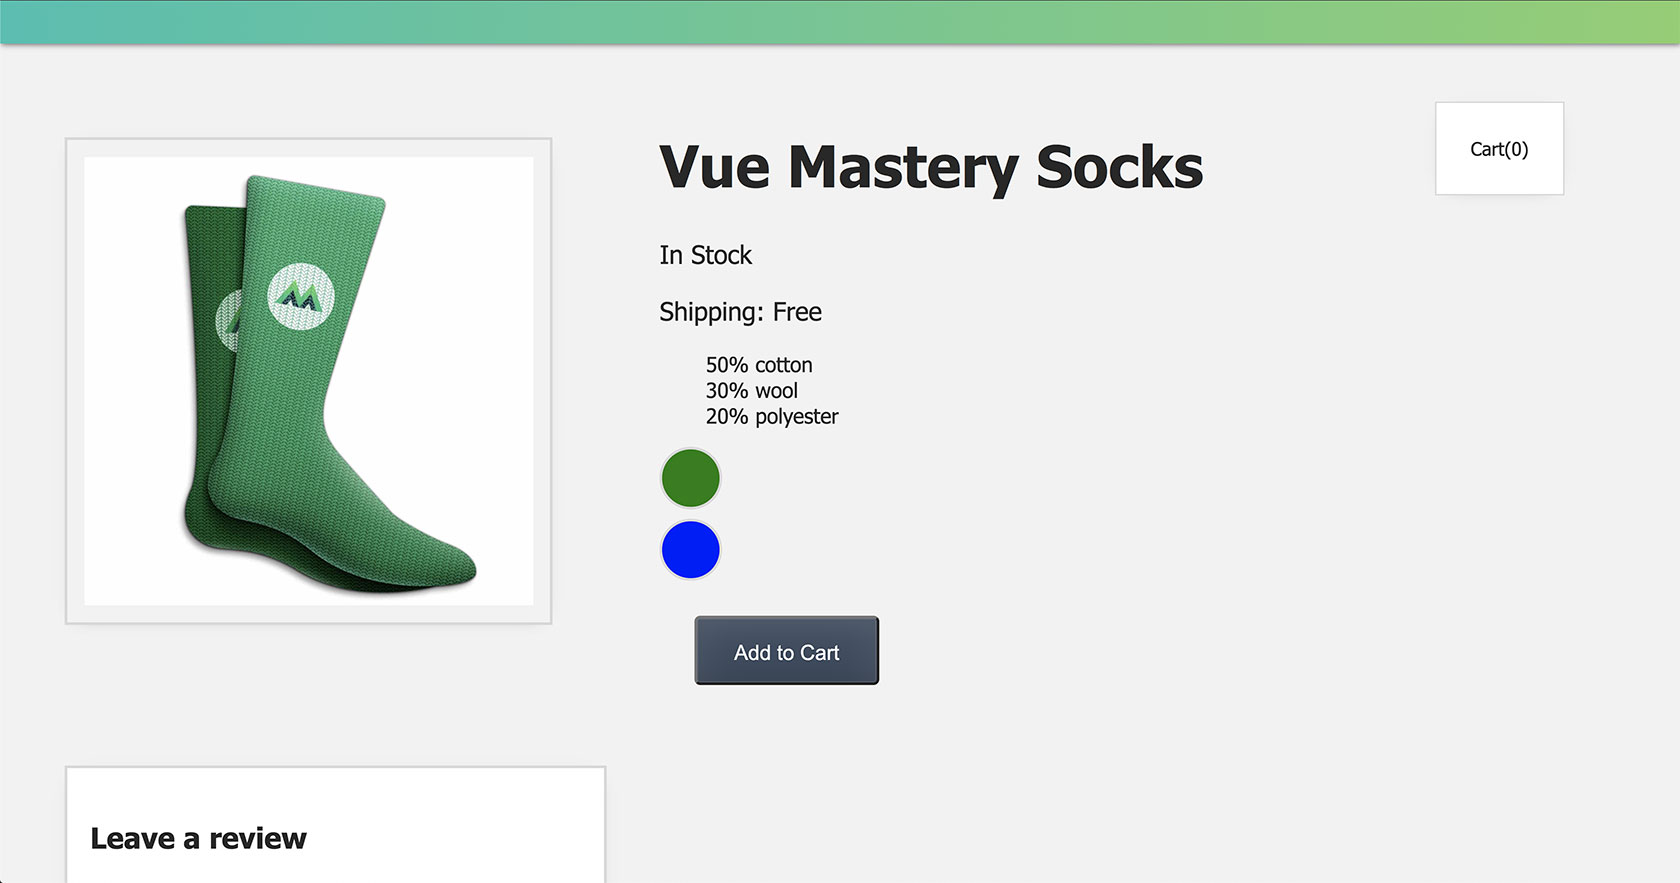\n\nTo get the most out of this course, you're going to want to be coding along. You're going to want to head over to the <a href=\"https://github.com/Code-Pop/Intro-to-Vue-3\" target=\"_blank\">course's repo</a> and clone the project. From there, you can switch between different branches for the starting and ending code for each lesson. For example, in the next lesson (lesson two) you can check out `L2-start` or `L2-end` for the starting and ending code, respectively. \n\nThroughout this course, you're going to see me using VS code. I do recommend this code editor for Vue development, but if you already have a code editor of your choice, you can stick with that one. If you want to use VS code and you don't already have it, you're going to want to <a href=\"https://code.visualstudio.com/download\" target=\"_blank\">download it now</a> and also install an extension <a href=\"https://marketplace.visualstudio.com/items?itemName=Tobermory.es6-string-html\" target=\"_blank\">es6-string-html</a>. You'll see why this extension will be useful in later lessons. \n\nFinally, at the end of each lesson, you'll see a coding challenge so you can put the concepts into practice. Now, if you're ready, let's create our first Vue app in the next lesson.",duration:"00:01:46",author:I,date:"2020-08-02T00:00:00-07:00",status:J,free:G,lock:F,twitterImage:[{
__meta__:{
createdBy:c,createdDate:aK
}
,contentType:E,file:aL,folderId:M,id:aM,sizes:[{
height:a,path:d,quality:b,width:e
}
,{
height:a,path:f,quality:b,width:g
}
,{
height:a,path:h,quality:b,width:i
}
,{
height:a,path:j,quality:b,width:k
}
,{
height:a,path:l,quality:b,width:m
}
,{
height:a,path:n,quality:b,width:o
}
,{
height:a,path:p,quality:b,width:q
}
,{
height:a,path:r,quality:b,width:s
}
,{
height:a,path:t,quality:b,width:u
}
,{
height:a,path:v,quality:b,width:w
}
,{
height:a,path:x,quality:b,width:y
}
,{
height:a,path:z,quality:b,width:A
}
,{
height:a,path:B,quality:b,width:C
}
],type:D,url:aN
}
],facebookImage:[{
__meta__:{
createdBy:c,createdDate:aK
}
,contentType:E,file:aL,folderId:M,id:aM,sizes:[{
height:a,path:d,quality:b,width:e
}
,{
height:a,path:f,quality:b,width:g
}
,{
height:a,path:h,quality:b,width:i
}
,{
height:a,path:j,quality:b,width:k
}
,{
height:a,path:l,quality:b,width:m
}
,{
height:a,path:n,quality:b,width:o
}
,{
height:a,path:p,quality:b,width:q
}
,{
height:a,path:r,quality:b,width:s
}
,{
height:a,path:t,quality:b,width:u
}
,{
height:a,path:v,quality:b,width:w
}
,{
height:a,path:x,quality:b,width:y
}
,{
height:a,path:z,quality:b,width:A
}
,{
height:a,path:B,quality:b,width:C
}
],type:D,url:aN
}
],socialSharingDescription:"I'm learning about Vue 3 in a free course on @vuemastery",belongsToCourse:H
}
,{
title:"Creating the Vue App",slug:"creating-the-vue-app-vue3",image:[{
__meta__:{
createdBy:c,createdDate:N
}
,contentType:E,file:O,folderId:P,id:Q,sizes:[{
height:a,path:d,quality:b,width:e
}
,{
height:a,path:f,quality:b,width:g
}
,{
height:a,path:h,quality:b,width:i
}
,{
height:a,path:j,quality:b,width:k
}
,{
height:a,path:l,quality:b,width:m
}
,{
height:a,path:n,quality:b,width:o
}
,{
height:a,path:p,quality:b,width:q
}
,{
height:a,path:r,quality:b,width:s
}
,{
height:a,path:t,quality:b,width:u
}
,{
height:a,path:v,quality:b,width:w
}
,{
height:a,path:x,quality:b,width:y
}
,{
height:a,path:z,quality:b,width:A
}
,{
height:a,path:B,quality:b,width:C
}
],type:D,url:R
}
],description:"Learn about creating a Vue app",markdown:"Are you ready to create a Vue app? To get started with this lesson, check out the starting code on the `L2-start` branch of <a href=\"https://github.com/Code-Pop/Intro-to-Vue-3/tree/L2-start\" target=\"_blank\">the repo</a>.\n\n---\n\n## Touring the Starting Code\n\nTo take a tour of the starting code, you'll see we have an assets directory. Inside of there, there's a directory for images. We've got one for blue socks, and green socks. We also have a CSS file for all of our styles. \n\n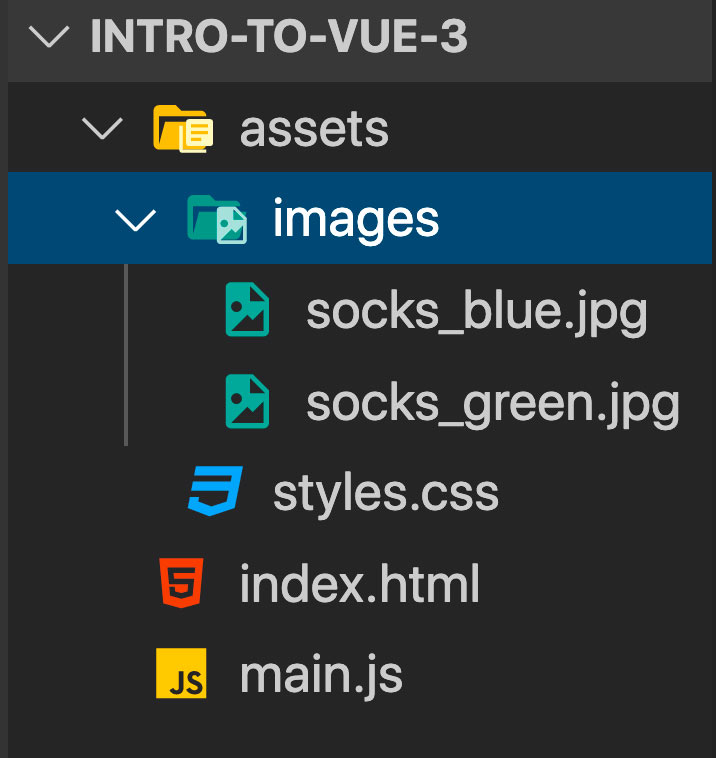\n\nInside of the **index.html**, we're importing those styles. Below that, we are importing the Vue.js library. Importing the Vue library via a CDN link is simplest possible way to start using Vue. You'll notice at the time of this recording, I'm using the Vue 3 beta CDN link, but if you're watching this and Vue 3 is already out, you're going to want to go to the <a href=\"https://v3.vuejs.org/guide/installation.html\" target=\"_blank\">official Vue.js docs</a> and copy the CDN link there (\"For prototyping and learning purposes\") and replace it in the script tag of your **index.html** file. \n\nAt the bottom of the file, we're importing our **main.js** file, which is pretty simple so far: just a `const product = 'Socks'`\n\n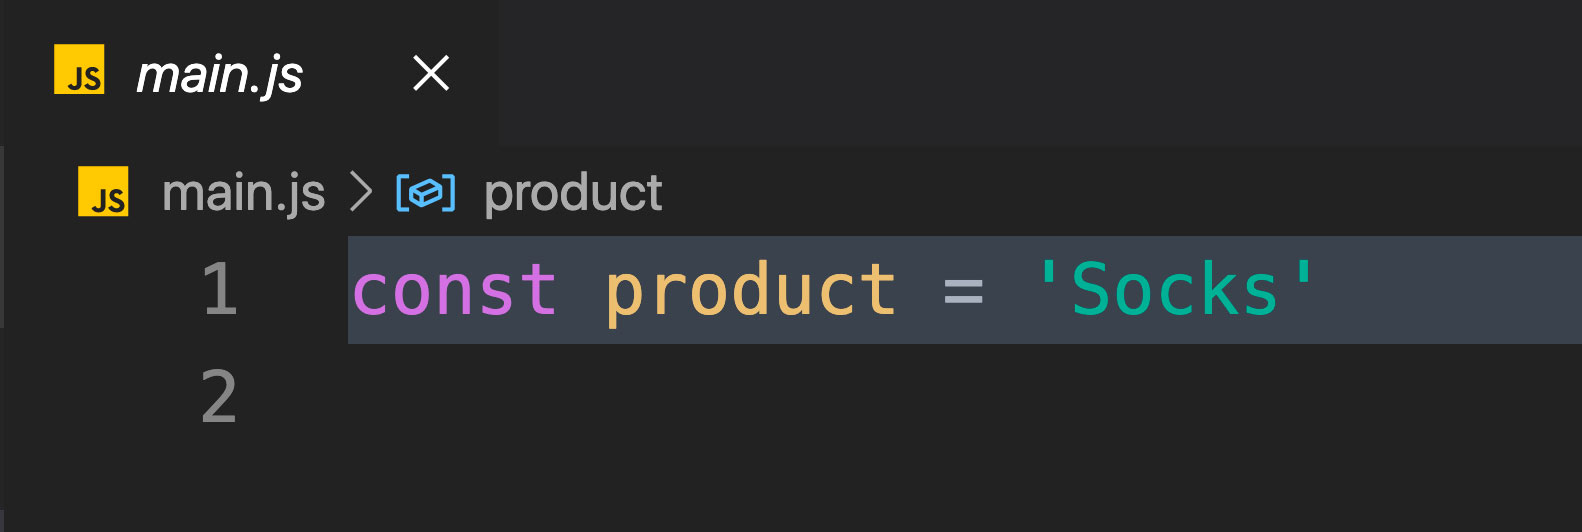\n\nYou'll notice that in the template, there is an `h1` that says \"Product goes here.\" So the question now is: **How do we display product using Vue?** \n\n---\n\n## Creating a Vue App\n\nTo display our data within our HTML, we'll first have to create a Vue app. In our **main.js** file, we'll create our app with: \n\n📄**main.js**\n\n```javascript\nconst app = Vue.createApp({
}
)\n```\n\nAs an argument, we're going to pass in an object and add a data property. This is going to be a function that returns another object, where we'll store our data. In here, we'll add `product` as a data item. \n\n📄**main.js**\n\n```javascript\nconst app = Vue.createApp({
\n data() {
\n return {
\n product: 'Socks'\n
}
\n
}
\n
}
)\n```\n\nNow we just need to make sure we're importing our Vue app into the index.html file.\n\n📄**index.html**\n\n```html\n\n<script src=\"./main.js\"></script>\n```\n\n---\n\n## Mounting Our App\n\nNow that we've created our app, we need to mount the app that we just created, into our DOM. We'll do that inside of a script tag, in our **index.html** file. \n\n📄**index.html**\n\n```html\n\n<script>\n const mountedApp = app.mount('#app')\n</script>\n```\n\nWe'll say `app`, which refers to the app that we just created, and then `.mount()`, which is a method that requires a DOM selector as an argument. This lets us plug the Vue app into that piece of our DOM. \n\n---\n\n## Displaying the Data\n\nNow that we've created, imported and mounted out Vue app, we can now start displaying the data that lives within it. \n\nTo render the `product` data within the `h1`, we'll write:\n\n📄**index.html**\n\n```html\n<div id=\"app\">\n <h1>{
{
product
}
}
</h1>\n</div>\n```\n\nNow if we check the browser, we'll see \"Product\" is being displayed. Great! But how exactly is this working? \n\n---\n\n## Understanding the Vue Instance\n\nWhen we created our Vue app, we passed in the options object, which allowed us to add some optional properties to configure the application. Doing this creates our Vue instance, the heart of our Vue application, which powers everything. \n\n📄**main.js**\n\n```javascript\nconst app = Vue.createApp({
Options Object
}
)\n```\n\nBy importing this app, and mounting it to the DOM, we've essentially plugged the app into our DOM, giving our HTML a direct line into the app. This way, our template code can access options from the app, such as its data.\n\n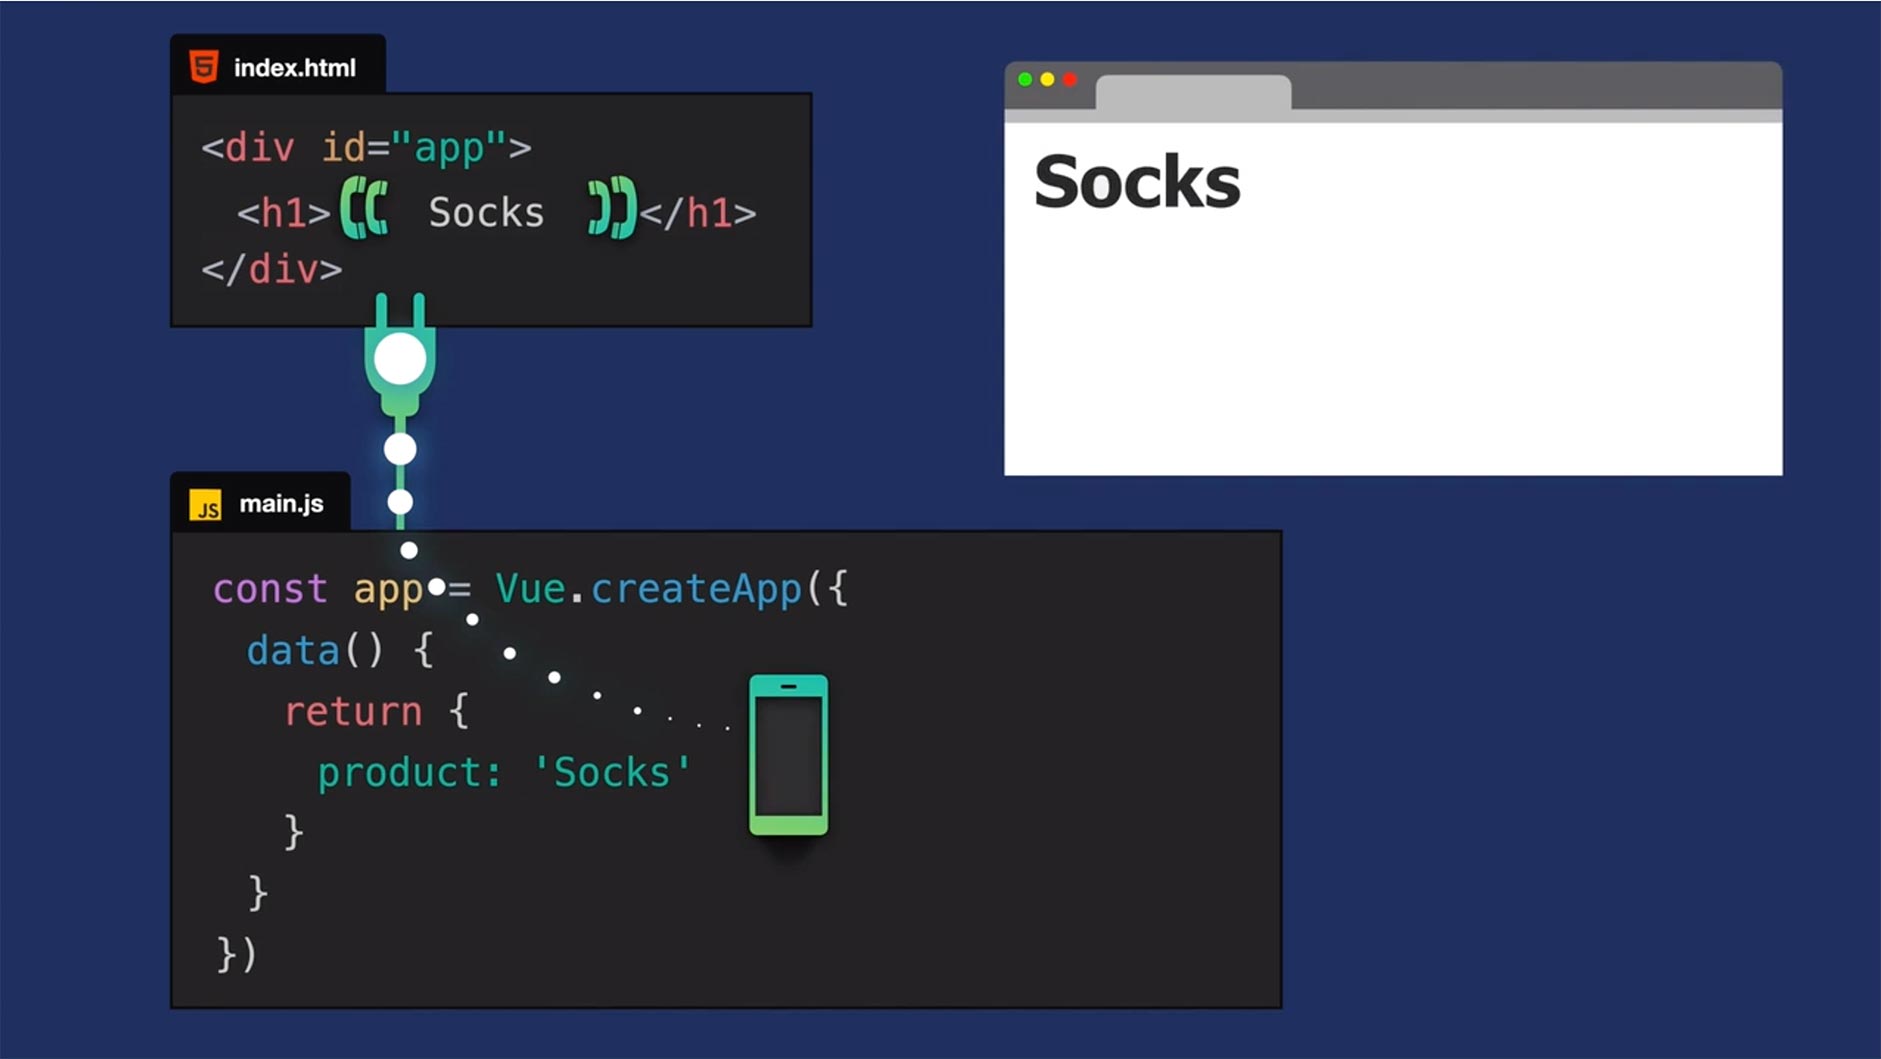\n\nIf you're wondering what's happening with this double curly brace syntax, you can imagine it like a phone, which has access to a phone within our Vue app. From our template, we're able to ask the app, \"Hey, what's the value of product?\" And the app responds, \"Socks.\" When the page renders, we see \"Socks\" display on the page. \n\nIf this double curly brace syntax, or mustache syntax, is new to you, it allows us to write JavaScript expressions. In other words, it allows us to run valid JavaScript within our HTML. \n\n---\n\n## Vue's Reactivity\n\nWhat would happen if we changed the value of `product` from \"Socks\" to \"Boots\"? \n\n📄**main.js**\n\n```javascript\nconst app = Vue.createApp({
\n data() {
\n return {
\n product: 'Boots' // updated data value //\n
}
\n
}
\n
}
)\n```\n\nBecause of how Vue works, the `h1`'s expression that is relying upon `product` would automatically receive that new value, and our DOM would update to display \"Boots\".\n\n📄**index.html**\n\n```html\n<div id=\"app\">\n <h1>{
{
product
}
}
</h1> <! -- will reactively receive any updates to product -->\n</div>\n```\n\nThis is because Vue is *reactive*. Under the hood, Vue has an entire reactivity system that handles updates. When a data value changes, anywhere relying on that data will automatically update for us. We don't have to do anything to make that happen. \n\n(As a side note, here on Vue Mastery, we have an entire Vue 3 reactivity course. So if you're interested in exploring the reactivity system under the hood, you can take that advanced course later.)\n\n---\n\n## Coding Challenge\n\nWe've reached the end of this lesson, which brings us to the first coding challenge. You can find the solution code by checking out the `L2-end` branch of <a href=\"https://github.com/Code-Pop/Intro-to-Vue-3/tree/L2-end\" target=\"_blank\">the repo</a>.\n\n**Add a `description` to the data object.** \n\n**Display the `description` using an expression within a `p` tag.**",duration:"00:06:45",author:I,date:K,status:J,free:G,lock:F,twitterImage:[{
__meta__:{
createdBy:c,createdDate:N
}
,contentType:E,file:O,folderId:P,id:Q,sizes:[{
height:a,path:d,quality:b,width:e
}
,{
height:a,path:f,quality:b,width:g
}
,{
height:a,path:h,quality:b,width:i
}
,{
height:a,path:j,quality:b,width:k
}
,{
height:a,path:l,quality:b,width:m
}
,{
height:a,path:n,quality:b,width:o
}
,{
height:a,path:p,quality:b,width:q
}
,{
height:a,path:r,quality:b,width:s
}
,{
height:a,path:t,quality:b,width:u
}
,{
height:a,path:v,quality:b,width:w
}
,{
height:a,path:x,quality:b,width:y
}
,{
height:a,path:z,quality:b,width:A
}
,{
height:a,path:B,quality:b,width:C
}
],type:D,url:R
}
],facebookImage:[{
__meta__:{
createdBy:c,createdDate:N
}
,contentType:E,file:O,folderId:P,id:Q,sizes:[{
height:a,path:d,quality:b,width:e
}
,{
height:a,path:f,quality:b,width:g
}
,{
height:a,path:h,quality:b,width:i
}
,{
height:a,path:j,quality:b,width:k
}
,{
height:a,path:l,quality:b,width:m
}
,{
height:a,path:n,quality:b,width:o
}
,{
height:a,path:p,quality:b,width:q
}
,{
height:a,path:r,quality:b,width:s
}
,{
height:a,path:t,quality:b,width:u
}
,{
height:a,path:v,quality:b,width:w
}
,{
height:a,path:x,quality:b,width:y
}
,{
height:a,path:z,quality:b,width:A
}
,{
height:a,path:B,quality:b,width:C
}
],type:D,url:R
}
],socialSharingDescription:"I'm learning about creating a Vue app in a free course on @vuemastery",belongsToCourse:H
}
,{
title:"Attribute Binding",slug:"attribute-binding-vue3",image:[{
__meta__:{
createdBy:c,createdDate:S
}
,contentType:E,file:T,folderId:U,id:V,sizes:[{
height:a,path:d,quality:b,width:e
}
,{
height:a,path:f,quality:b,width:g
}
,{
height:a,path:h,quality:b,width:i
}
,{
height:a,path:j,quality:b,width:k
}
,{
height:a,path:l,quality:b,width:m
}
,{
height:a,path:n,quality:b,width:o
}
,{
height:a,path:p,quality:b,width:q
}
,{
height:a,path:r,quality:b,width:s
}
,{
height:a,path:t,quality:b,width:u
}
,{
height:a,path:v,quality:b,width:w
}
,{
height:a,path:x,quality:b,width:y
}
,{
height:a,path:z,quality:b,width:A
}
,{
height:a,path:B,quality:b,width:C
}
],type:D,url:W
}
],description:"Learn about attribute binding",markdown:"In this lesson, we're going to look at the concept of attribute binding. If you're coding along with the repo, you can checkout the `L3-start` <a href=\"https://github.com/Code-Pop/Intro-to-Vue-3/tree/L3-start\" target=\"_blank\">branch</a>.\n\n---\n\n## Our Goal\n\nIn the starting code, we have a new `div` with the class of `product-image`. \n\n📄**index.html**\n\n```html\n<div class=\"product-image\">\n \n</div>\n```\n\nBy the end of the lesson, we're going to have an `img` element here that is reactively bound to a new `image` property on our data. Whenever the value of that image changes, our image will update in the DOM.\n\n---\n\n## Adding an image to our data\n\nRemember in our **assets** directory we have an **images** folder, with images for green and blue socks? Let's target one of those images from a new data property on our Vue app. We'll do so by setting `image` equal to a path so it can grab that image.\n\n📄**main.js**\n\n```javascript\nconst app = Vue.createApp({
\n data() {
\n return {
\n product: 'Socks',\n image: './assets/images/socks_green.jpg'\n
}
\n
}
\n
}
)\n```\n\nNow we're ready to add an `img` element in the template.\n\n📄**index.html**\n\n```html\n<div class=\"product-image\">\n <img src=\"image\">\n</div>\n```\n\nIn the source attribute, we'll say `image`. Right now, this won't do anything. We want `src` to pull in the `image` path from our data, similar to how we pulled in the `product` data value in the `h1` expression in the previous lesson.\n\nSo the question here is: **How do we bind the `src` attribute to the `image` data?** \n\n---\n\n## Introducing Attribute Binding\n\nTo create a bond between an HTML element's attribute and a value from your Vue app's data, we'll use a Vue directive called `v-bind`.\n\n📄**index.html**\n\n```html\n<img v-bind:src=\"image\">\n```\n\nNow, we've created a reactive bond between what lives in this attribute (`\"image\"`) and the `image` data itself. \n\nLooking in the browser, we'll now see our green socks image displaying. \n\n\n\n---\n\n## Understanding v-bind\n\nHow exactly is the `v-bind` directive working? We use this directive to dynamically bind an attribute to an expression. In this case, the attribute is `src` and the expression is whatever is in that attribute's quotes: `\"image\"`\n\n📄**index.html**\n\n```html\n<img v-bind:src=\"image\"> <! -- src attribute bound to the image data -->\n```\n\nIf you're thinking this doesn't look like a typical JavaScript expression, you can imagine it looking like this: `v-bind:src=\"{
{
image
}
}
\"`. Under the hood, Vue is going to evaluate it just the same.\n\n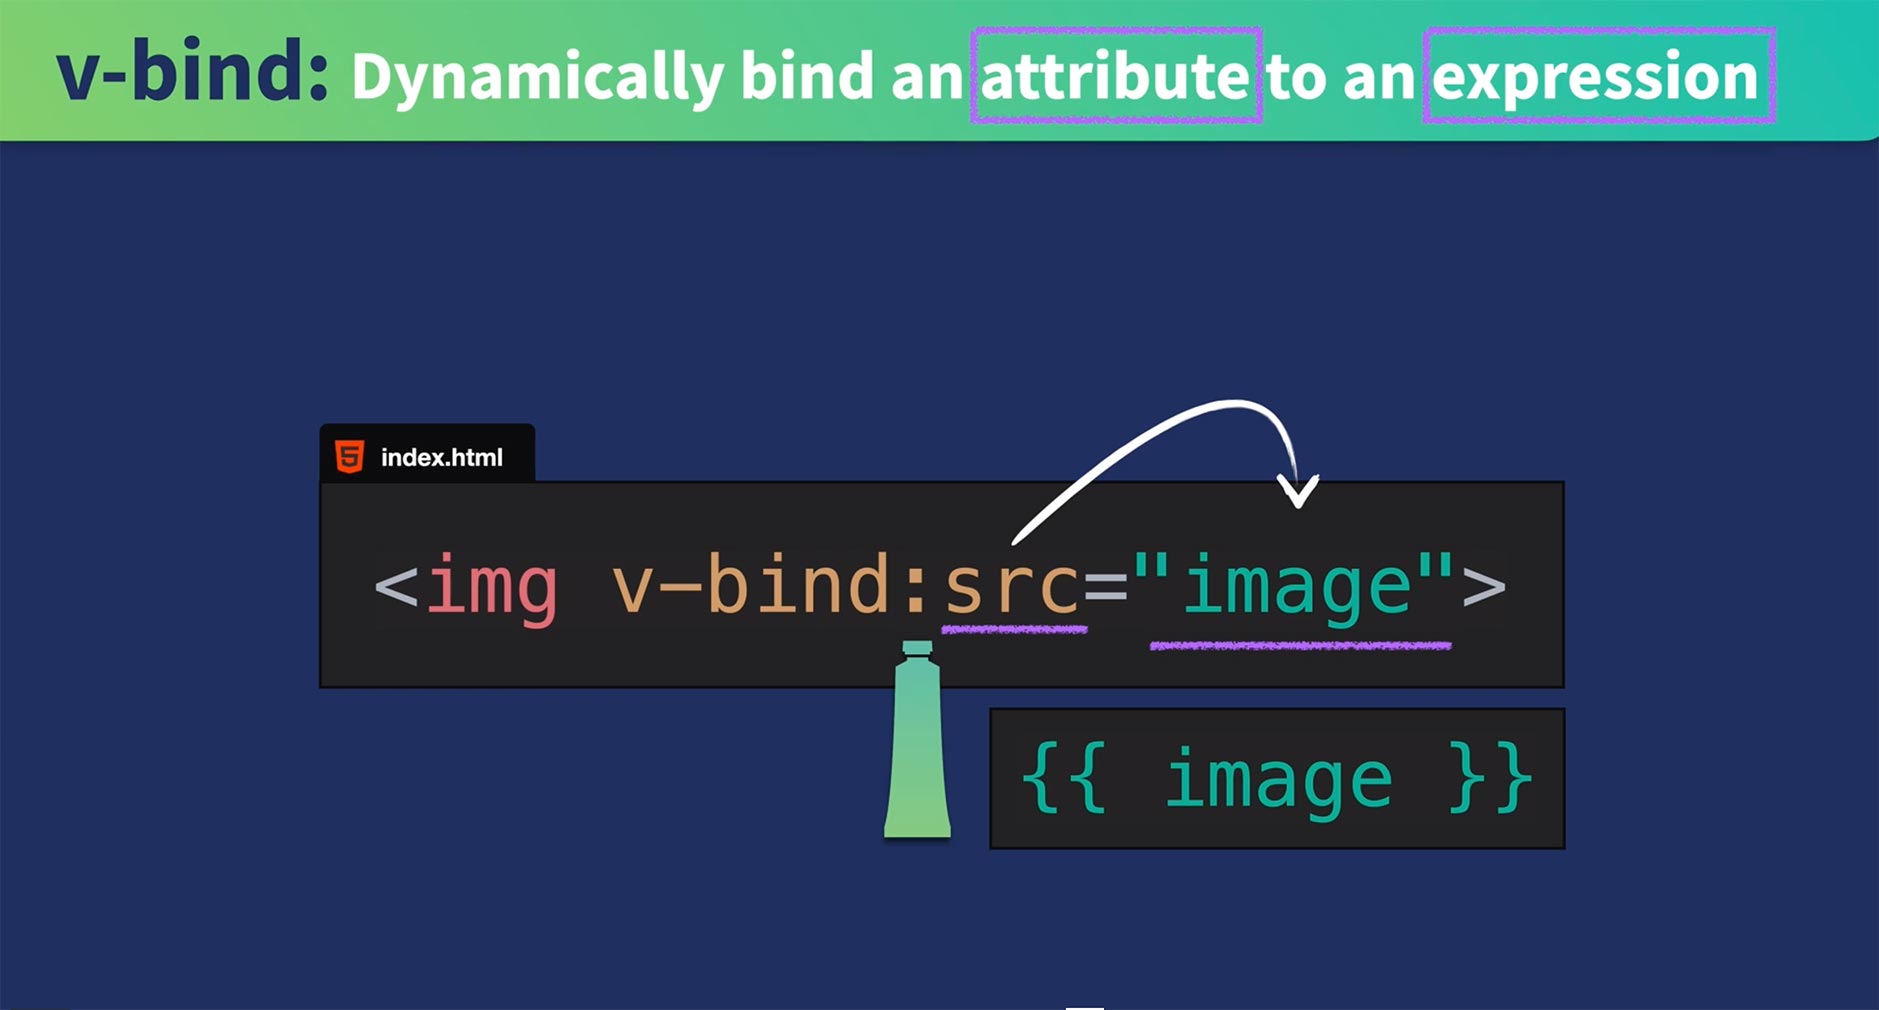\n\n---\n\n## A Reactive Bond\n\nBecause of Vue's reactivity system, if we updated our `image` data to a path that points to the image of our blue socks (`image: './assets/images/socks_blue.jpg'`), the expression that our `src` attribute is bound to would update and our browser would display the blue socks image. \n\n---\n\n## A shorthand for v-bind\n\nUsing `v-bind` is super common—so common that there is a shorthand for it, and it's just the colon, like so:\n\n```html\n<img :src=\"image\"> \n```\n\nAs you can imagine, since there's so many different HTML attributes, there are many use cases for `v-bind`. For example, you might be binding a description to an `alt` attribute, binding a URL to an `href`, binding some dynamic styles to a `class` or `style` attribute, disabling and enabling a button, and so on. \n\n---\n\n## Coding Challenge\n\nWe've reached the end of the lesson and we're onto our second challenge:\n\n**Add a `url` to the data object**\n\n**Bind the `url` to an anchor tag's `href` attribute**\n\nAs a reminder, if you're coding along with our repo, you can check out `L3-end` <a href=\"https://github.com/Code-Pop/Intro-to-Vue-3/tree/L3-end\" target=\"_blank\">branch</a>.",duration:"00:03:48",author:I,date:K,status:J,free:G,lock:F,twitterImage:[{
__meta__:{
createdBy:c,createdDate:S
}
,contentType:E,file:T,folderId:U,id:V,sizes:[{
height:a,path:d,quality:b,width:e
}
,{
height:a,path:f,quality:b,width:g
}
,{
height:a,path:h,quality:b,width:i
}
,{
height:a,path:j,quality:b,width:k
}
,{
height:a,path:l,quality:b,width:m
}
,{
height:a,path:n,quality:b,width:o
}
,{
height:a,path:p,quality:b,width:q
}
,{
height:a,path:r,quality:b,width:s
}
,{
height:a,path:t,quality:b,width:u
}
,{
height:a,path:v,quality:b,width:w
}
,{
height:a,path:x,quality:b,width:y
}
,{
height:a,path:z,quality:b,width:A
}
,{
height:a,path:B,quality:b,width:C
}
],type:D,url:W
}
],facebookImage:[{
__meta__:{
createdBy:c,createdDate:S
}
,contentType:E,file:T,folderId:U,id:V,sizes:[{
height:a,path:d,quality:b,width:e
}
,{
height:a,path:f,quality:b,width:g
}
,{
height:a,path:h,quality:b,width:i
}
,{
height:a,path:j,quality:b,width:k
}
,{
height:a,path:l,quality:b,width:m
}
,{
height:a,path:n,quality:b,width:o
}
,{
height:a,path:p,quality:b,width:q
}
,{
height:a,path:r,quality:b,width:s
}
,{
height:a,path:t,quality:b,width:u
}
,{
height:a,path:v,quality:b,width:w
}
,{
height:a,path:x,quality:b,width:y
}
,{
height:a,path:z,quality:b,width:A
}
,{
height:a,path:B,quality:b,width:C
}
],type:D,url:W
}
],socialSharingDescription:"I'm learning about attribute binding in a free course on @vuemastery",belongsToCourse:H
}
,{
title:"Conditional Rendering",slug:"conditional-rendering-vue3",image:[{
__meta__:{
createdBy:c,createdDate:X
}
,contentType:E,file:Y,folderId:Z,id:_,sizes:[{
height:a,path:d,quality:b,width:e
}
,{
height:a,path:f,quality:b,width:g
}
,{
height:a,path:h,quality:b,width:i
}
,{
height:a,path:j,quality:b,width:k
}
,{
height:a,path:l,quality:b,width:m
}
,{
height:a,path:n,quality:b,width:o
}
,{
height:a,path:p,quality:b,width:q
}
,{
height:a,path:r,quality:b,width:s
}
,{
height:a,path:t,quality:b,width:u
}
,{
height:a,path:v,quality:b,width:w
}
,{
height:a,path:x,quality:b,width:y
}
,{
height:a,path:z,quality:b,width:A
}
,{
height:a,path:B,quality:b,width:C
}
],type:D,url:$
}
],description:"Learn about conditional rendering",markdown:"In this lesson, we're going to look at the concept of conditional rendering. If you're coding along with the repo, you can checkout the `L4-start` <a href=\"https://github.com/Code-Pop/Intro-to-Vue-3/tree/L4-start\" target=\"_blank\">branch</a>.\n\n---\n\n## Our Goal\n\nWe want to display different HTML elements based upon a condition. We'll display a `p` tag that says \"in stock\" when our product is in stock, or one that says \"out of stock\" when it's not.\n\n---\n\n## To render or not to render\n\nIn our index.html file, we'll add two new `p` tags.\n\n📄**index.html**\n\n```html\n<p>In Stock</p>\n<p>Out of Stock</p>\n```\n\nWe only want one of these to show up depending on if our product is in stock or not, so we'll head into our Vue app's data object and add a new `inStock` boolean.\n\n📄**main.js**\n\n```javascript\nconst app = Vue.createApp({
\n data() {
\n return {
\n product: 'Socks',\n image: './assets/images/socks_blue.jpg',\n inStock: true // new data property //\n
}
\n
}
\n
}
)\n```\n\nNow that we've added the elements we want to conditionally render, and the condition (`inStock`) that we'll use to decide which one to render, we're ready to learn about another Vue directive.\n\n---\n\n## The v-if directive\n\nWe can add the `v-if` directive onto an element to render it based upon a condition, like so: \n\n```html\n<p v-if=\"inStock\">In Stock</p>\n```\n\nNow, this element will render only *if* `inStock` is truthy.\n\nWe can combine the `v-if` directive with its sister directive `v-else` to display another element as the fallback if the first condition turns out to be falsey.\n\n📄**index.html**\n\n```html\n<p v-if=\"inStock\">In Stock</p>\n<p v-else>Out of Stock</p>\n```\n\nNow, if `inStock` is `false`, we'll see \"Out of Stock\" gets rendered to the page.\n\n---\n\n## Show and Hide\n\nIt's worth noting that you don't always need to pair `v-if` with `v-else`. There are plenty of use cases where you don't need a fallback element to render. However, in these cases, it is sometimes a better option to use the `v-show` directive.\n\n📄**index.html**\n\n```html\n<p v-show=\"inStock\">In Stock</p>\n```\n\nThe `v-show` directive is used for toggling an element's **visibility** instead of adding and removing the element from the DOM entirely, like `v-if` does. \n\nAs you might imagine, this is a more performant option if you have something that's toggling off and on the screen often. We can verify this by setting `inStock` to `false` and viewing the element in the browser's Developer Tools. When `v-show` is used, we can see that the element is still present in the DOM, but it's now hidden with an inline style of `display: none;
` added to it.\n\n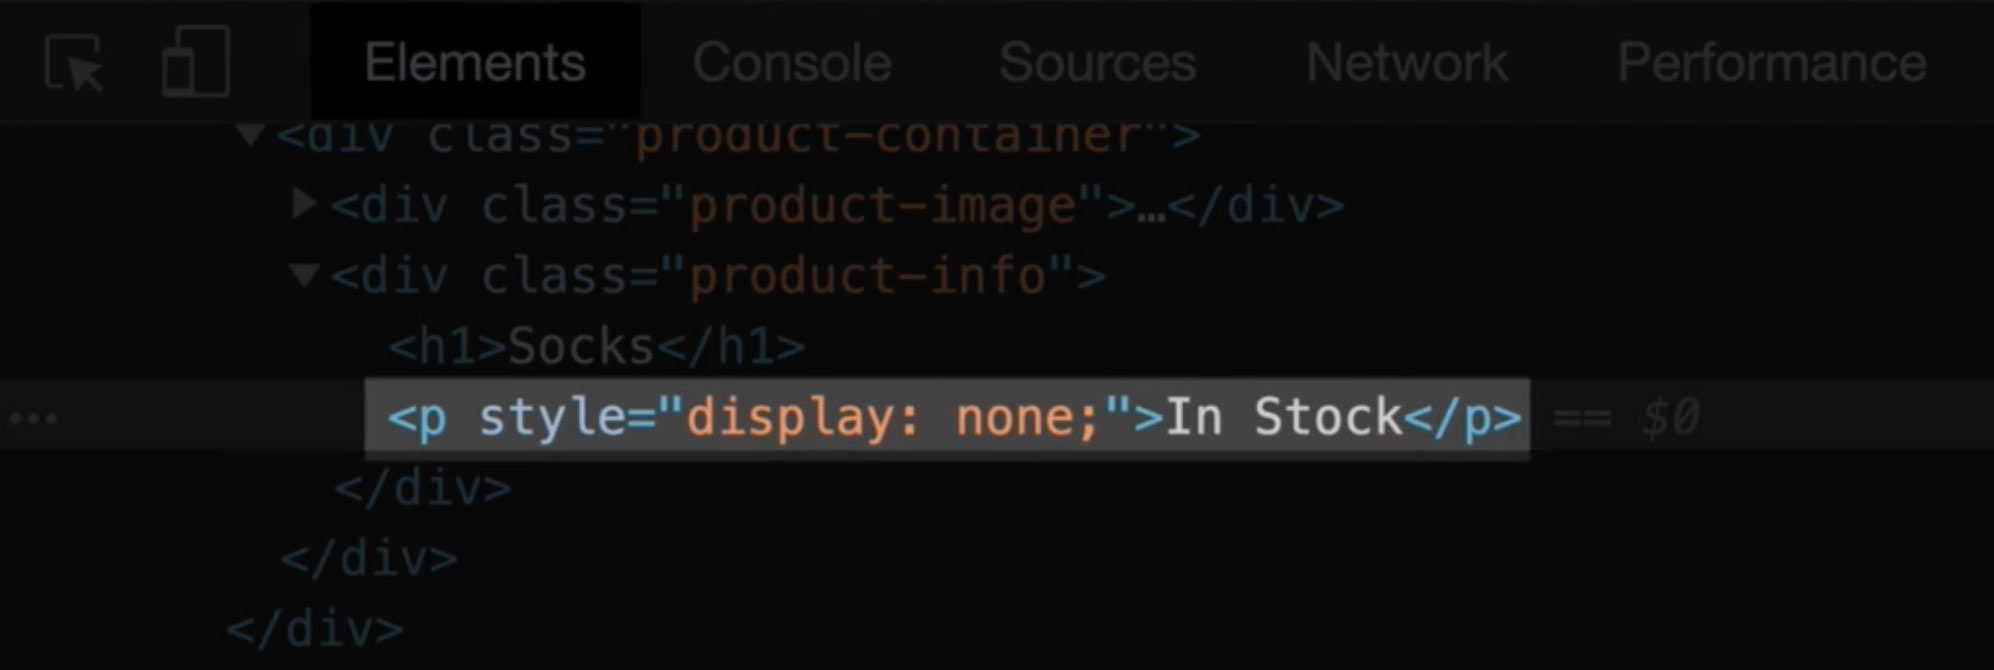\n\n---\n\n## Chained Conditional Logic\n\nEarlier, we looked at `v-if` with `v-else`, now let's take a look at how we can add additional layers of conditional logic. \n\nTo do this, we'll replace `inStock` with `inventory`:\n\n📄**main.js**\n\n```javascript\nconst app = Vue.createApp({
\n data() {
\n return {
\n ...\n inventory: 100 \n
}
\n```\n\nSince our condition (`inventory`) is now an integer, we can use a bit more complex logic within our expression. For example:\n\n📄**index.html**\n\n```html\n<p v-if=\"inventory > 10\">In Stock</p>\n<p v-else>Out of Stock</p>\n```\n\nNow, we will only render the first `p` tag if `inventory` is greater than `10`. \n\nLet's say we want display a new message when the product is almost sold out. In this situation, we could add another conditional level, where we're watching out for `inventory` to get below `10` but above `0`.\n\n📄**index.html**\n\n```html\n<p v-if=\"inventory > 10\">In Stock</p>\n<p v-else-if=\"inventory <= 10 && inventory > 0\">Almost sold out!</p>\n<p v-else>Out of Stock</p>\n```\n\nThe `v-else-if` directive gives us a middle layer of logic. So in this example, if `inventory` were `8`, this `p` tag would get rendered.\n\nOf course, if `inventory` is zero, we'll default to the final level of `v-else` and display \"Out of stock\".\n\n---\n\n## Coding Challenge\n\nWe've reached the end of the lesson and we're onto our challenge:\n\nAdd an `onSale` Boolean to the data object. \n\nUse `onSale` to conditionally render a `p` tag that says \"On Sale,\" whenever `onSale` is `true`.\n\nAs a reminder, if you're coding along with our repo, you can check out `L4-end` <a href=\"https://github.com/Code-Pop/Intro-to-Vue-3/tree/L4-end\" target=\"_blank\">branch</a>.",duration:"00:05:07",author:I,date:K,status:J,free:G,lock:F,twitterImage:[{
__meta__:{
createdBy:c,createdDate:X
}
,contentType:E,file:Y,folderId:Z,id:_,sizes:[{
height:a,path:d,quality:b,width:e
}
,{
height:a,path:f,quality:b,width:g
}
,{
height:a,path:h,quality:b,width:i
}
,{
height:a,path:j,quality:b,width:k
}
,{
height:a,path:l,quality:b,width:m
}
,{
height:a,path:n,quality:b,width:o
}
,{
height:a,path:p,quality:b,width:q
}
,{
height:a,path:r,quality:b,width:s
}
,{
height:a,path:t,quality:b,width:u
}
,{
height:a,path:v,quality:b,width:w
}
,{
height:a,path:x,quality:b,width:y
}
,{
height:a,path:z,quality:b,width:A
}
,{
height:a,path:B,quality:b,width:C
}
],type:D,url:$
}
],facebookImage:[{
__meta__:{
createdBy:c,createdDate:X
}
,contentType:E,file:Y,folderId:Z,id:_,sizes:[{
height:a,path:d,quality:b,width:e
}
,{
height:a,path:f,quality:b,width:g
}
,{
height:a,path:h,quality:b,width:i
}
,{
height:a,path:j,quality:b,width:k
}
,{
height:a,path:l,quality:b,width:m
}
,{
height:a,path:n,quality:b,width:o
}
,{
height:a,path:p,quality:b,width:q
}
,{
height:a,path:r,quality:b,width:s
}
,{
height:a,path:t,quality:b,width:u
}
,{
height:a,path:v,quality:b,width:w
}
,{
height:a,path:x,quality:b,width:y
}
,{
height:a,path:z,quality:b,width:A
}
,{
height:a,path:B,quality:b,width:C
}
],type:D,url:$
}
],socialSharingDescription:"I'm learning about conditional rendering in a free course on @vuemastery",belongsToCourse:H
}
,{
title:"List Rendering",slug:"list-rendering-vue3",image:[{
__meta__:{
createdBy:c,createdDate:aa
}
,contentType:E,file:ab,folderId:ac,id:ad,sizes:[{
height:a,path:d,quality:b,width:e
}
,{
height:a,path:f,quality:b,width:g
}
,{
height:a,path:h,quality:b,width:i
}
,{
height:a,path:j,quality:b,width:k
}
,{
height:a,path:l,quality:b,width:m
}
,{
height:a,path:n,quality:b,width:o
}
,{
height:a,path:p,quality:b,width:q
}
,{
height:a,path:r,quality:b,width:s
}
,{
height:a,path:t,quality:b,width:u
}
,{
height:a,path:v,quality:b,width:w
}
,{
height:a,path:x,quality:b,width:y
}
,{
height:a,path:z,quality:b,width:A
}
,{
height:a,path:B,quality:b,width:C
}
],type:D,url:ae
}
],description:"Learn about list rendering",markdown:"In this lesson, we're going to look at the concept of list binding. If you're coding along with the repo, you can checkout the `L5-start` <a href=\"https://github.com/Code-Pop/Intro-to-Vue-3/tree/L5-start\" target=\"_blank\">branch</a>.\n\n---\n\n## Our Goal\n\nRender HTML lists from an array in our data.\n\n---\n\n## Looping through data arrays\n\nIn the starting code, we now have an array of `details`. \n\n📄**main.js**\n\n```javascript\nconst app = Vue.createApp({
\n data() {
\n return {
\n ...\n details: ['50% cotton', '30% wool', '20% polyester']\n
}
\n
}
\n
}
)\n```\n\nThe question now is: how do we display this data as a list? \n\nWe'll start by creating an unordered list in our **index.html**. On the `li` inside of it, we'll add another Vue directive: `v-for` \n\n📄**index.html**\n\n```html\n<ul>\n <li v-for=\"detail in details\">{
{
detail
}
}
</li>\n</ul>\n```\n\nInside the `v-for` expression, we wrote: `detail in details`. Here, `details` refers to the `details` array in our data, and `detail` is the alias for the current element from that array, as we're looping through it to print out a new `li`. \n\nEach `li` will display that array element because in the inner HTML we've written an expression: `{
{
detail
}
}
` to print out each detail.\n\nIf we check the browser, we'll see a list of the `details` is displayed.\n\n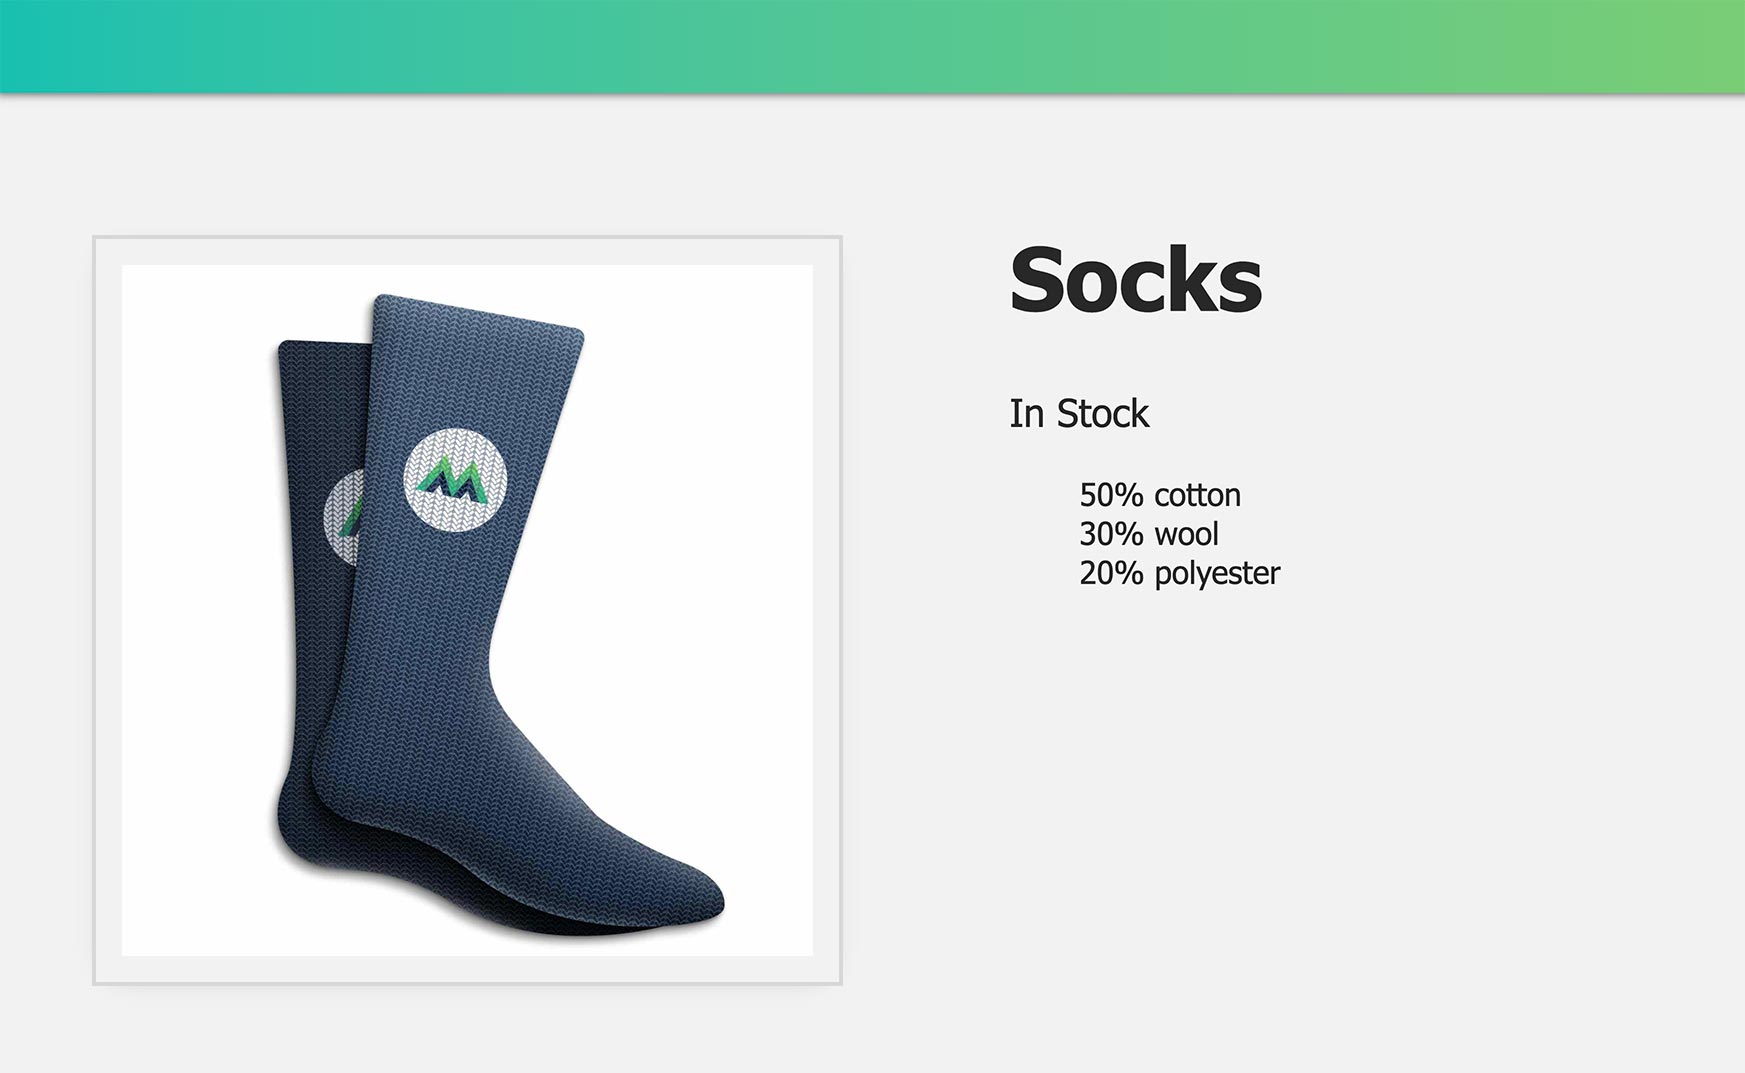\n\nSo far so good, but how is `v-for` actually working?\n\n---\n\n## Product Variant Colors\n\nTo get more familiar with list rendering with `v-for`, we'll work on another example within our app. Let's add a new `variants` array to our data:\n\n📄**main.js**\n\n```javascript\ndata() {
\n return {
\n ...\n variants: [\n {
id: 2234, color: 'green'
}
,\n {
id: 2235, color: 'blue'
}
\n ]\n
}
\n
}
\n```\n\nWe now have an array that contains an object for each variant of our product. Each product variant has an `id`, and a `color`. So for our next task, we'll print out each variant color, and use the `id` to help Vue keep track of our list items.\n\n📄**index.html**\n\n```html\n<div v-for=\"variant in variants\" :key=\"variant.id\">{
{
variant.color
}
}
</div>\n```\n\nNotice how we're using dot notation to print out each `variant` as we loop through the `variants` array. But what is that `:key` attribute doing there? \n\n---\n\n## Key Attribute: An essential for list items\n\nBy saying `:key=\"variant.id\"`, we're using the shorthand for `v-bind` to bind the variant's `id` to the `key` attribute. This gives each DOM element a unique key so that Vue can grasp onto the element and not lose track of it as things update within the app. \n\nThis provides some performance improvements, and later down the line, if you're doing something like animating your elements, you'll find that the `key` attribute really helps Vue effectively manage your elements as they move around the DOM. \n\n---\n\n## Coding Challenge\n\nWe've reached the end of the lesson and we're onto our challenge:\n\n**Add an array of `sizes` to the data object.**\n\n**Use `v-for` to display the `sizes` in a list.** \n\nAs a reminder, if you're coding along with our repo, you can check out `L5-end` <a href=\"https://github.com/Code-Pop/Intro-to-Vue-3/tree/L5-end\" target=\"_blank\">branch</a>.",duration:"00:03:27",author:I,date:K,status:J,free:G,lock:F,twitterImage:[{
__meta__:{
createdBy:c,createdDate:aa
}
,contentType:E,file:ab,folderId:ac,id:ad,sizes:[{
height:a,path:d,quality:b,width:e
}
,{
height:a,path:f,quality:b,width:g
}
,{
height:a,path:h,quality:b,width:i
}
,{
height:a,path:j,quality:b,width:k
}
,{
height:a,path:l,quality:b,width:m
}
,{
height:a,path:n,quality:b,width:o
}
,{
height:a,path:p,quality:b,width:q
}
,{
height:a,path:r,quality:b,width:s
}
,{
height:a,path:t,quality:b,width:u
}
,{
height:a,path:v,quality:b,width:w
}
,{
height:a,path:x,quality:b,width:y
}
,{
height:a,path:z,quality:b,width:A
}
,{
height:a,path:B,quality:b,width:C
}
],type:D,url:ae
}
],facebookImage:[{
__meta__:{
createdBy:c,createdDate:aa
}
,contentType:E,file:ab,folderId:ac,id:ad,sizes:[{
height:a,path:d,quality:b,width:e
}
,{
height:a,path:f,quality:b,width:g
}
,{
height:a,path:h,quality:b,width:i
}
,{
height:a,path:j,quality:b,width:k
}
,{
height:a,path:l,quality:b,width:m
}
,{
height:a,path:n,quality:b,width:o
}
,{
height:a,path:p,quality:b,width:q
}
,{
height:a,path:r,quality:b,width:s
}
,{
height:a,path:t,quality:b,width:u
}
,{
height:a,path:v,quality:b,width:w
}
,{
height:a,path:x,quality:b,width:y
}
,{
height:a,path:z,quality:b,width:A
}
,{
height:a,path:B,quality:b,width:C
}
],type:D,url:ae
}
],socialSharingDescription:"I'm learning about list rendering in a free course on @vuemastery",belongsToCourse:H
}
,{
title:"Event Handling",slug:"event-handling-vue3",image:[{
__meta__:{
createdBy:c,createdDate:af
}
,contentType:E,file:ag,folderId:ah,id:ai,sizes:[{
height:a,path:d,quality:b,width:e
}
,{
height:a,path:f,quality:b,width:g
}
,{
height:a,path:h,quality:b,width:i
}
,{
height:a,path:j,quality:b,width:k
}
,{
height:a,path:l,quality:b,width:m
}
,{
height:a,path:n,quality:b,width:o
}
,{
height:a,path:p,quality:b,width:q
}
,{
height:a,path:r,quality:b,width:s
}
,{
height:a,path:t,quality:b,width:u
}
,{
height:a,path:v,quality:b,width:w
}
,{
height:a,path:x,quality:b,width:y
}
,{
height:a,path:z,quality:b,width:A
}
,{
height:a,path:B,quality:b,width:C
}
],type:D,url:aj
}
],description:"Learn about event handling",markdown:"In this lesson, we're going to look at the concept of Event Handling. If you're coding along with the repo, you can checkout the `L6-start` <a href=\"https://github.com/Code-Pop/Intro-to-Vue-3/tree/L6-start\" target=\"_blank\">branch</a>.\n\nIn the starting code, you'll see that we now have an Add to Cart `button`, along with a cart `div`, which includes an expression to print out the value of our new `cart` data.\n\n📄**index.html**\n\n```html\n<div class=\"cart\">Cart({
{
cart
}
}
)</div>\n...\n<button class=\"button\">Add to Cart</button>\n```\n\n📄**main.js**\n\n```javascript\ndata() {
\n return {
\n cart: 0,\n ...\n
}
\n
}
\n```\n\n---\n\n## Our Goal\n\nWe want to be able to click the `button` and increment the value of `cart`.\n\n---\n\n## Listening for Events\n\nIn order to know when the button is clicked, we need to be listening for events on that element, specifically *click* events. We can achieve this by using another Vue directive: `v-on`.\n\n📄**index.html**\n\n```html\n<button class=\"button\" v-on:click=\"logic to run\">Add to Cart</button>\n```\n\nHere, we are telling `v-on` what type of event to listen for: a `click`. Inside the quotes, we place the logic (or method name) we want to run when that event happens. \n\nIf we write `v-on:click=\"cart += 1\"`, we'll increment the value of cart by `1`, when a click event happens. \n\n---\n\n## Triggering a method\n\nBecause the logic `cart += 1` is very simple, we could keep it in-line on the `button` element, like we have it. But often, we need to trigger more complex logic. In those situations, we can add a method name to fire when the event happens. So let's do that now.\n\n📄**index.html**\n\n```html\n<button class=\"button\" v-on:click=\"addToCart\">Add to Cart</button>\n```\n\nNow, when the button is clicked, the `addToCart` method will be run. Let's add that method to our Vue app's options object, like so:\n\n```javascript\nconst app = Vue.createApp({
\n data() {
\n return {
\n cart: 0,\n ...\n
}
\n
}
,\n methods: {
\n addToCart() {
\n this.cart += 1\n
}
\n
}
\n
}
)\n```\n\nNotice how we added the `methods` option, and inside of that we added the new `addToCart` method, which contains the same logic we just had in-line. The difference here is now we're saying `this.cart` to refer to *this* `cart` in *this* Vue instance's data.\n\nIn the browser, we should now be able to click the **Add To Cart** `button` and see the value of cart climb up by 1. \n\n---\n\n## Understanding v-on\n\nLet's take a deeper look into how this event handling is working. \n\n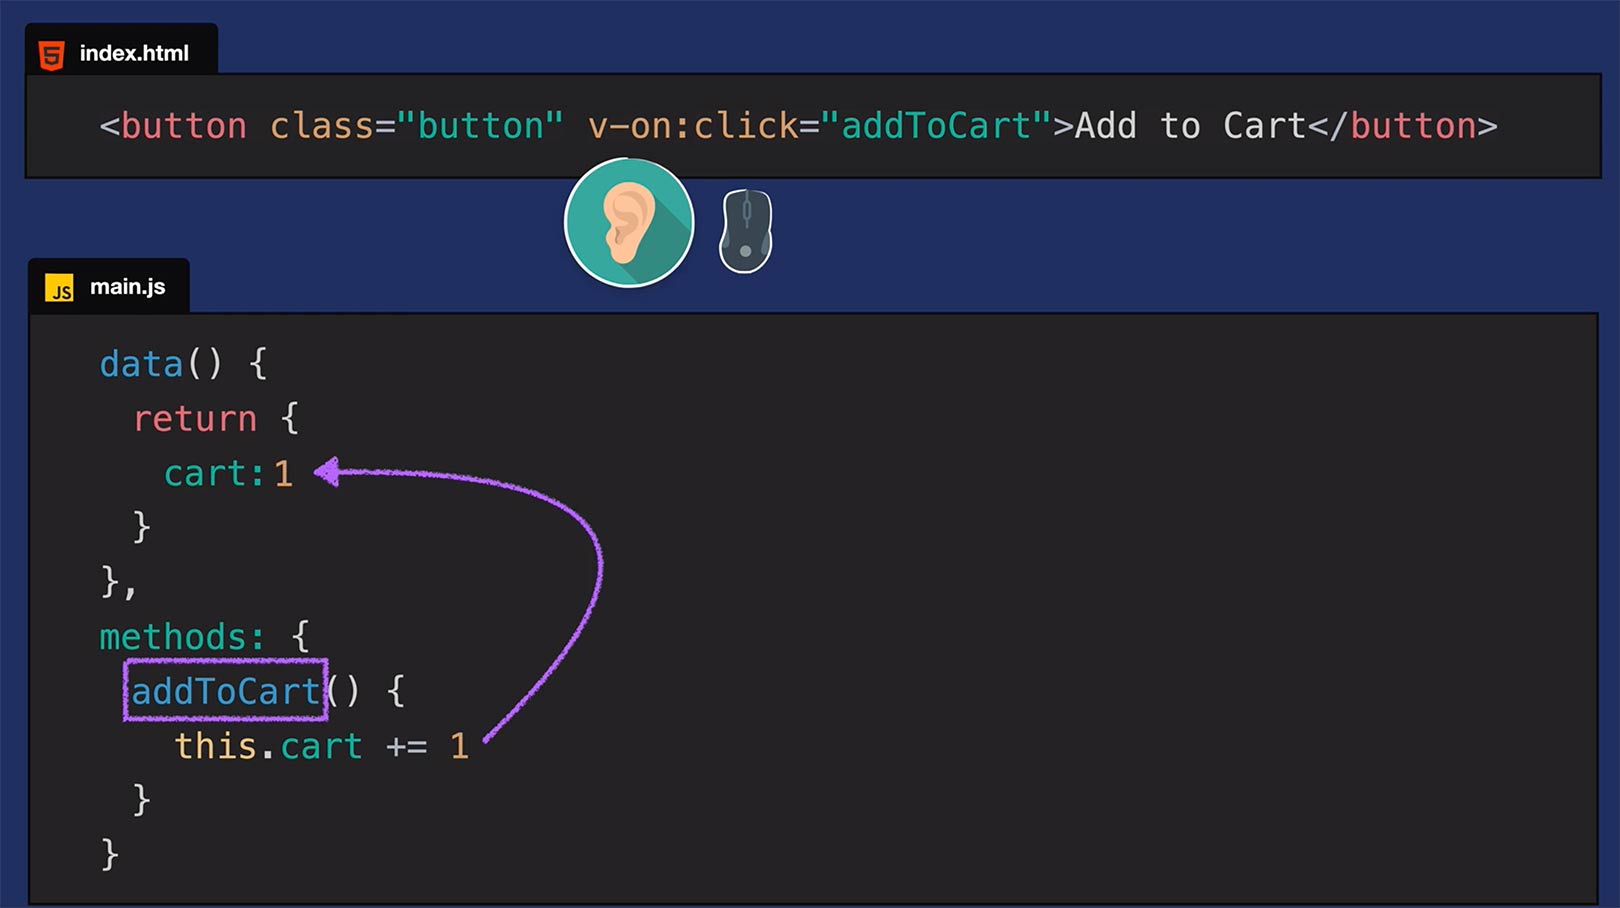\n\nBy adding `v-on` to an element, we're essentially giving it an ear that can listen for events. In this case, we've specified that we're listening for click events. When a click happens, the `addToCart` method runs, which as we just saw, takes the value of cart and increments it by one. \n\n---\n\n## A shorthand for v-on\n\nAs you can imagine, listening for events on your elements is super common. Just like how `v-bind` had a shorthand (`:`), `v-on` has a shorthand: `@` \n\nSo our code could be simplified to: \n\n📄**index.html**\n\n```html\n<button class=\"button\" @click=\"addToCart\">Add to Cart</button>\n```\n\n---\n\n## Another Example: Mouseover Events\n\nNow that we understand the basics of event handling, let's listen for another kind of event within our Vue app. \n\nCurrently we're displaying the variant colors, \"green\" and \"blue\", just below the product details:\n\n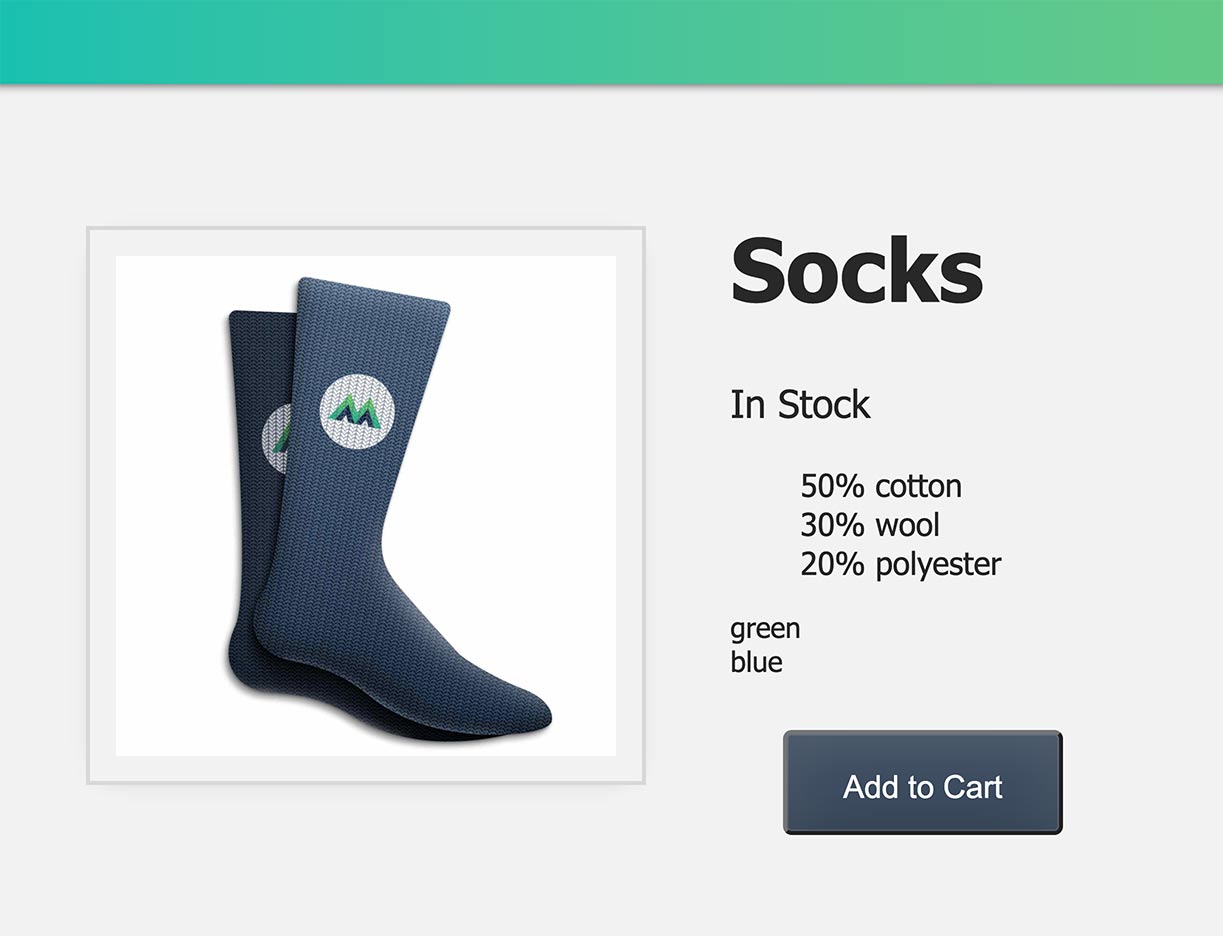\n\nWouldn't it be nice if, when we hovered our mouse over \"green\" and \"blue\", we triggered an update of the image to the green and blue image, respectively? Let's add the ability to listen for `mouseover` events (Vue's term for \"hover\") on these color names.\n\nBecause we want to update the image that we're displaying when we mouse over the variant colors, I've added a new property to each variant object. \n\n📄**main.js**\n\n```javascript\ndata() {
\n return {
\n ...\n variants: [\n {
id: 2234, color: 'green', image: './assets/images/socks_green.jpg'
}
,\n {
id: 2235, color: 'blue', image: './assets/images/socks_blue.jpg'
}
,\n ]\n
}
\n
}
\n```\n\nNow each variant has an image path for the green and blue socks, respectively. We're ready to add a listener for `mouseover` events on the variant color `div`.\n\n📄**main.js**\n\n```html\n<div v-for=\"variant in variants\" :key=\"variant.id\" @mouseover=\"updateImage(variant.image)\">{
{
variant.color
}
}
</div>\n```\n\nWhen a `mouseover` event happens, we're triggering the `updateImage` method, passing in the image path of each variant. That method looks like this:\n\n```javascript\nmethods: {
\n ...\n updateImage(variantImage) {
\n this.image = variantImage\n
}
\n
}
\n```\n\nIt expects the `variantImage` as the parameter, and when it's run, it sets `this.image` (in *this* Vue instance's data) equal to the variant image that was passed in.\n\nNow in the browser, when we hover our mouse over \"green\", we should see the green image. When we hover over \"blue\", we should see the blue image.\n\n---\n\n## Coding Challenge\n\nWe've reached the end of the lesson and we're onto our challenge:\n\n**Create a new button that decrements the value of cart.**\n\nAs a reminder, if you're coding along with our repo, you can check out `L6-end` <a href=\"https://github.com/Code-Pop/Intro-to-Vue-3/tree/L6-end\" target=\"_blank\">branch</a>.",duration:"00:04:27",author:I,date:K,status:J,free:G,lock:F,twitterImage:[{
__meta__:{
createdBy:c,createdDate:af
}
,contentType:E,file:ag,folderId:ah,id:ai,sizes:[{
height:a,path:d,quality:b,width:e
}
,{
height:a,path:f,quality:b,width:g
}
,{
height:a,path:h,quality:b,width:i
}
,{
height:a,path:j,quality:b,width:k
}
,{
height:a,path:l,quality:b,width:m
}
,{
height:a,path:n,quality:b,width:o
}
,{
height:a,path:p,quality:b,width:q
}
,{
height:a,path:r,quality:b,width:s
}
,{
height:a,path:t,quality:b,width:u
}
,{
height:a,path:v,quality:b,width:w
}
,{
height:a,path:x,quality:b,width:y
}
,{
height:a,path:z,quality:b,width:A
}
,{
height:a,path:B,quality:b,width:C
}
],type:D,url:aj
}
],facebookImage:[{
__meta__:{
createdBy:c,createdDate:af
}
,contentType:E,file:ag,folderId:ah,id:ai,sizes:[{
height:a,path:d,quality:b,width:e
}
,{
height:a,path:f,quality:b,width:g
}
,{
height:a,path:h,quality:b,width:i
}
,{
height:a,path:j,quality:b,width:k
}
,{
height:a,path:l,quality:b,width:m
}
,{
height:a,path:n,quality:b,width:o
}
,{
height:a,path:p,quality:b,width:q
}
,{
height:a,path:r,quality:b,width:s
}
,{
height:a,path:t,quality:b,width:u
}
,{
height:a,path:v,quality:b,width:w
}
,{
height:a,path:x,quality:b,width:y
}
,{
height:a,path:z,quality:b,width:A
}
,{
height:a,path:B,quality:b,width:C
}
],type:D,url:aj
}
],socialSharingDescription:"I'm learning about event handling in a free course on @vuemastery",belongsToCourse:H
}
,{
title:"Class & Style Binding",slug:"class-and-style-binding-vue3",image:[{
__meta__:{
createdBy:c,createdDate:ak
}
,contentType:E,file:al,folderId:am,id:an,sizes:[{
height:a,path:d,quality:b,width:e
}
,{
height:a,path:f,quality:b,width:g
}
,{
height:a,path:h,quality:b,width:i
}
,{
height:a,path:j,quality:b,width:k
}
,{
height:a,path:l,quality:b,width:m
}
,{
height:a,path:n,quality:b,width:o
}
,{
height:a,path:p,quality:b,width:q
}
,{
height:a,path:r,quality:b,width:s
}
,{
height:a,path:t,quality:b,width:u
}
,{
height:a,path:v,quality:b,width:w
}
,{
height:a,path:x,quality:b,width:y
}
,{
height:a,path:z,quality:b,width:A
}
,{
height:a,path:B,quality:b,width:C
}
],type:D,url:ao
}
],description:"Learn about class and style binding",markdown:"In this lesson, we're going to look at the concept of class and style binding. If you're coding along with the repo, you can checkout the `L7-start` <a href=\"https://github.com/Code-Pop/Intro-to-Vue-3/tree/L7-start\" target=\"_blank\">branch</a>.\n\n---\n\n## Our Goal\n\nBind classes and styles to our elements based on our app's data.\n\n---\n\n## Style Binding\n\nIn the last lesson, we added the feature where if you hover over \"green\" or \"blue\", you update the image that is being displayed;
the green or blue socks, respectively. But wouldn't the user experience be nicer if instead of hovering over the *word \"*green\" or \"blue\", we hovered over the actual *colors* green and blue? \n\nLet's create green and blue circles that we can hover on. We can achieve this by using style binding.\n\nFirst, to style our divs like circles, we'll we need to add a new class `.color-circle` to the variant div. \n\n📄**index.html**\n\n```html\n<div \n v-for=\"variant in variants\" \n :key=\"variant.id\" \n @mouseover=\"updateImage(variant.image)\" \n class=\"color-circle\" \n</div>\n```\n\nThis class already lives in our css file. As you can see, it simply transform our divs into a circle with a 50px diameter:\n\n📄**styles.css**\n\n```css\n.color-circle {
\n width: 50px;
\n height: 50px;
\n margin-top: 8px;
\n border: 2px solid #d8d8d8;
\n border-radius: 50%;
\n
}
\n```\n\nNow that we've got that out of the way, we can move on to the actual style binding. Just like it sounds, we want to bind styles to the variant divs. We do so by using `v-bind` (or its shorthand: `:`) on the `style` attribute, and binding a style object to it.\n\n📄**index.html**\n\n```html\n<div \n v-for=\"variant in variants\" \n :key=\"variant.id\" \n @mouseover=\"updateImage(variant.image)\" \n class=\"color-circle\" \n :style=\"{
backgroundColor: variant.color
}
\">\n</div>\n```\n\nHere, we're setting the divs' `backgroundColor` equal to the `variant.color`. So instead of printing out those strings, \"green\" and \"blue\", we're using them to set the background color of our circles.\n\nChecking this out in the browser, we should now see two color circles filled in with a green and blue background.\n\n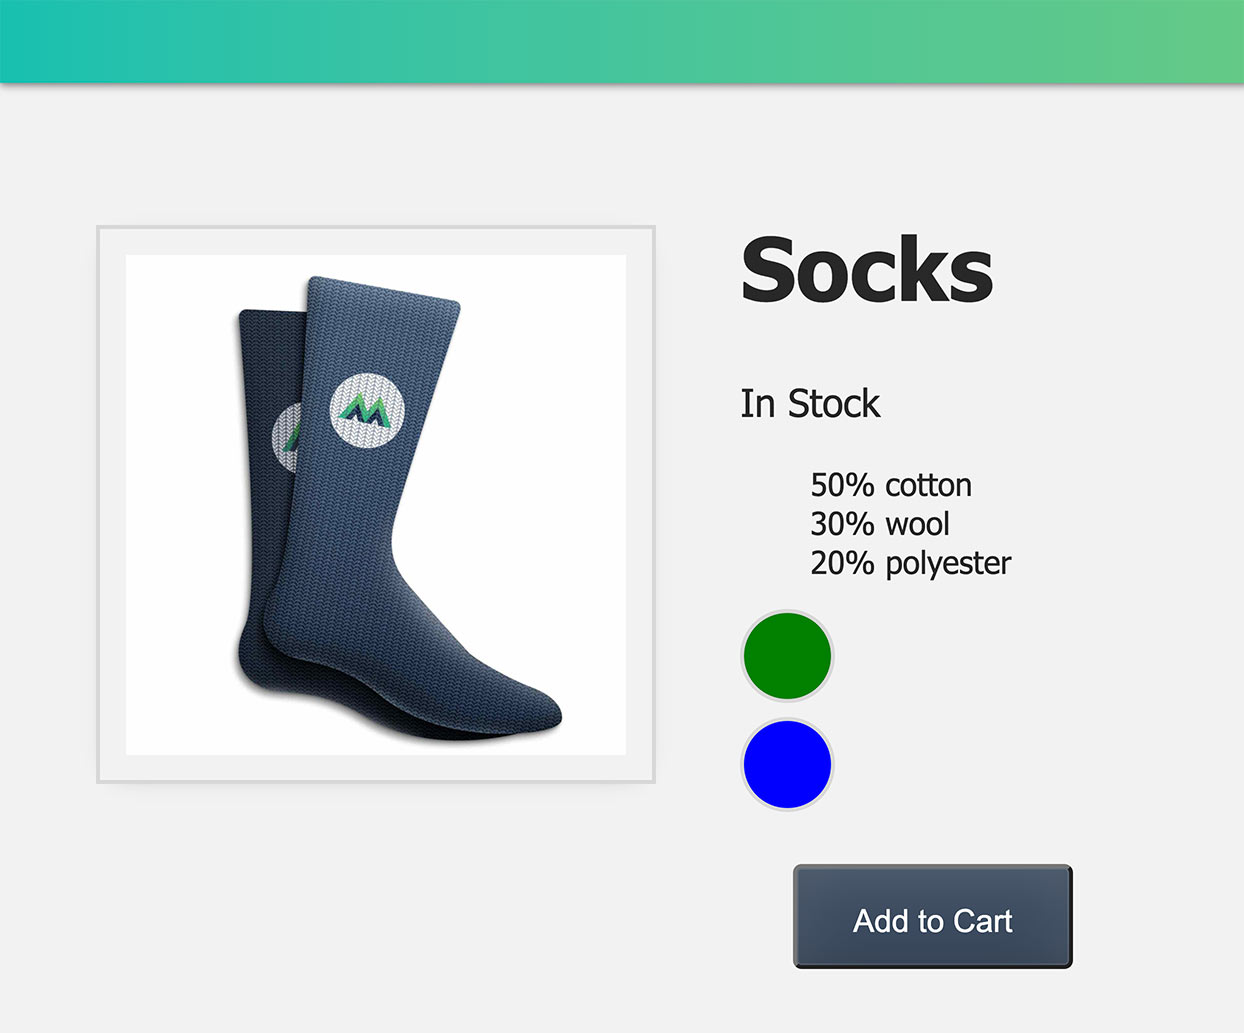\n\nCool! Now let's understand, on a deeper level, how this is all working.\n\n---\n\n## Understanding Style Binding\n\nOn our variant `div`, we added the `style` attribute and bound a style object to it. \n\n📄**index.html**\n\n```html\n<div \n ...\n :style=\"{
backgroundColor: variant.color
}
\">\n</div>\n```\n\nThat style object has the CSS property of `backgroundColor`, and we're setting that equal to whatever the variant color is at the time of that `v-for` iteration. \n\nIn the first iteration, `variant.color` is `\"green\"` \n\nVue takes that information and converts it into the code:`style=\"{
backgroundColor: green
}
\"` \n\nThen prints out a green background circle. \n\n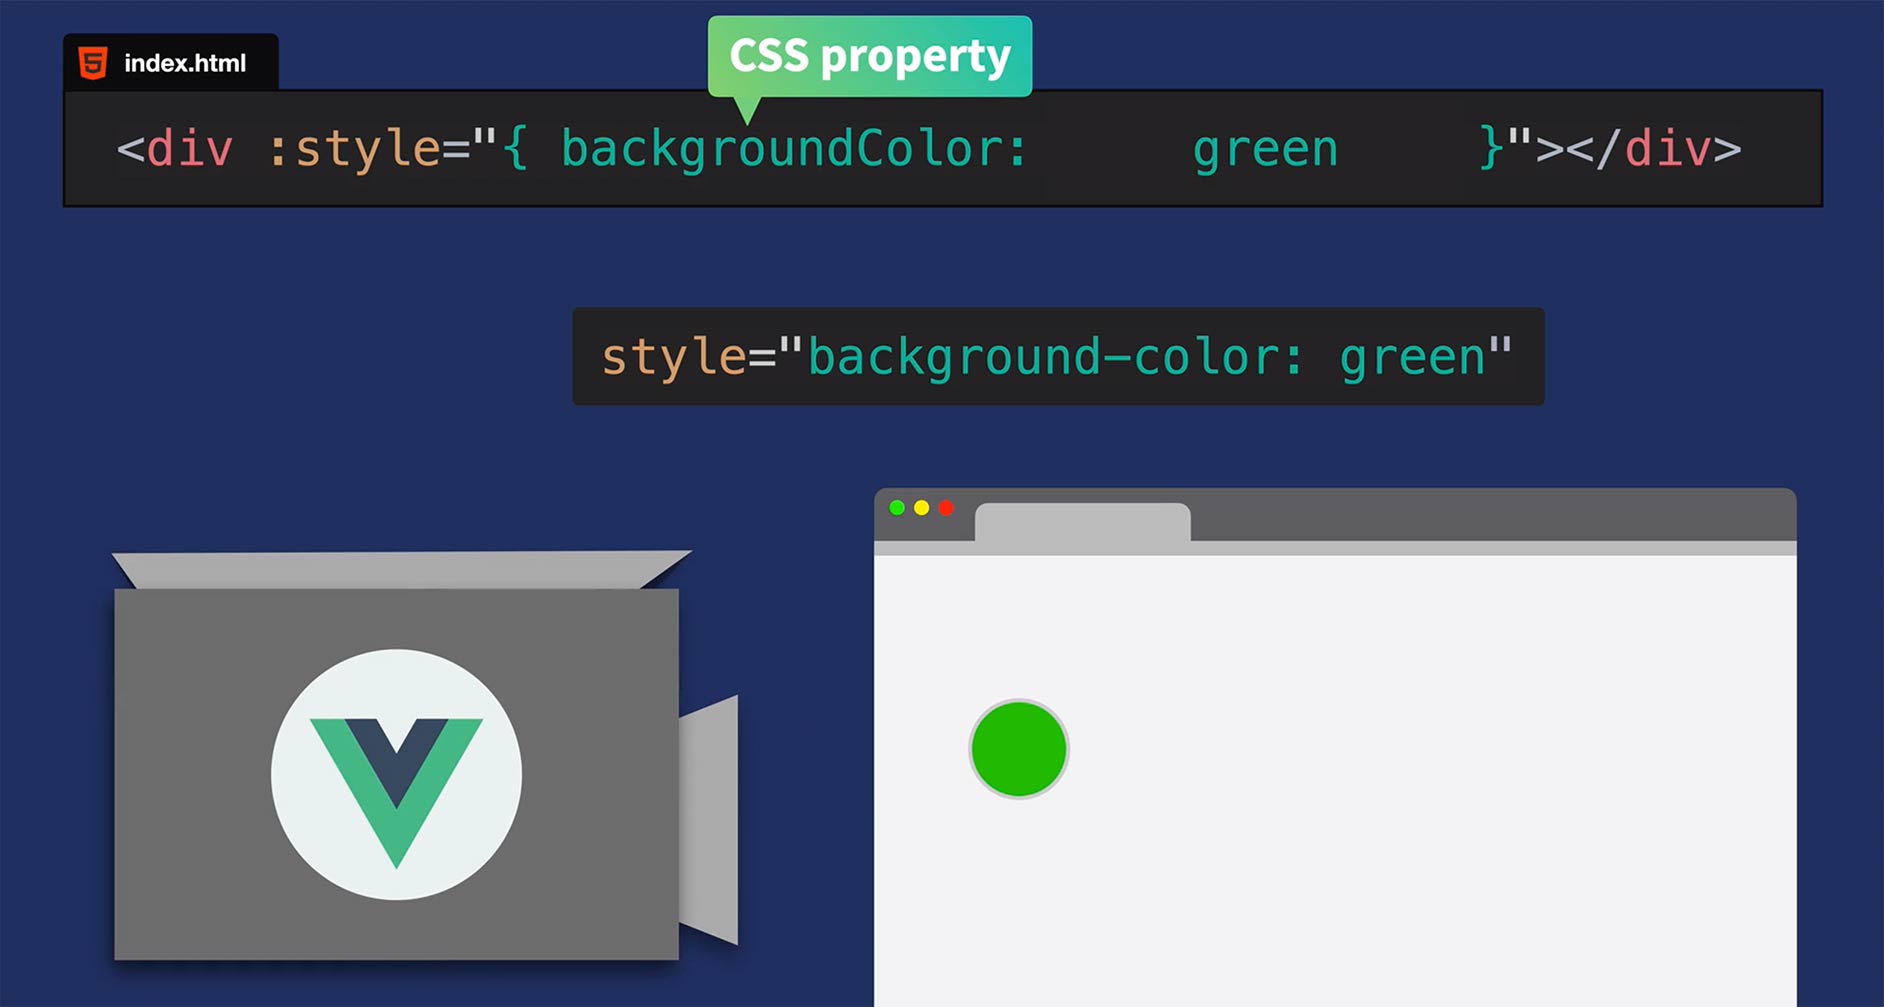\n\nIt repeats this process for the second variant color to create the blue circle.\n\n---\n\n## Camel vs Kebab\n\nThere are some important things to consider when using style binding like this. \n\n```html\n<div :style=\"{
backgroundColor: variant.color
}
></div>\n```\n\nInside of this expression, remember that this style object is all JavaScript. That's why I used camelCase in the property name. If I had said `background-color`, that `-` would've been interpreted as a minus sign. But we're not doing any math here. We're setting a CSS property name. \n\nSo since we're in this JavaScript object, we have to use camelCased unless we want to use 'kebab-cased' in quotes to avoid the mathematical misinterpretation, like so:\n\n```html\n<div :style=\"{
'background-color': variant.color
}
></div>\n```\n\nBoth options will work, as long as you remember your quotation marks.\n\n---\n\n## Style Binding: Objects\n\nSometimes you might want to add a bunch of styles to an element, but adding them all in-line could get messy. In these situations, we can bind to an entire style object that lives within our data.\n\n\n\nNow that we've taken a look into the topic of style binding, let's look at a similar topic: class binding.\n\n---\n\n---\n\n## Class Binding\n\nBack in our app, you'll notice that when our `inStock` data value is false, we can still click the Add to Cart button and increment the value of the cart. But if the product is out of stock, maybe we don't want the user to be able to add the product to the cart. So let's change up this behavior, disabling the button whenever `inStock` is `false` AND making the button *appear* disabled, using class binding.\n\n \n\nTo get this started, we'll use the shorthand for `v-bind` on the `disabled` attribute to add that attribute whenever our product is not in stock. \n\n📄**index.html**\n\n```html\n<button \n class=\"button\" \n :disabled=\"!inStock\" \n @click=\"addToCart\">\n Add to Cart\n</button>\n```\n\nNow, whenever `inStock` is `false` and we click the Add to Cart button, nothing will happen since it's disabled. But the button still *appears* active, which is misleading to our users. So let's use class binding to add a `disabledButton` class as well, whenever `inStock` is `false`.\n\nYou'll see in our CSS file that we already have this `disabledButton` class, which sets the `background-color` to gray and makes the `cursor` not-allowed. \n\n📄**styles.css**\n\n```css\n.disabledButton {
\n background-color: #d8d8d8;
\n cursor: not-allowed;
\n
}
\n```\n\nTo apply this class conditionally, based on the value of `inStock`, we'll use the shorthand for `v-bind` on the `class` attribute, and use an expression that adds the `disabledButton` class (or not) whenever `!inStock`.\n\n📄**index.html**\n\n```html\n<button \n class=\"button\" \n :class=\"{
disabledButton: !inStock
}
\" \n :disabled=\"!inStock\" \n @click=\"addToCart\">\n Add to Cart\n</button>\n```\n\nNow whenever `inStock` is `false`, not only will the button be disabled, it will also appear disabled. \n\n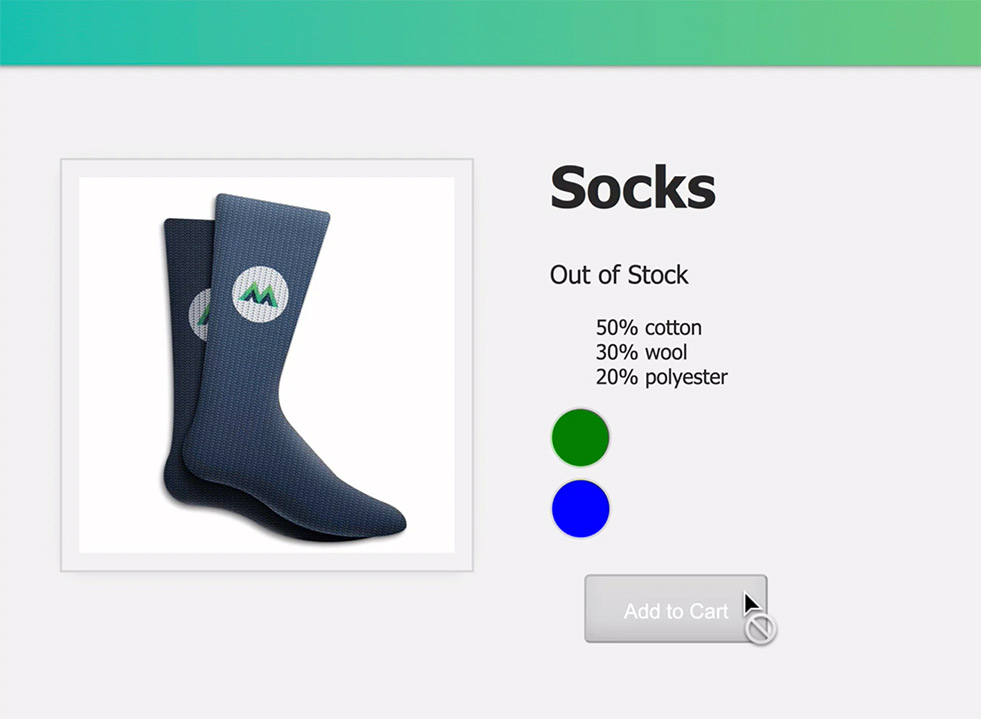\n\n---\n\n## Multiple Class Names\n\nWhen getting started with class binding, there are some things to note. For example, what happens when we already have an existing class and we want to conditionally add another class based on a data value?\n\nFor example, if we already have the `color-circle` class on this `div`, and we conditionally add the `active` class, how will this look?\n\n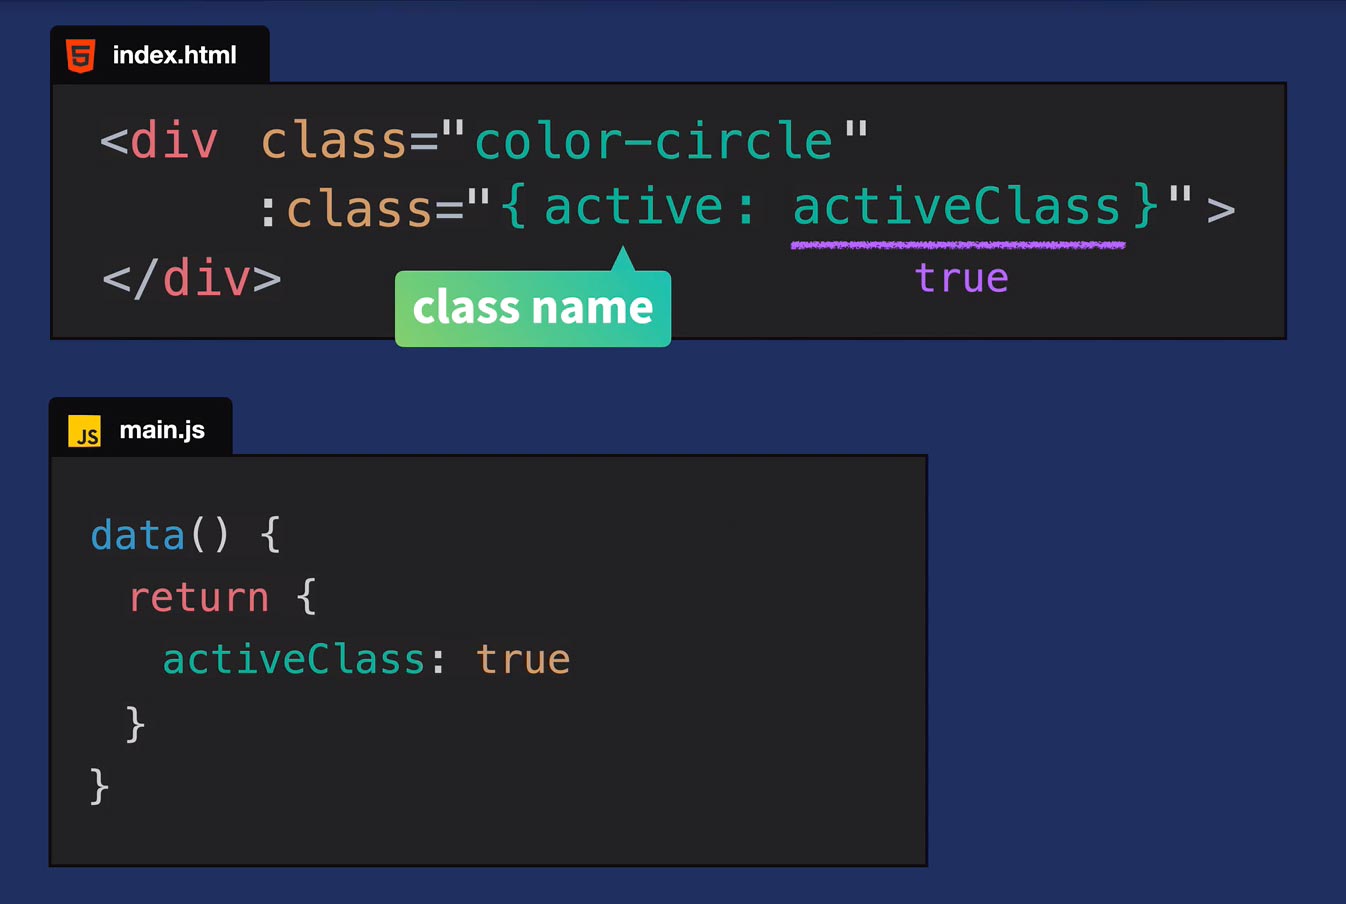\n\nThose classes are going to be combined like so:\n\n```html\n<div class=\"color-circle active\"></div>\n```\n\n \n\n---\n\n## Ternary Operators\n\nA helpful tool that class binding gives us is the ability to use in-line ternary operators to add different classes based upon a condition.\n\n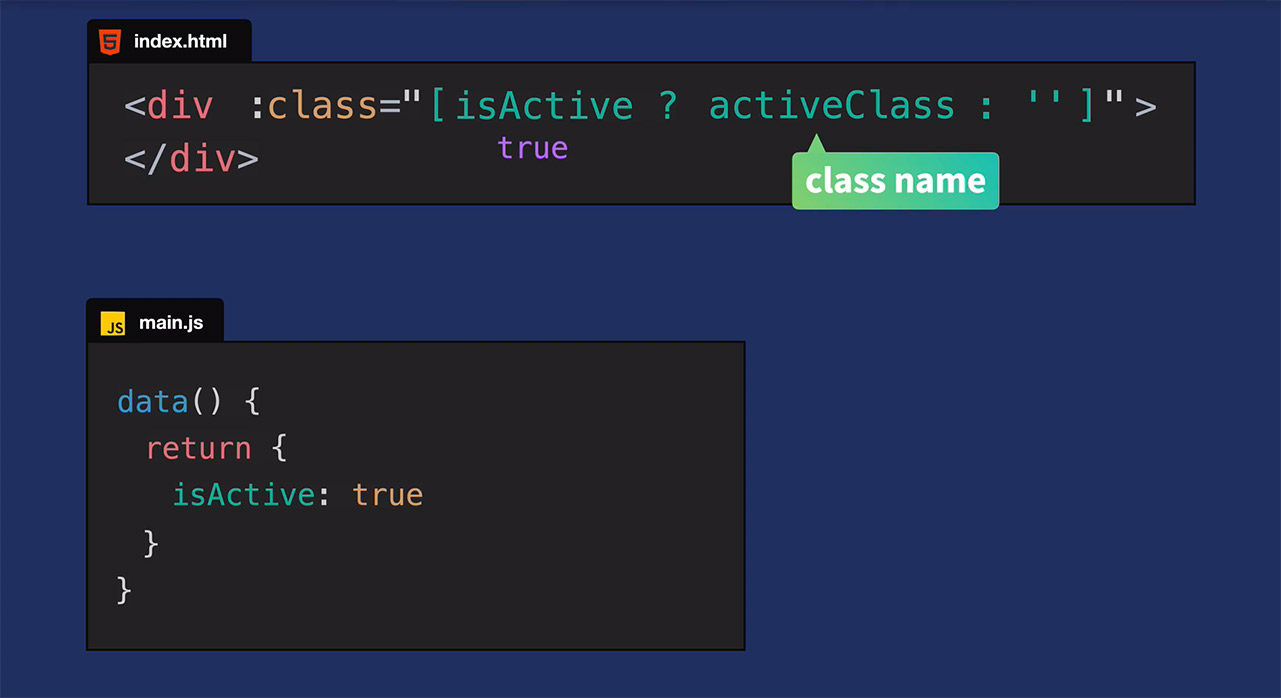\n\nIn this case, because `isActive` is `true`, we are indeed adding the `activeClass`. If it were `false`, we'd add no class (`''`);
alternatively, we could have added an entirely different class.\n\n---\n\nThe variations in syntax and use cases that I just showed you with class and style binding is only the start. So I recommend checking out the Vue docs for more use cases and examples. \n\n---\n\n## Coding Challenge\n\nWe've reached the end of the lesson and we're onto our challenge:\n\n**Bind the `out-of-stock-img` class to the image whenever `inStock` is `false`.**\n\nAs a reminder, if you're coding along with our repo, you can check out `L7-end` <a href=\"https://github.com/Code-Pop/Intro-to-Vue-3/tree/L7-end\" target=\"_blank\">branch</a>.",duration:"00:06:33",author:I,date:"2020-08-04T00:00:00-07:00",status:J,free:G,lock:F,twitterImage:[{
__meta__:{
createdBy:c,createdDate:ak
}
,contentType:E,file:al,folderId:am,id:an,sizes:[{
height:a,path:d,quality:b,width:e
}
,{
height:a,path:f,quality:b,width:g
}
,{
height:a,path:h,quality:b,width:i
}
,{
height:a,path:j,quality:b,width:k
}
,{
height:a,path:l,quality:b,width:m
}
,{
height:a,path:n,quality:b,width:o
}
,{
height:a,path:p,quality:b,width:q
}
,{
height:a,path:r,quality:b,width:s
}
,{
height:a,path:t,quality:b,width:u
}
,{
height:a,path:v,quality:b,width:w
}
,{
height:a,path:x,quality:b,width:y
}
,{
height:a,path:z,quality:b,width:A
}
,{
height:a,path:B,quality:b,width:C
}
],type:D,url:ao
}
],facebookImage:[{
__meta__:{
createdBy:c,createdDate:ak
}
,contentType:E,file:al,folderId:am,id:an,sizes:[{
height:a,path:d,quality:b,width:e
}
,{
height:a,path:f,quality:b,width:g
}
,{
height:a,path:h,quality:b,width:i
}
,{
height:a,path:j,quality:b,width:k
}
,{
height:a,path:l,quality:b,width:m
}
,{
height:a,path:n,quality:b,width:o
}
,{
height:a,path:p,quality:b,width:q
}
,{
height:a,path:r,quality:b,width:s
}
,{
height:a,path:t,quality:b,width:u
}
,{
height:a,path:v,quality:b,width:w
}
,{
height:a,path:x,quality:b,width:y
}
,{
height:a,path:z,quality:b,width:A
}
,{
height:a,path:B,quality:b,width:C
}
],type:D,url:ao
}
],socialSharingDescription:"I'm learning about class and style binding in a free course on @vuemastery",belongsToCourse:H
}
,{
title:"Computed Properties",slug:"computed-properties-vue3",image:[{
__meta__:{
createdBy:c,createdDate:ap
}
,contentType:E,file:aq,folderId:ar,id:as,sizes:[{
height:a,path:d,quality:b,width:e
}
,{
height:a,path:f,quality:b,width:g
}
,{
height:a,path:h,quality:b,width:i
}
,{
height:a,path:j,quality:b,width:k
}
,{
height:a,path:l,quality:b,width:m
}
,{
height:a,path:n,quality:b,width:o
}
,{
height:a,path:p,quality:b,width:q
}
,{
height:a,path:r,quality:b,width:s
}
,{
height:a,path:t,quality:b,width:u
}
,{
height:a,path:v,quality:b,width:w
}
,{
height:a,path:x,quality:b,width:y
}
,{
height:a,path:z,quality:b,width:A
}
,{
height:a,path:B,quality:b,width:C
}
],type:D,url:at
}
],description:"Learn about computed properties",markdown:"In this lesson, we're going to look at the concept of computed properties. If you're coding along with the repo, you can checkout the `L8-start` <a href=\"https://github.com/Code-Pop/Intro-to-Vue-3/tree/L8-start\" target=\"_blank\">branch</a>.\n\n---\n\n## Our Goal\n\nUpdate both the variant image AND whether it's in stock or not, using computed properties.\n\n---\n\n## A Simple Computed Property\n\nIn the starting code, you'll notice we have a new data property:\n\n📄**main.js**\n\n```javascript\ndata() {
\n return {
\n product: 'Socks',\n brand: 'Vue Mastery'\n
}
\n```\n\nWhat if we wanted to combine the `brand` and the `product`, in our template? We could do that within an expression like so:\n\n📄**index.html**\n\n```html\n<h1>{
{
brand + ' ' + product
}
}
</h1>\n```\n\nIf we checked this out in the browser, we'd see \"Vue mastery Socks\" displayed. But wouldn't it be neat if, instead of handling this logic in the inner HTML, our app had the ability to compute that value for us? For example, taking the `brand` and the `product`, adding them together, and returning that new value. \n\nComputed properties are exactly like they sound: properties we can add to a Vue app that compute values for us. They help us keep computational logic out of the template and give us performance improvements that we'll cover soon. For now, let's turn this simple example into a computed property. We'll alter the `h1`'s expression like so:\n\n📄**index.html**\n\n```html\n<h1>{
{
title
}
}
</h1>\n```\n\nNow, `title` is the name of a computed property that we'll create now. First, we'll add the `computed` option to the app, just below our `methods`, then create the `title` property.\n\n📄**main.js**\n\n```javascript\n...\ncomputed: {
\n title() {
\n return this.brand + ' ' + this.product\n
}
\n
}
\n```\n\nIf we check out the browser, we'll still see \"Vue Mastery Socks\" displayed, except now we've abstracted that computational logic out of the template and contained it neatly on the options object.\n\nBut how exactly are computed properties working? Let's take a deeper look.\n\n---\n\n## Think of them like a Calculator\n\nI like to think of computed properties kind of like a calculator, because they calculate or *compute* values for us. This computational calculator takes our values, `brand` and `product`, adds them together, and gives us the result.\n\n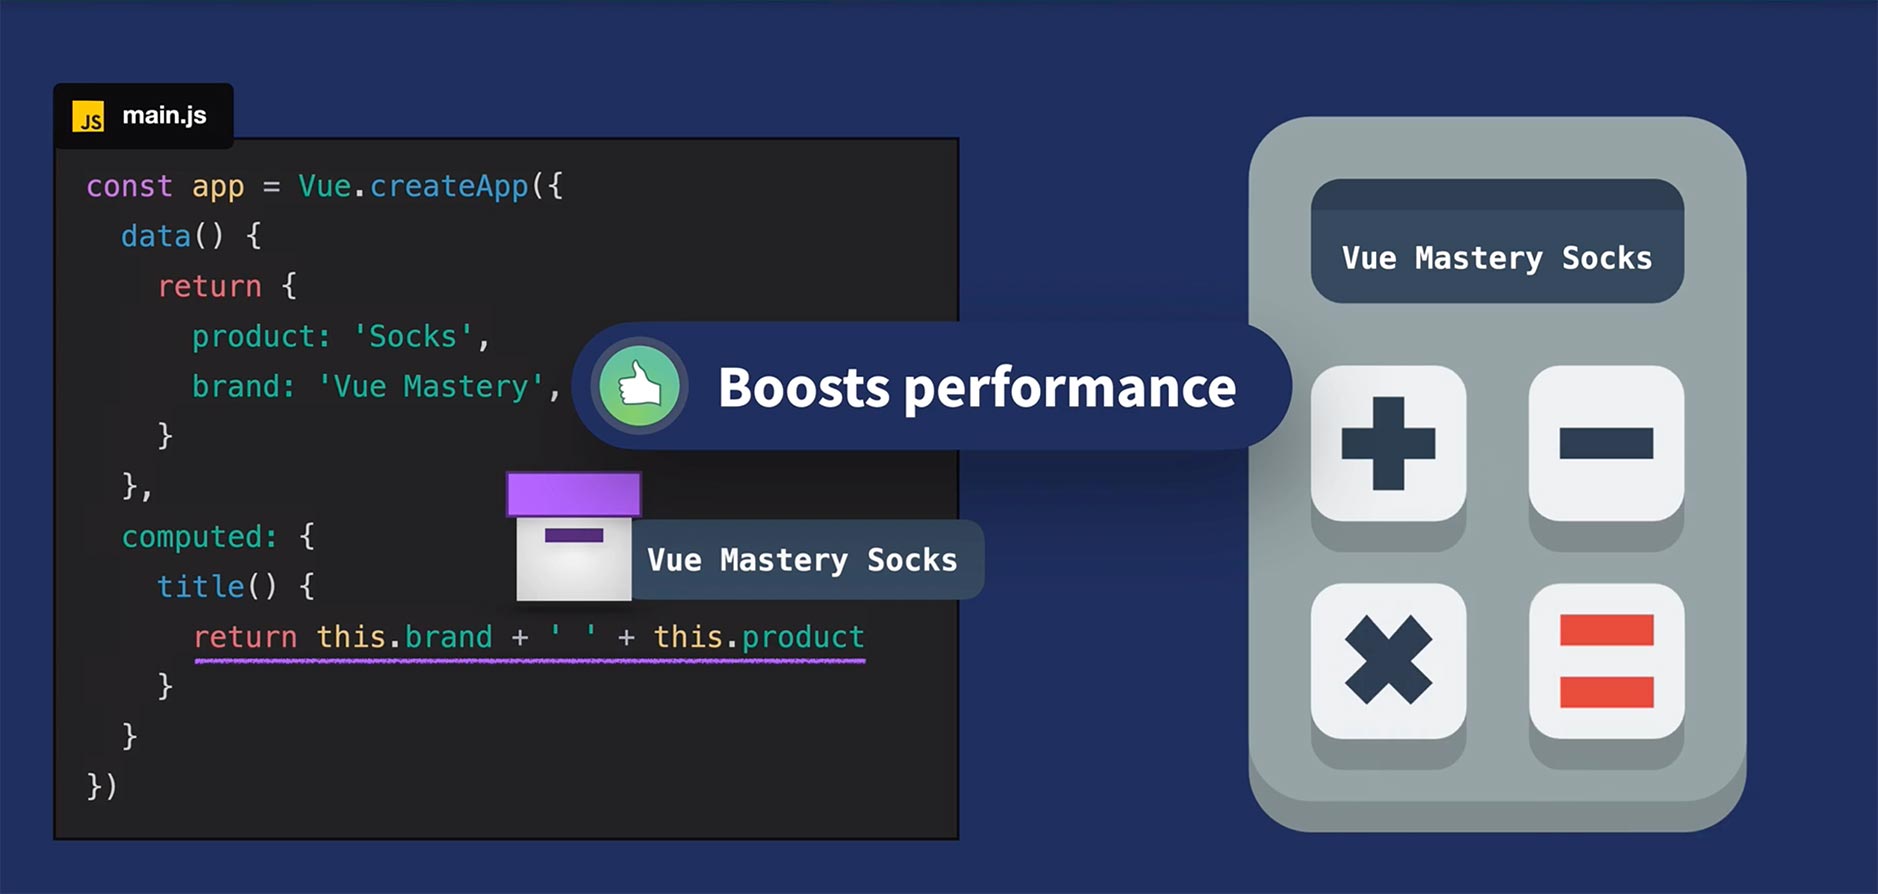\n\nLike I mentioned earlier, computed properties provide us a performance improvement. This is because they cache the calculated value. The value (`'Vue Mastery Socks'`) gets stored away and only updates when it needs to, when one of its dependencies change. For example, if the `brand` were to change from `'Vue Mastery'` to `'Node Mastery'`, our computed property would receive that new `brand` dependency, then recalculate and return the new value: `'Node Mastery Socks'`\n\nNow that we're starting to comprehend computed properties, let's implement a more practical example in our Vue app.\n\n---\n\n## Computing Image & Quantity\n\nHeading back into our code, let's add a new `quantity` property to our variant objects.\n\n📄**main.js**\n\n```javascript\ndata() {
\n return {
\n ...\n variants: [\n {
id: 2234, color: 'green', image: './assets/images/socks_green.jpg', quantity: 50
}
,\n {
id: 2235, color: 'blue', image: './assets/images/socks_blue.jpg', quantity: 0
}
,\n ]\n
}
\n
}
\n```\n\nNotice how the green socks have a `quantity` of `50` while the blue socks have `0`. In other words, the green socks are in stock and the blue socks are out of stock. However, we're currently displaying \"In stock\" or \"Out of stock\" based on the `inStock` data value, which no longer reflects the truth about our product and its variant quantities. So we'll want to create a computed property we can use to display \"In stock\" or \"Out of stock\" based on these new quantities.\n\nTo get started, remember how we updated the variant image, based on which variant color is moused over? Instead of that mouseover event triggering the `updateImage()` method, we're going to have it trigger a new method called `updateVariant()`.\n\n📄**index.html**\n\n```html\n<div \n v-for=\"(variant, index) in variants\" \n :key=\"variant.id\" \n @mouseover=\"updateVariant(index)\" <! -- new method -->\n class=\"color-circle\" \n :style=\"{
backgroundColor: variant.color
}
\">\n</div>\n```\n\nNotice how we're passing in the `index` of the currently hovered-on variant: `updateVariant(index)`. We got access to that `index` by adding it as a second parameter in our `v-for` directive:\n\n`v-for=\"(variant, index) in variants\"`\n\nWhy are we passing in the `index`? We're going to use it to tell our app which variant is currently hovered on, so it can use that information to trigger the updating of both the image AND whether that variant is in stock or not.\n\nWe'll add a new data property to our app, which will be updated to equal that `index`\n\n📄**main.js**\n\n```javascript\ndata() {
\n return {
\n ...\n selectedVariant: 0,\n ...\n
}
\n
}
\n```\n\nOur `updateVariant()` method will set the `selectedVariant`'s value equal to the `index` of the currently hovered-on variant.\n\n📄**main.js**\n\n```javascript\nupdateVariant(index) {
\n this.selectedVariant = index\n
}
\n```\n\nNow, we've implemented a way for our app to know which product variant is being engaged with, and we're able to use that information to trigger the computing of which image to show and whether to show \"In stock\" or \"Out of stock\", based on which variant the user is moused over.\n\n---\n\nWe're now ready to delete `image` and `inStock` from our data, and replace those with computed properties of the same names. \n\n📄**main.js**\n\n```javascript\ncomputed: {
\n image() {
\n return ??\n
}
,\n inStock() {
\n return ??\n
}
\n
}
\n```\n\nSo how do we grab the variant image and quantity? That will look like this:\n\n📄**main.js**\n\n```javascript\nimage() {
\n return this.variants[this.selectedVariant].image\n
}
\n```\n\nWe're targeting the first or second element of our `variants` array based off the `selectedVariant`, which is either `0` or `1`, depending on which variant color circle is hovered on. Then we just use dot notation to grab the `image` off that variant.\n\nThe logic for computing `inStock` is nearly identical:\n\n📄**main.js**\n\n```javascript\ninStock() {
\n return this.variants[this.selectedVariant].quantity\n
}
\n```\n\nChecking this out in the browser, when we hover over the color circles, not only are we updating the variant image, but we're also displaying whether that variant is in stock or out of stock, using its quantity. \n\n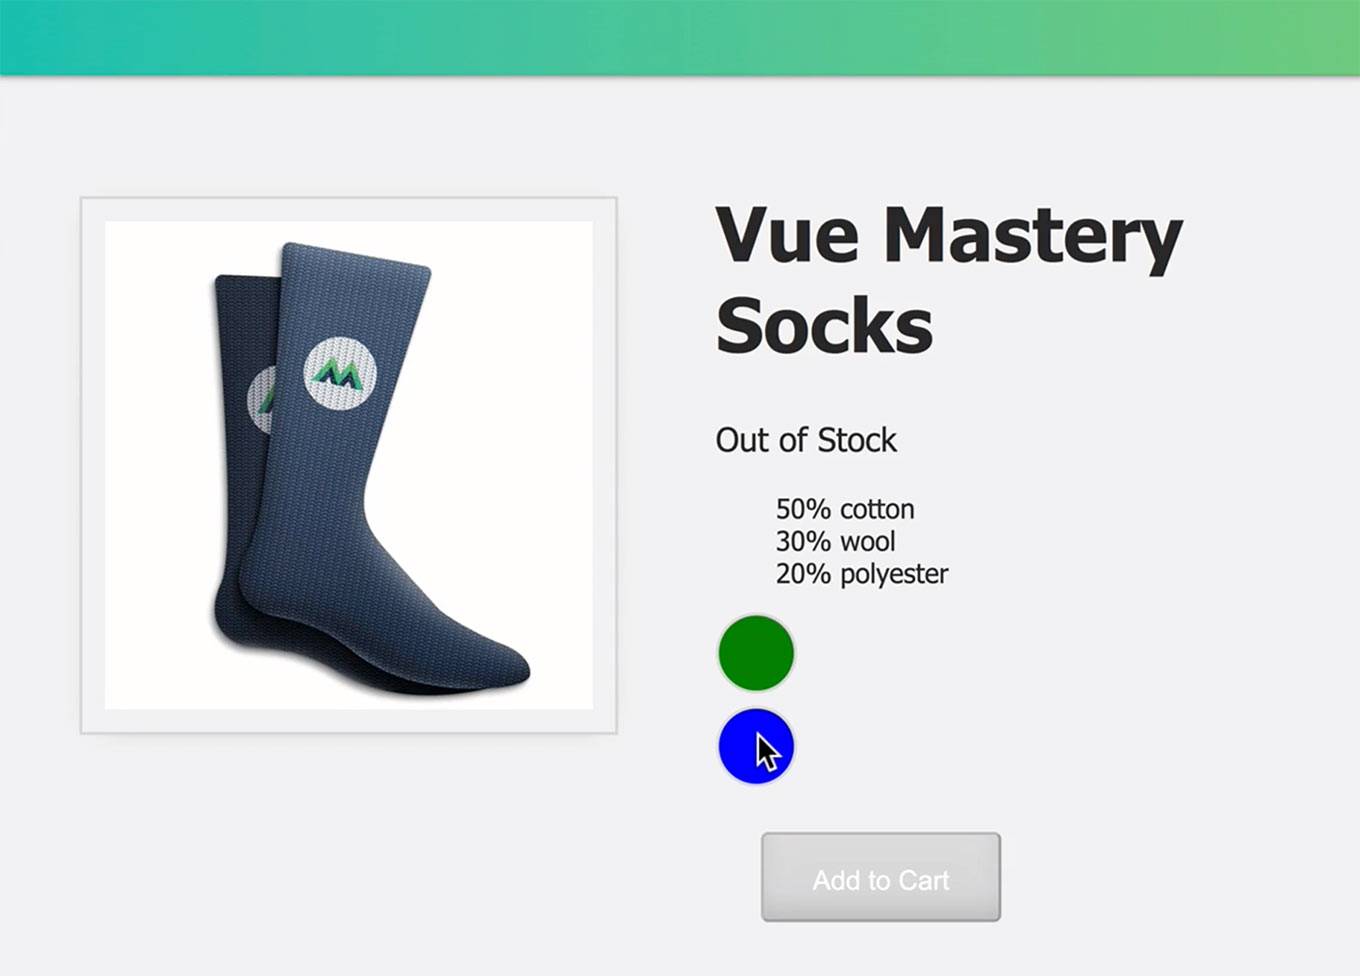\n\nNotice how the button is still automatically updating for us, enabling and disabling. That's because, in our template, we're still using `inStock`. \n\n📄**index.html**\n\n```html\n<button \n class=\"button\" \n :class=\"{
disabledButton: !inStock
}
\" \n :disabled=\"!inStock\" \n v-on:click=\"addToCart\">\n Add to Cart\n</button>\n```\n\nNow `inStock` is no longer a data property;
it's the new computed property.\n\n---\n\n## Coding Challenge\n\nWe've reached the end of the lesson and we're onto our challenge:\n\n**Add an `onSale` boolean to the data.**\n\n**Use a computed property to display the string: '`brand` + ' ' `product` + ' ' is on sale', whenever `onSale` is `true`.**\n\nAs a reminder, if you're coding along with our repo, you can check out `L8-end` <a href=\"https://github.com/Code-Pop/Intro-to-Vue-3/tree/L8-end\" target=\"_blank\">branch</a>.",duration:"00:06:17",author:I,date:K,status:J,free:G,lock:F,twitterImage:[{
__meta__:{
createdBy:c,createdDate:ap
}
,contentType:E,file:aq,folderId:ar,id:as,sizes:[{
height:a,path:d,quality:b,width:e
}
,{
height:a,path:f,quality:b,width:g
}
,{
height:a,path:h,quality:b,width:i
}
,{
height:a,path:j,quality:b,width:k
}
,{
height:a,path:l,quality:b,width:m
}
,{
height:a,path:n,quality:b,width:o
}
,{
height:a,path:p,quality:b,width:q
}
,{
height:a,path:r,quality:b,width:s
}
,{
height:a,path:t,quality:b,width:u
}
,{
height:a,path:v,quality:b,width:w
}
,{
height:a,path:x,quality:b,width:y
}
,{
height:a,path:z,quality:b,width:A
}
,{
height:a,path:B,quality:b,width:C
}
],type:D,url:at
}
],facebookImage:[{
__meta__:{
createdBy:c,createdDate:ap
}
,contentType:E,file:aq,folderId:ar,id:as,sizes:[{
height:a,path:d,quality:b,width:e
}
,{
height:a,path:f,quality:b,width:g
}
,{
height:a,path:h,quality:b,width:i
}
,{
height:a,path:j,quality:b,width:k
}
,{
height:a,path:l,quality:b,width:m
}
,{
height:a,path:n,quality:b,width:o
}
,{
height:a,path:p,quality:b,width:q
}
,{
height:a,path:r,quality:b,width:s
}
,{
height:a,path:t,quality:b,width:u
}
,{
height:a,path:v,quality:b,width:w
}
,{
height:a,path:x,quality:b,width:y
}
,{
height:a,path:z,quality:b,width:A
}
,{
height:a,path:B,quality:b,width:C
}
],type:D,url:at
}
],socialSharingDescription:"I'm learning about computed properties in a free course on @vuemastery",belongsToCourse:H
}
,{
title:"Components & Props",slug:"components-and-props-vue3",image:[{
__meta__:{
createdBy:c,createdDate:au
}
,contentType:E,file:av,folderId:aw,id:ax,sizes:[{
height:a,path:d,quality:b,width:e
}
,{
height:a,path:f,quality:b,width:g
}
,{
height:a,path:h,quality:b,width:i
}
,{
height:a,path:j,quality:b,width:k
}
,{
height:a,path:l,quality:b,width:m
}
,{
height:a,path:n,quality:b,width:o
}
,{
height:a,path:p,quality:b,width:q
}
,{
height:a,path:r,quality:b,width:s
}
,{
height:a,path:t,quality:b,width:u
}
,{
height:a,path:v,quality:b,width:w
}
,{
height:a,path:x,quality:b,width:y
}
,{
height:a,path:z,quality:b,width:A
}
,{
height:a,path:B,quality:b,width:C
}
],type:D,url:ay
}
],description:"Learn about components and props",markdown:"In this lesson, we're going to look at the concept of Vue.js components and props. If you're coding along with the repo, you can checkout the `L9-start` <a href=\"https://github.com/Code-Pop/Intro-to-Vue-3/tree/L9-start\" target=\"_blank\">branch</a>.\n\n---\n\n## Our Goal\n\nRefactor the example app to use a product component, which uses a prop.\n\n---\n\n## Building Blocks of a Vue App\n\nIn modern front-end JavaScript frameworks, components are the building blocks of an app, and that's certainly the case with Vue. You can imagine components a bit like Legos that you can plug into each other in a component family tree hierarchy.\n\n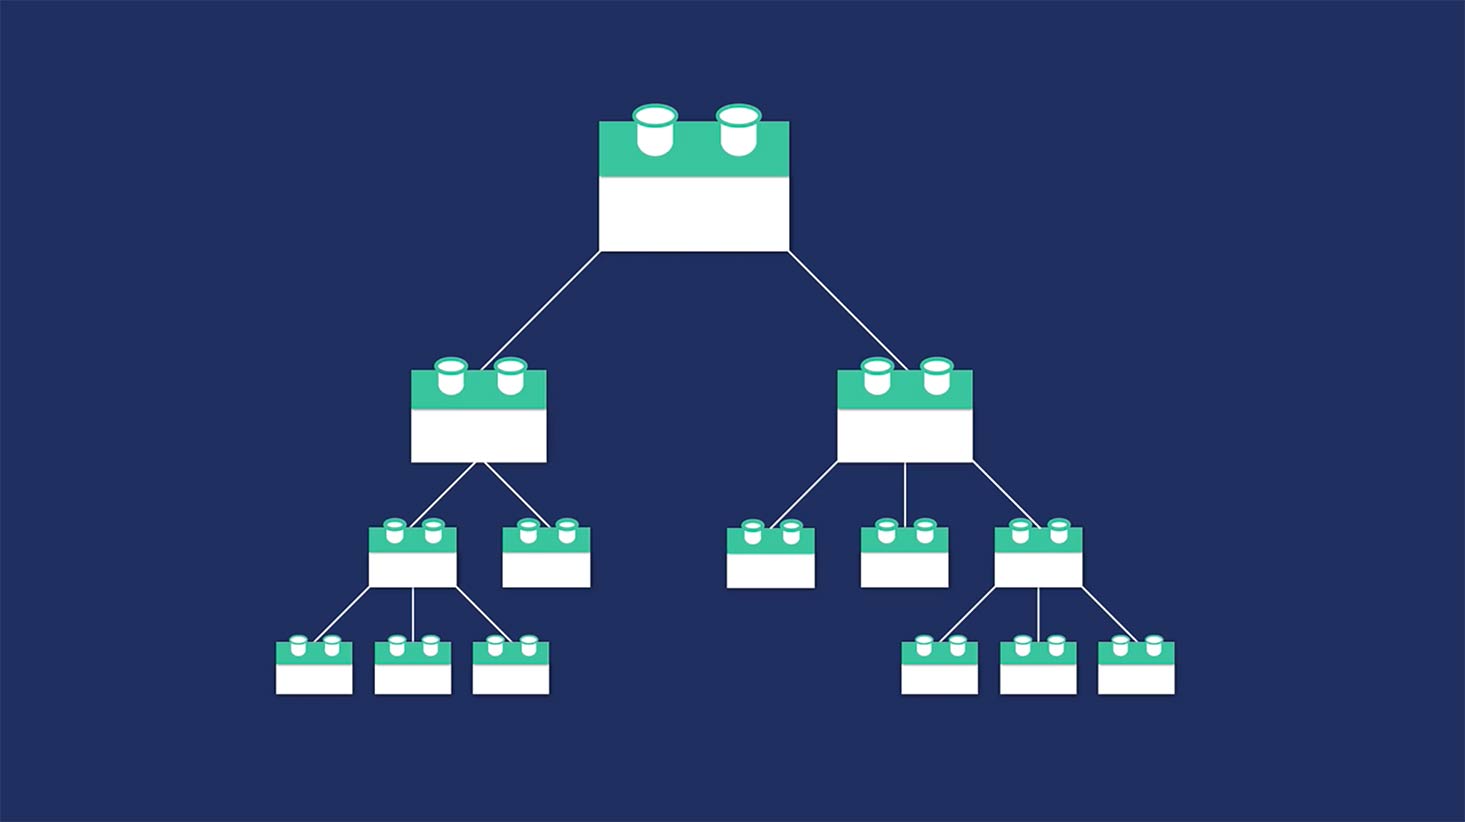\n\nAny given web page may be composed of multiple components, and it's common for components to be \"parents\" that have child components nested within them.\n\n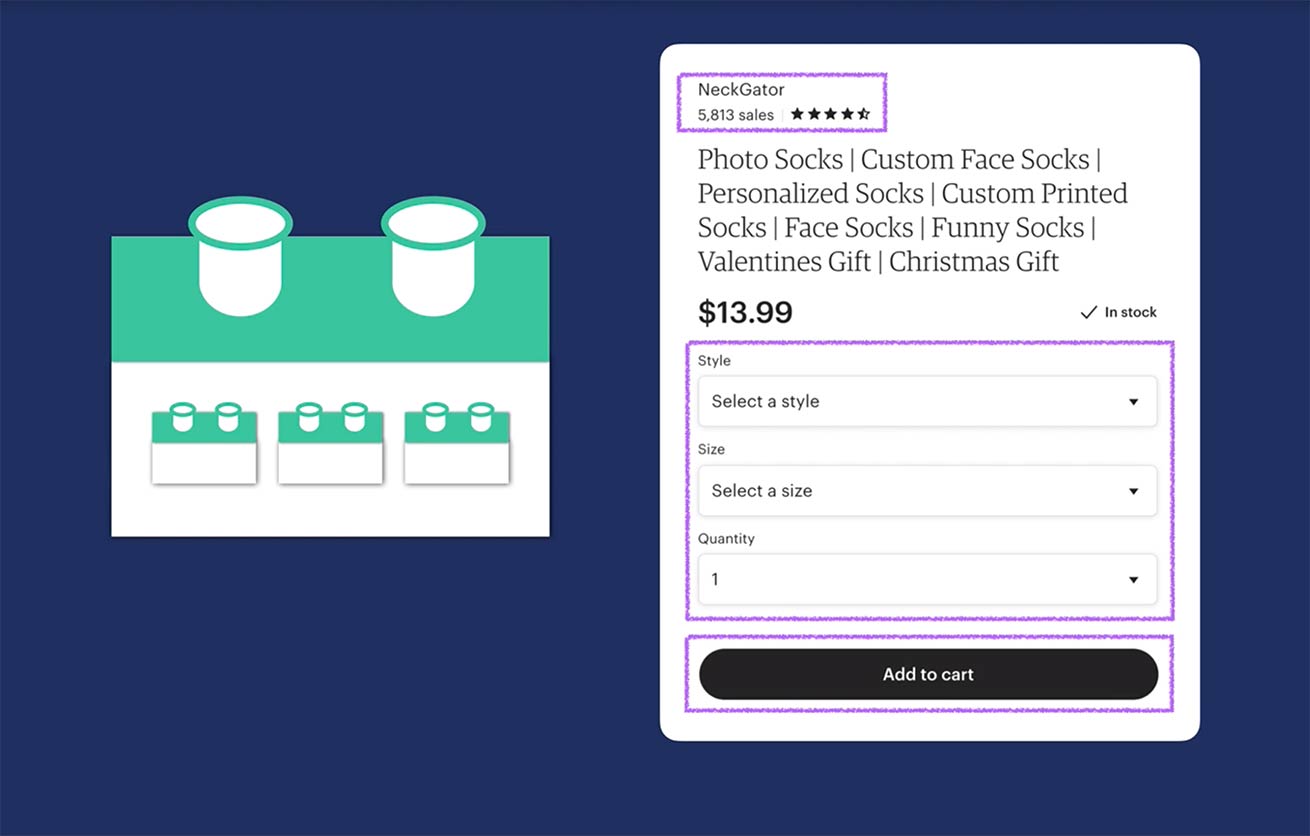\n\n---\n\n## Creating our First Component\n\nLet's head in to our app and create our first component. Because our app will eventually have multiple components, we'll create a **components** folder, inside of which we'll create our first component, called **ProductDisplay.js**. \n\n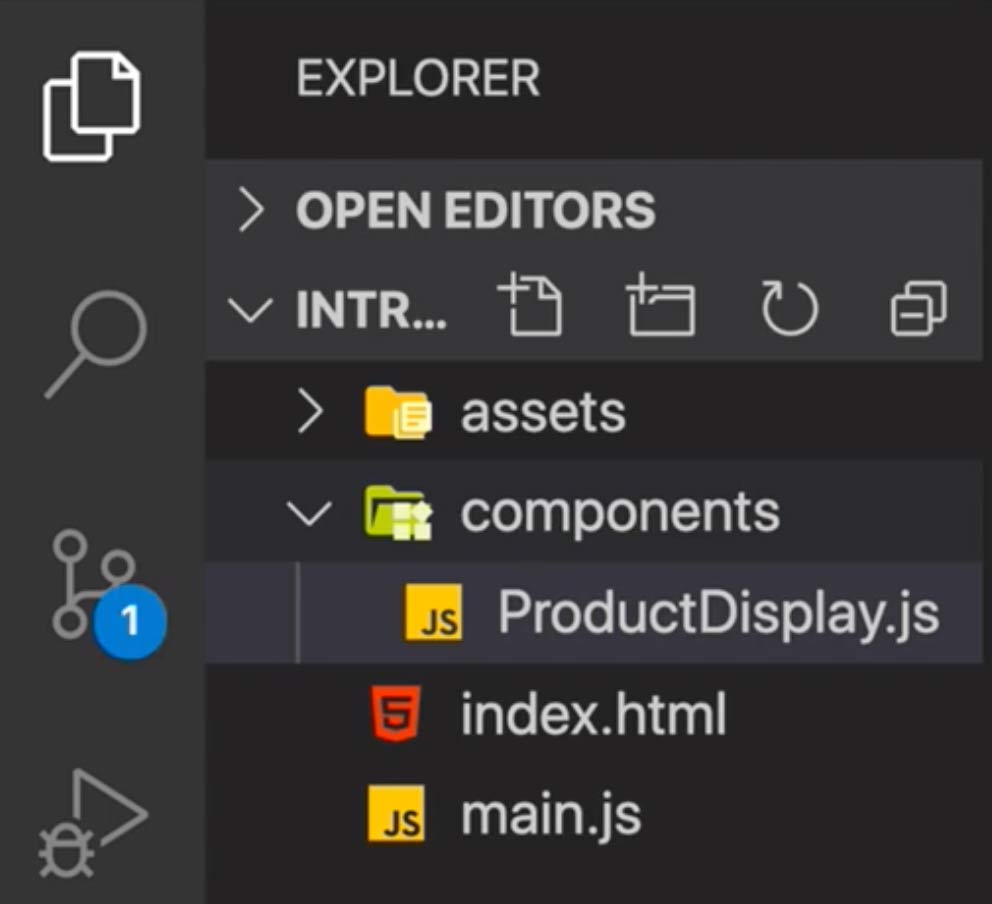\n\nThe syntax to create a component looks like this:\n\n📄**components/ProductDisplay.js**\n\n```javascript\napp.component('product-display', {
}
)\n```\n\nThe first argument is the component name, `'product-display'` in this case, and the second argument is an object to configure our component (similar to the options object used to configure our root Vue app).\n\n---\n\n### Template\n\nBecause we need our component to have structure, we'll add the `template` property and paste all of the product-based HTML code that currently resides in **index.html into here**, within a [template literal](https://developer.mozilla.org/en-US/docs/Web/JavaScript/Reference/Template_literals).\n\n📄**components/ProductDisplay.js**\n\n```javascript\napp.component('product-display', {
\n template: \n \n `<div class=\"product-display\">\n <div class=\"product-container\">\n <div class=\"product-image\">\n <img v-bind:src=\"image\">\n </div>\n <div class=\"product-info\">\n <h1>{
{
title
}
}
</h1>\n \n <p v-if=\"inStock\">In Stock</p>\n <p v-else>Out of Stock</p>\n \n <div \n v-for=\"(variant, index) in variants\" \n :key=\"variant.id\" \n @mouseover=\"updateVariant(index)\" \n class=\"color-circle\" \n :style=\"{
backgroundColor: variant.color
}
\">\n </div>\n \n <button \n class=\"button\" \n :class=\"{
disabledButton: !inStock
}
\" \n :disabled=\"!inStock\" \n v-on:click=\"addToCart\">\n Add to Cart\n </button>\n </div>\n </div>\n </div>`\n
}
)\n```\n\nNote that we haven't changed any of this code, we're simply moving it into the `product-display` component so that it's encapsulated there. If you're wondering what the `` is doing there, that activates the VS Code extension [es6-string-html](https://marketplace.visualstudio.com/items?itemName=Tobermory.es6-string-html), which gives us syntax highlighting even though we're in this template literal.\n\n---\n\n### Data & Methods\n\nNow that we've given this component its template, or its structure, we need to give it its data and methods, which still live in **main.js**. So we'll paste them in now:\n\n📄**components/ProductDisplay.js**\n\n```javascript\napp.component('product-display', {
\n template: \n \n `<div class=\"product-display\">\n ...\n </div>`,\n data() {
\n return {
\n product: 'Socks',\n brand: 'Vue Mastery',\n selectedVariant: 0,\n details: ['50% cotton', '30% wool', '20% polyester'],\n variants: [\n {
id: 2234, color: 'green', image: './assets/images/socks_green.jpg', quantity: 50
}
,\n {
id: 2235, color: 'blue', image: './assets/images/socks_blue.jpg', quantity: 0
}
,\n ]\n
}
\n
}
,\n methods: {
\n addToCart() {
\n this.cart += 1\n
}
,\n updateVariant(index) {
\n this.selectedVariant = index\n
}
\n
}
,\n computed: {
\n title() {
\n return this.brand + ' ' + this.product\n
}
,\n image() {
\n return this.variants[this.selectedVariant].image\n
}
,\n inStock() {
\n return this.variants[this.selectedVariant].quantity\n
}
\n
}
\n
}
)\n```\n\nWe'll make sure to delete `cart` from the `data` here because we don't need each product to have its own cart.\n\n---\n\n### Cleaning up main.js\n\nNow that we've encapsulated all of this product-specific code within our `product-display` component, we can clean up our **main.js** file.\n\n📄**main.js**\n\n```javascript\nconst app = Vue.createApp({
\n data() {
\n return {
\n cart: 0,\n
}
\n
}
,\n methods: {
}
\n
}
)\n```\n\nWe've left the `cart` and the `methods` option because it'll have a new method later on.\n\n---\n\n### Importing the Component\n\nIn order to make use of `product-display`, we need to import it into we'll **index.html**.\n\n📄**index.html**\n\n```html\n\n<script src=\"./components/ProductDisplay.js\"></script>\n```\n\nNow that it's imported, we can use it within our template. \n\n📄**index.html**\n\n```html\n<div id=\"app\">\n <div class=\"nav-bar\"></div>\n\n <div class=\"cart\">Cart({
{
cart
}
}
)</div>\n <product-display></product-display>\n</div>\n```\n\nIf we check this out in a browser, we'll see everything is still showing up just like it was before, but now since we've rearranged things, the Add to Cart button is no longer incrementing the cart. We'll fix that in the next lesson.\n\nFor now, to show you how helpful these reusable blocks of code can be, I'm going to add two more `product-display` components. \n\n📄**index.html**\n\n```html\n<div id=\"app\">\n <div class=\"nav-bar\"></div>\n\n <div class=\"cart\">Cart({
{
cart
}
}
)</div>\n <product-display></product-display>\n <product-display></product-display>\n <product-display></product-display>\n</div>\n```\n\nWhen we refresh the browser, we'll see them all showing up. Each of them are independently functional. \n\n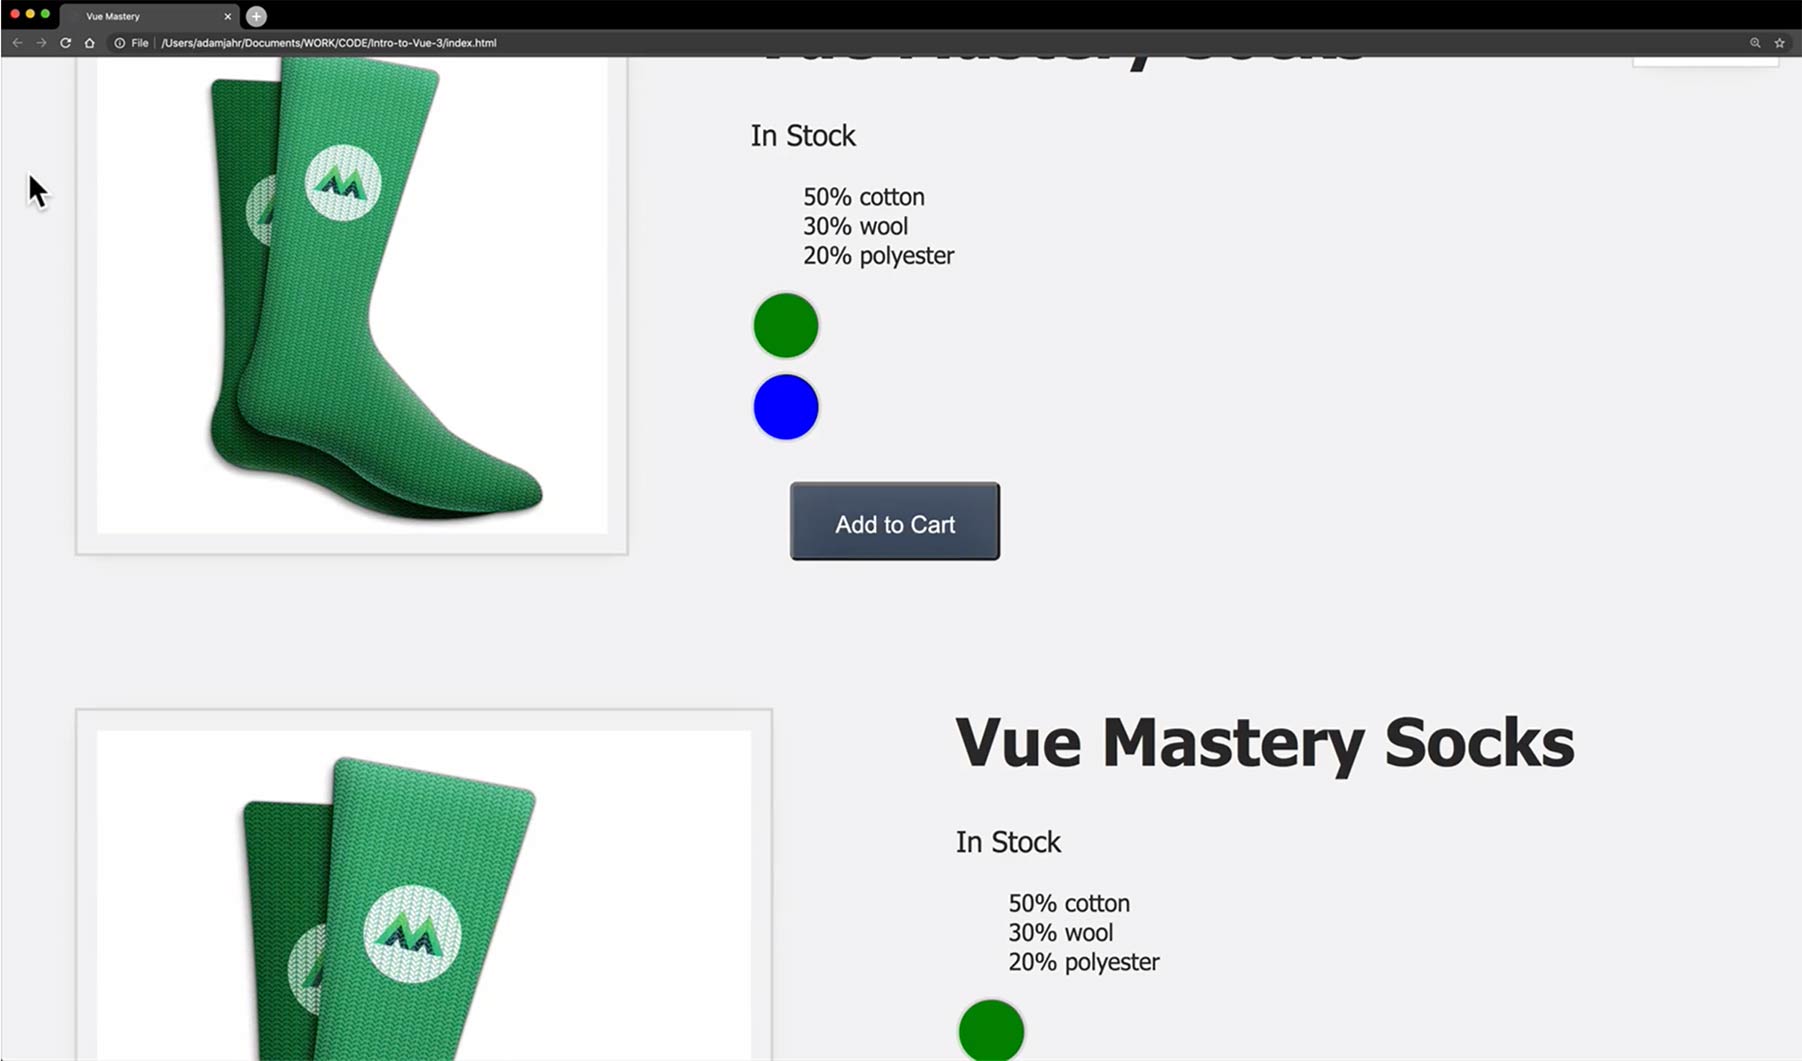\n\n---\n\n## Props\n\nNow that we're starting to learn how to encapsulate reusable code into these components, what happens when our component needs something that is outside of itself? For example, what if the parent, so-to-speak, had some `message` data, and the child needed it? Because a component has its own isolated scope, it can't reach up outside of itself to grab something that's outside of its scope. \n\n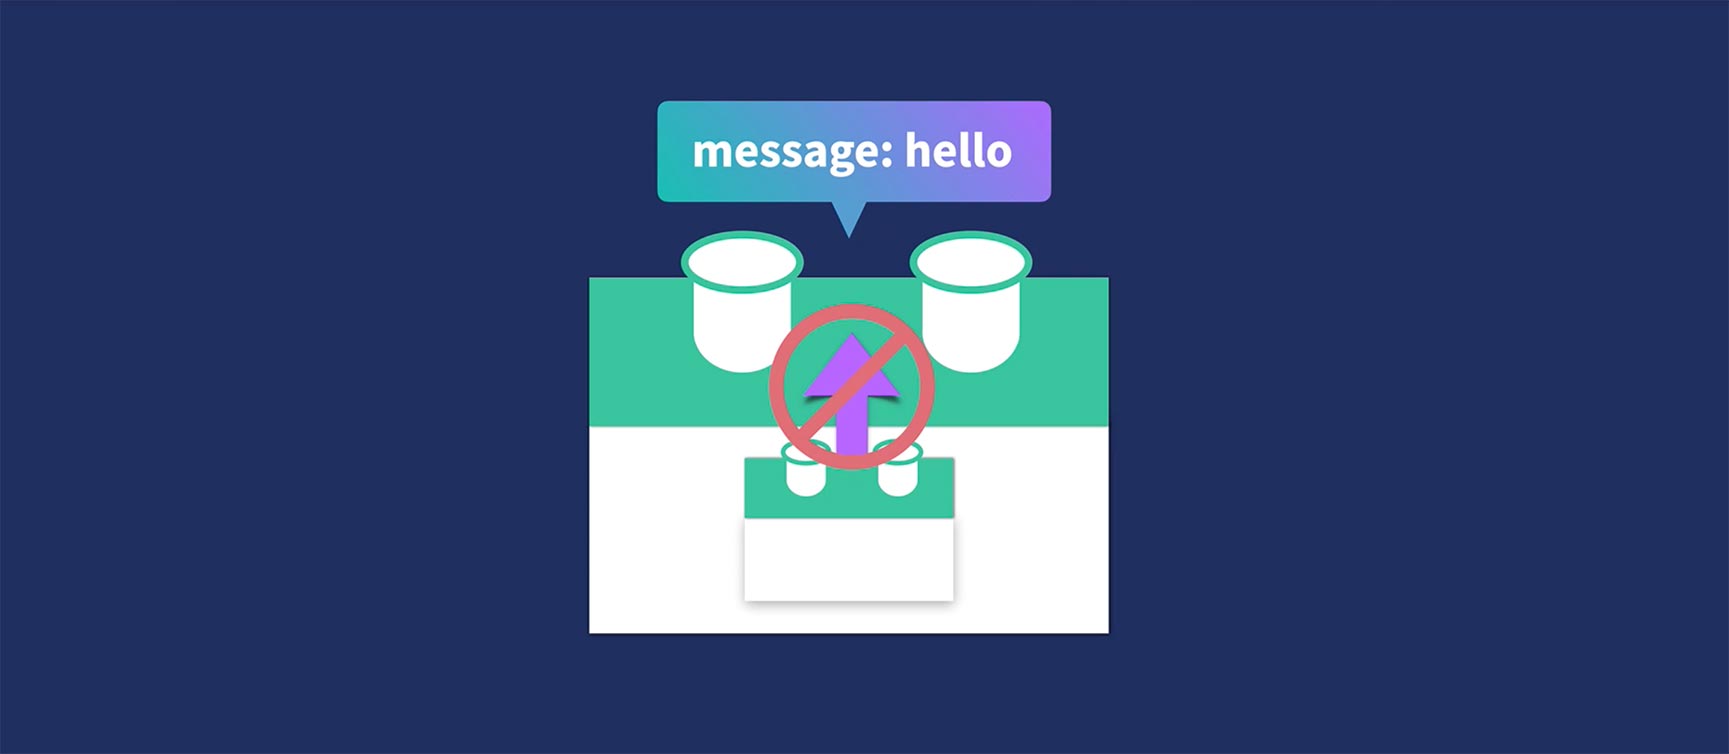\n\nThe answer here is **props**. These are custom attributes for passing data into a component. They function kind of like a funnel, into which you can pass the data the component needs. \n\n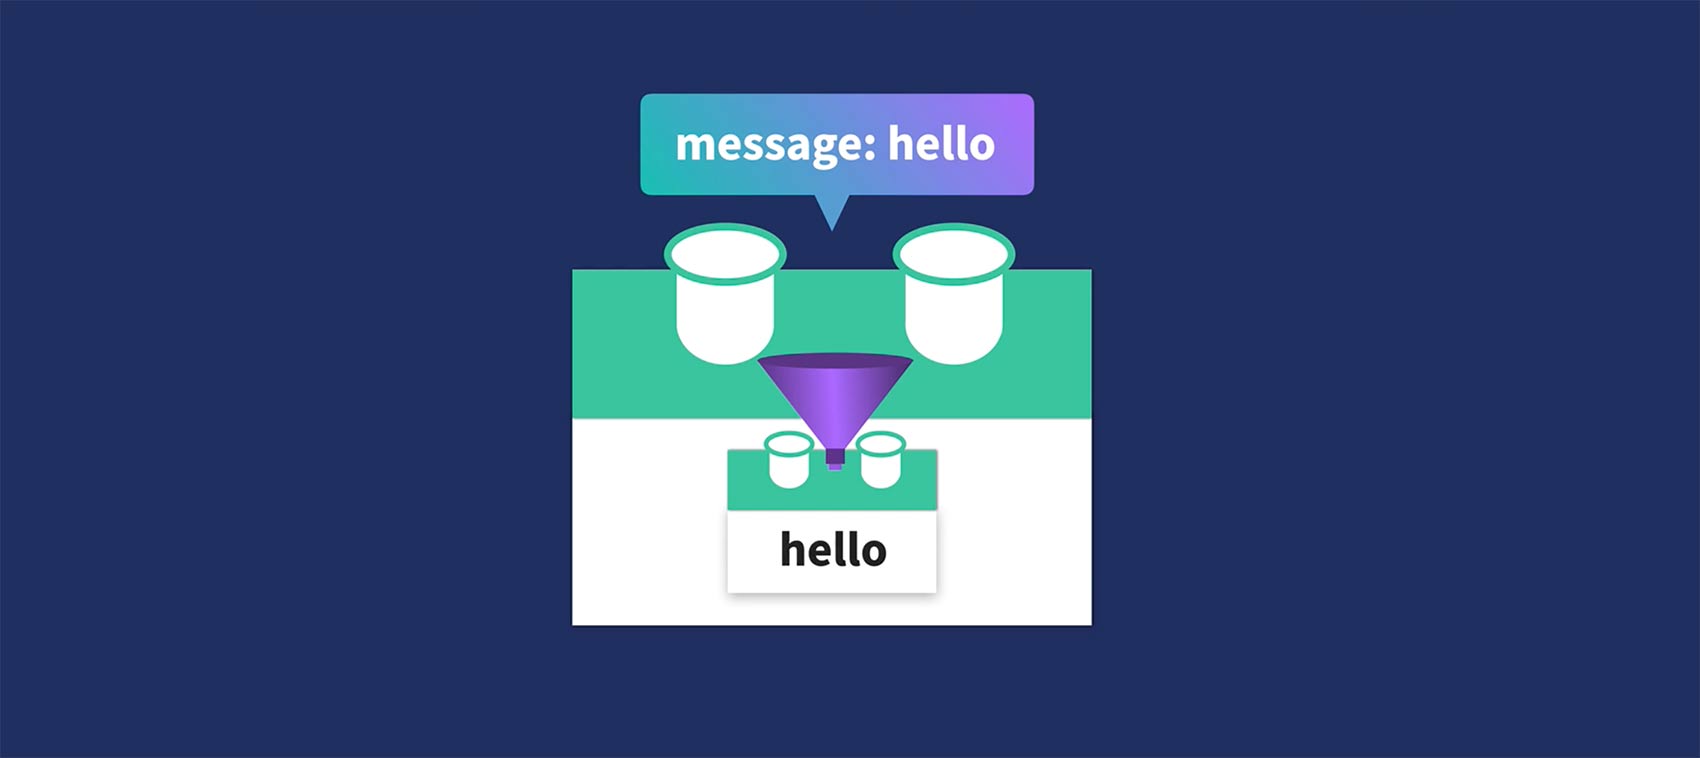\n\nLet's add the ability for our `product-display` component to take in a prop. \n\n---\n\n## Giving our component a prop\n\nLet's give our root Vue app, located in **main.js**, a new data property, which indicates whether the user was a `premium` user or not.\n\n📄**main.js**\n\n```javascript\nconst app = Vue.createApp({
\n data() {
\n return {
\n cart: 0,\n premium: true\n
}
\n
}
\n
}
)\n```\n\nIf a user is `premium`, their shipping will be free. So our `product-display` component needs access to this data. In other words, it needs a custom attribute (a funnel) that we can feed this data into. Let's add that now, which we'll do by giving the component a `props` option, and adding a `premium` prop to it.\n\n📄**components/ProductDisplay.js**\n\n```javascript\napp.component('product-display', {
\n props: {
\n premium: {
\n type: Boolean,\n required: true\n
}
\n
}
,\n ...\n
}
\n```\n\nNotice how Vue's props feature has built-in validation, so we can specify things like the prop's `type` and whether it's `required`, etc.\n\nNow that we've configured this, we can add that custom attribute onto the `product-display` component where we're using it. \n\n📄**index.html**\n\n```html\n<div id=\"app\">\n <div class=\"nav-bar\"></div>\n\n <div class=\"cart\">Cart({
{
cart
}
}
)</div>\n <product-display :premium=\"premium\"></product-display>\n</div>\n```\n\n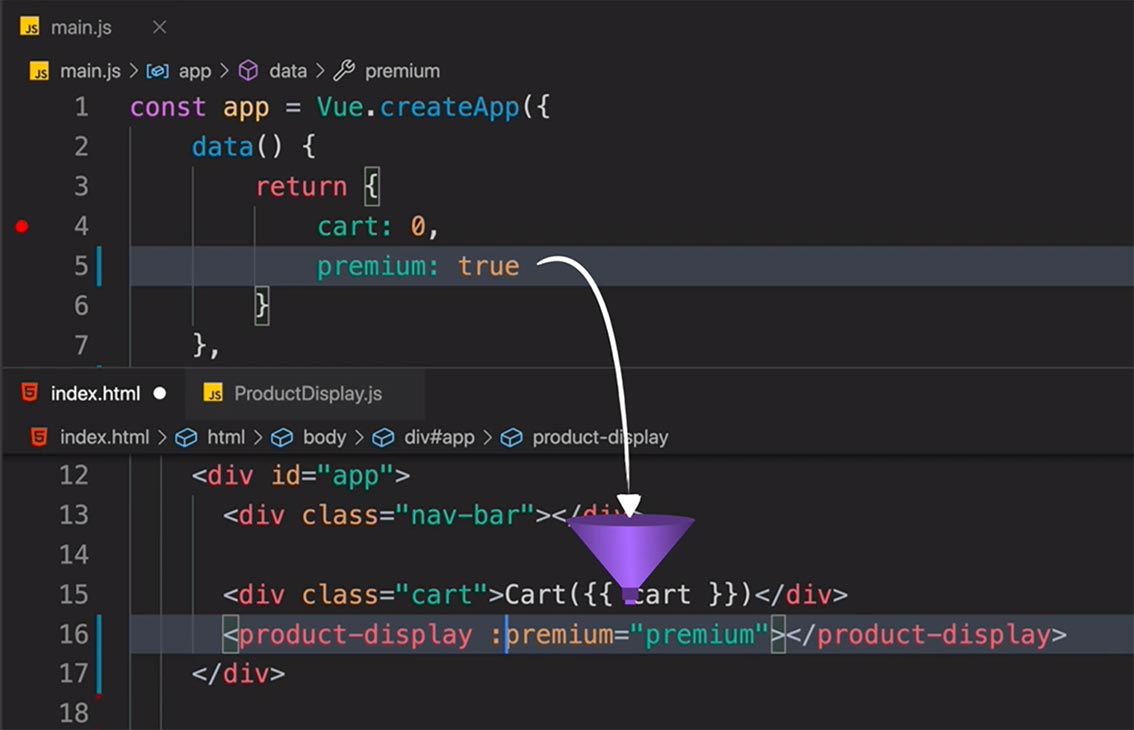\n\nNotice how we're using the shorthand for `v-bind` so we can reactively receive the new value of `premium` if it updates (from `true` to `false`). \n\n---\n\n## Using the Prop\n\nNow that our `product-display` component has the `premium` prop, we can make use of it within the component. Remember, we want to use the fact a user is `premium` or not to determine what they need to pay for shipping.\n\nIn the component's template, we'll add:\n\n📄**components/ProductDisplay.js**\n\n```html\ntemplate: \n \n `<div class=\"product-display\">\n ...\n <p>Shipping: {
{
shipping
}
}
</p>\n ...\n </div>`,\n```\n\nHere, `shipping` is the name of a new computed property on the `product-display` component, which looks like this:\n\n📄**components/ProductDisplay.js**\n\n```javascript\ncomputed: {
\n ...\n shipping() {
\n if (this.premium) {
\n return 'Free'\n
}
\n return 2.99\n
}
\n
}
\n```\n\nThe computed property checks whether the `premium` prop is `true`, and if so, returns `'Free'`. Otherwise, it returns `2.99` \n\n---\n\n## Coding Challenge\n\nWe've reached the end of the lesson and we're onto our challenge:\n\n**Create a new component called `'product-details'`, which receives the `details` through a prop called `details`.** \n\nAs a reminder, if you're coding along with our repo, you can check out `L9-end` <a href=\"https://github.com/Code-Pop/Intro-to-Vue-3/tree/L9-end\" target=\"_blank\">branch</a>.",duration:"00:06:35",author:I,date:K,status:J,free:G,lock:F,twitterImage:[{
__meta__:{
createdBy:c,createdDate:au
}
,contentType:E,file:av,folderId:aw,id:ax,sizes:[{
height:a,path:d,quality:b,width:e
}
,{
height:a,path:f,quality:b,width:g
}
,{
height:a,path:h,quality:b,width:i
}
,{
height:a,path:j,quality:b,width:k
}
,{
height:a,path:l,quality:b,width:m
}
,{
height:a,path:n,quality:b,width:o
}
,{
height:a,path:p,quality:b,width:q
}
,{
height:a,path:r,quality:b,width:s
}
,{
height:a,path:t,quality:b,width:u
}
,{
height:a,path:v,quality:b,width:w
}
,{
height:a,path:x,quality:b,width:y
}
,{
height:a,path:z,quality:b,width:A
}
,{
height:a,path:B,quality:b,width:C
}
],type:D,url:ay
}
],facebookImage:[{
__meta__:{
createdBy:c,createdDate:au
}
,contentType:E,file:av,folderId:aw,id:ax,sizes:[{
height:a,path:d,quality:b,width:e
}
,{
height:a,path:f,quality:b,width:g
}
,{
height:a,path:h,quality:b,width:i
}
,{
height:a,path:j,quality:b,width:k
}
,{
height:a,path:l,quality:b,width:m
}
,{
height:a,path:n,quality:b,width:o
}
,{
height:a,path:p,quality:b,width:q
}
,{
height:a,path:r,quality:b,width:s
}
,{
height:a,path:t,quality:b,width:u
}
,{
height:a,path:v,quality:b,width:w
}
,{
height:a,path:x,quality:b,width:y
}
,{
height:a,path:z,quality:b,width:A
}
,{
height:a,path:B,quality:b,width:C
}
],type:D,url:ay
}
],socialSharingDescription:"I'm learning about components and props in a free course on @vuemastery",belongsToCourse:H
}
,{
title:"Communicating Events",slug:"communicating-events-vue3",image:[{
__meta__:{
createdBy:c,createdDate:az
}
,contentType:E,file:aA,folderId:aB,id:aC,sizes:[{
height:a,path:d,quality:b,width:e
}
,{
height:a,path:f,quality:b,width:g
}
,{
height:a,path:h,quality:b,width:i
}
,{
height:a,path:j,quality:b,width:k
}
,{
height:a,path:l,quality:b,width:m
}
,{
height:a,path:n,quality:b,width:o
}
,{
height:a,path:p,quality:b,width:q
}
,{
height:a,path:r,quality:b,width:s
}
,{
height:a,path:t,quality:b,width:u
}
,{
height:a,path:v,quality:b,width:w
}
,{
height:a,path:x,quality:b,width:y
}
,{
height:a,path:z,quality:b,width:A
}
,{
height:a,path:B,quality:b,width:C
}
],type:D,url:aD
}
],description:"Learn about communicating events",markdown:"In this lesson, we're going to look at the concept of communicating events that happen within our components. If you're coding along with the repo, you can checkout the `L10-start` <a href=\"https://github.com/Code-Pop/Intro-to-Vue-3/tree/L10-start\" target=\"_blank\">branch</a>.\n\n---\n\n## Our Goal\n\nGive our component the ability to let its parent know an event happened within it.\n\n---\n\n## Emitting the event\n\nWhen we refactored things in our last lesson, moving product-related code into the new `product-display` component, we broke the ability to click the Add to Cart button and increment the value of `cart`. This is because the `cart` lives outside of the `product-display` component, inside the root Vue app in **main.js**. \n\nWe need to give the `product-display` component a way to *announce* that its button is clicked. How do we get this to happen? \n\nWe already know that props are a way to pass data down into a component, but what about when something happens within that component, like a button click? How do we let other parts of our app know that that event happened? \n\n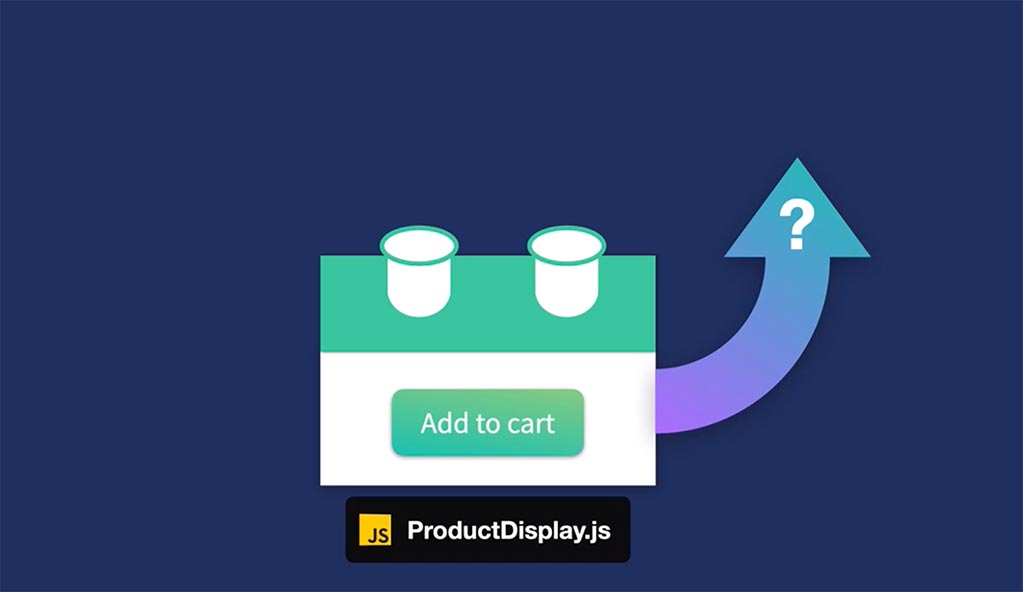\n\nThe answer is to emit that event, telling the parent that it happened. Let's add this ability within our `product-display` component, by amending the `addToCart()` method.\n\n📄**components/ProductDisplay.js**\n\n```javascript\nmethods: {
\n addToCart() {
\n this.$emit('add-to-cart')\n
}
\n ...\n
}
\n```\n\nWe'll write `this.$emit()` and emit an event called `'add-to-cart'`. So when the button is clicked, we're emitting, or bubbling up, that event. We can listen for that event from within the parent scope, where we're using `product-display`, by adding a listener: `@add-to-cart`\n\n📄**index.html**\n\n```html\n<product-display :premium=\"premium\" @add-to-cart=\"updateCart\"></product-display>\n```\n\nWhen that event is \"heard\" by the parent, it will trigger a new method by the name of `updateCart`, which we'll add within **main.js**.\n\n\n\n📄**main.js**\n\n```javascript\nconst app = Vue.createApp({
\n data() {
\n return {
\n cart: [],\n ...\n
}
\n
}
,\n methods: {
\n updateCart() {
\n this.cart += 1\n
}
\n
}
\n
}
)\n```\n\nIf we check this out in the browser, we should now be able to click the Add To Cart button, which lets the parent know the `add-to-cart` event happened, triggering the `updateCart()` method. \n\n---\n\n## Adding product id to the cart\n\nTo make our app more realistic, our `cart` shouldn't just be a number. It should be an array that contains the ids of the products that are added into it. So let's do a bit of refactoring.\n\n📄**main.js**\n\n```javascript\nconst app = Vue.createApp({
\n data() {
\n return {
\n cart: [],\n ...\n
}
\n
}
,\n methods: {
\n updateCart(id) {
\n this.cart.push(id)\n
}
\n
}
\n
}
)\n```\n\nNow, `cart` is an array and `updateCart(id)` pushes the product `id` into it. We just need to add a payload to our `add-to-cart` event emission, so `updateCart` has access to that `id`.\n\n📄**components/ProductDisplay.js**\n\n```javascript\nmethods: {
\n addToCart() {
\n this.$emit('add-to-cart', this.variants[this.selectedVariant].id)\n
}
\n ...\n
}
\n```\n\nHere, we've added a second parameter and grabbed the product's `id` much like we grabbed the `image` and `quantity` before:\n\n📄**components/ProductDisplay.js**\n\n```javascript\ncomputed: {
\n image() {
\n return this.variants[this.selectedVariant].image\n
}
,\n inStock() {
\n return this.variants[this.selectedVariant].quantity\n
}
\n
}
\n```\n\n---\n\nNow in the browser, you can see that we're adding the product ids into the cart, which is now an array.\n\n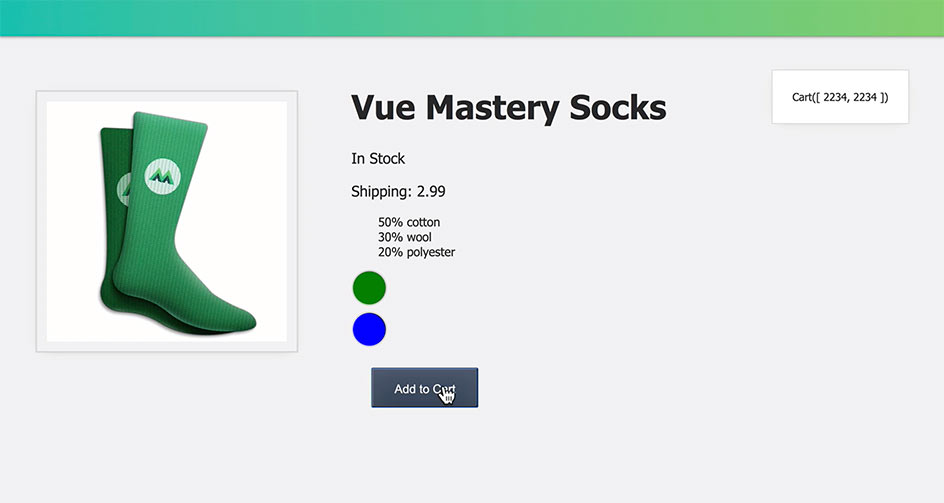\n\nBut we don't need to actually display these ids. We just want to display how many items are in the cart. Fortunately, that's a quick fix.\n\n📄**index.html**\n\n```html\n<div id=\"app\">\n ...\n <div class=\"cart\">Cart({
{
cart.length
}
}
)</div>\n ...\n </div>\n```\n\nBy adding `cart.length` we'll now only display the *amount* of items in the `cart`.\n\n---\n\n## Coding Challenge\n\nWe've reached the end of the lesson and we're onto our challenge:\n\n **Add a new button to `product-display`, which removes the product from the `cart`.**\n\nAs a reminder, if you're coding along with our repo, you can check out `L10-end` <a href=\"https://github.com/Code-Pop/Intro-to-Vue-3/tree/L10-end\" target=\"_blank\">branch</a>.",duration:"00:03:53",author:I,date:K,status:J,free:G,lock:F,twitterImage:[{
__meta__:{
createdBy:c,createdDate:az
}
,contentType:E,file:aA,folderId:aB,id:aC,sizes:[{
height:a,path:d,quality:b,width:e
}
,{
height:a,path:f,quality:b,width:g
}
,{
height:a,path:h,quality:b,width:i
}
,{
height:a,path:j,quality:b,width:k
}
,{
height:a,path:l,quality:b,width:m
}
,{
height:a,path:n,quality:b,width:o
}
,{
height:a,path:p,quality:b,width:q
}
,{
height:a,path:r,quality:b,width:s
}
,{
height:a,path:t,quality:b,width:u
}
,{
height:a,path:v,quality:b,width:w
}
,{
height:a,path:x,quality:b,width:y
}
,{
height:a,path:z,quality:b,width:A
}
,{
height:a,path:B,quality:b,width:C
}
],type:D,url:aD
}
],facebookImage:[{
__meta__:{
createdBy:c,createdDate:az
}
,contentType:E,file:aA,folderId:aB,id:aC,sizes:[{
height:a,path:d,quality:b,width:e
}
,{
height:a,path:f,quality:b,width:g
}
,{
height:a,path:h,quality:b,width:i
}
,{
height:a,path:j,quality:b,width:k
}
,{
height:a,path:l,quality:b,width:m
}
,{
height:a,path:n,quality:b,width:o
}
,{
height:a,path:p,quality:b,width:q
}
,{
height:a,path:r,quality:b,width:s
}
,{
height:a,path:t,quality:b,width:u
}
,{
height:a,path:v,quality:b,width:w
}
,{
height:a,path:x,quality:b,width:y
}
,{
height:a,path:z,quality:b,width:A
}
,{
height:a,path:B,quality:b,width:C
}
],type:D,url:aD
}
],socialSharingDescription:"I'm learning about communicating events in a free course on @vuemastery",belongsToCourse:H
}
,{
title:"Forms & v-model",slug:"forms-and-v-model-vue3",image:[{
__meta__:{
createdBy:c,createdDate:aE
}
,contentType:E,file:aF,folderId:aG,id:aH,sizes:[{
height:a,path:d,quality:b,width:e
}
,{
height:a,path:f,quality:b,width:g
}
,{
height:a,path:h,quality:b,width:i
}
,{
height:a,path:j,quality:b,width:k
}
,{
height:a,path:l,quality:b,width:m
}
,{
height:a,path:n,quality:b,width:o
}
,{
height:a,path:p,quality:b,width:q
}
,{
height:a,path:r,quality:b,width:s
}
,{
height:a,path:t,quality:b,width:u
}
,{
height:a,path:v,quality:b,width:w
}
,{
height:a,path:x,quality:b,width:y
}
,{
height:a,path:z,quality:b,width:A
}
,{
height:a,path:B,quality:b,width:C
}
],type:D,url:aI
}
],description:"Learn about forms and v-model",markdown:"In this lesson, we're going to look at the concept of attribute binding. If you're coding along with the repo, you can checkout the `L11-start` <a href=\"https://github.com/Code-Pop/Intro-to-Vue-3/tree/L11-start\" target=\"_blank\">branch</a>.\n\n---\n\n## Our Goal\n\nCreate a form for users to add product reviews.\n\n---\n\n## Introducing v-model\n\nAt the beginning of this course, we learned about `v-bind`, which creates a one-way binding, from the data to the template. When working with forms, however, this one way binding isn't enough. We also need to be binding from the template to the data. \n\nFor example, when a user inputs their name into an input field, we want to record and store that value in our data. The `v-model` directive helps us achieve this, creating two-way data binding. \n\n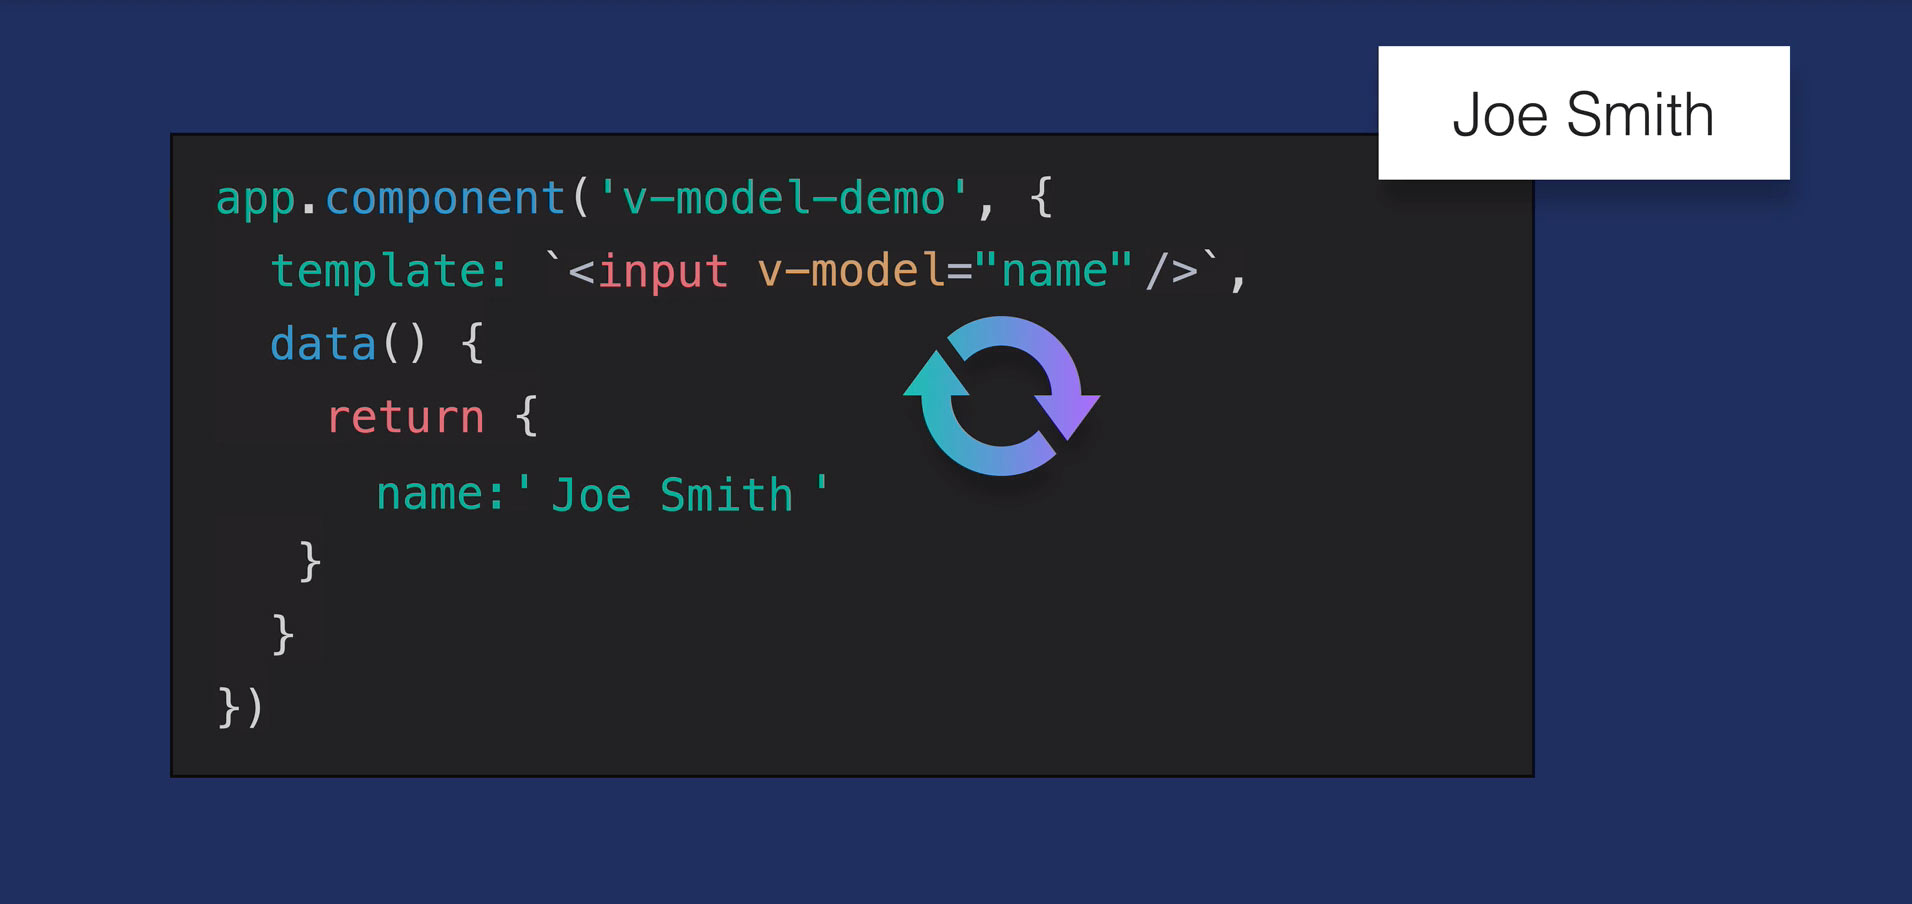\n\nTo see this all in action, we're going to create a new `review-form` component. \n\n---\n\n## The review-form component\n\nWe'll add a new **ReviewForm.js** file into our components folder, and scaffold out the component. \n\n📄**components/ReviewForm.js**\n\n```javascript\napp.component('review-form', {
\n template:\n \n `<form class=\"review-form\">\n <h3>Leave a review</h3>\n <label for=\"name\">Name:</label>\n <input id=\"name\">\n\n <label for=\"review\">Review:</label> \n <textarea id=\"review\"></textarea>\n\n <label for=\"rating\">Rating:</label>\n <select id=\"rating\">\n <option>5</option>\n <option>4</option>\n <option>3</option>\n <option>2</option>\n <option>1</option>\n </select>\n\n <input class=\"button\" type=\"submit\" value=\"Submit\">\n </form>`,\n data() {
\n return {
\n name: '',\n review: '',\n rating: null\n
}
\n
}
\n
}
)\n```\n\nInside of our template, notice these elements:\n\n- `<input id=\"name\">`\n- `<textarea id=\"review\">`\n- `<select id=\"rating\">`\n\nWe want to bind these input fields to their respective data properties so that when the user fills out the form, we store their data locally.\n\n```javascript\n data() {
\n return {
\n name: '',\n review: '',\n rating: null\n
}
\n
}
\n```\n\nWe'll achieve this by adding the `v-model` directive to each of those input elements.\n\n📄**components/ReviewForm.js**\n\n```javascript\napp.component('review-form', {
\n template:\n \n `<form class=\"review-form\">\n <h3>Leave a review</h3>\n <label for=\"name\">Name:</label>\n <input id=\"name\" v-model=\"name\">\n\n <label for=\"review\">Review:</label> \n <textarea id=\"review\" v-model=\"review\"></textarea>\n\n <label for=\"rating\">Rating:</label>\n <select id=\"rating\" v-model.number=\"rating\">\n <option>5</option>\n <option>4</option>\n <option>3</option>\n <option>2</option>\n <option>1</option>\n </select>\n\n <input class=\"button\" type=\"submit\" value=\"Submit\"> \n </form>`,\n data() {
\n return {
\n name: '',\n review: '',\n rating: null\n
}
\n
}
)\n```\n\nNotice how on the `<select>` element, we used `v-model.number`, this is a modifier that typecasts the value as a number. \n\n---\n\n### Submitting the Review Form\n\nIn order to submit this form, we'll add a listener at the top:\n\n📄**components/ReviewForm.js**\n\n```javascript\napp.component('review-form', {
\n template:\n \n `<form class=\"review-form\" @submit.prevent=\"onSubmit\">\n ...\n <input class=\"button\" type=\"submit\" value=\"Submit\"> \n </form>`\n ...\n
}
)\n```\n\nWe're using another modifier, `@submit.prevent=\"onSubmit\"` to prevent the default behavior (a browser refresh). When this form is submitted, it will trigger the `onSubmit()` method, which we'll write now:\n\n📄**components/ReviewForm.js**\n\n```javascript\n...\ndata() {
\n return {
\n name: '',\n review: '',\n rating: null\n
}
\n
}
,\n methods: {
\n onSubmit() {
\n let productReview = {
\n name: this.name,\n review: this.review,\n rating: this.rating,\n
}
\n this.$emit('review-submitted', productReview)\n\n this.name = ''\n this.review = ''\n this.rating = null\n
}
\n
}
\n...\n```\n\nThat method will create a `productReview` object, containing the `name` , `review` and `rating` from our `data`. It will then `$emit` a `review-submitted` event, sending that `productReview` along as the payload.\n\nFinally, we're clearing out the data fields.\n\n---\n\n### Using the Review Form\n\nNow that our review form is created, we can import it within **index.html**. \n\n📄**index.html**\n\n```html\n\n...\n<script src=\"./components/ReviewForm.js\"></script>\n...\n```\n\nThen we'll head into `product-display`, and actually use the component within its template, below the \"product-container\".\n\n📄**components/ProductDisplay.js**\n\n```html\ntemplate: \n \n `<div class=\"product-display\">\n <div class=\"product-container\">\n ...\n </div>\n <review-form></review-form>\n </div>`\n
}
)\n```\n\nNow in the browser, we can see the review form. \n\n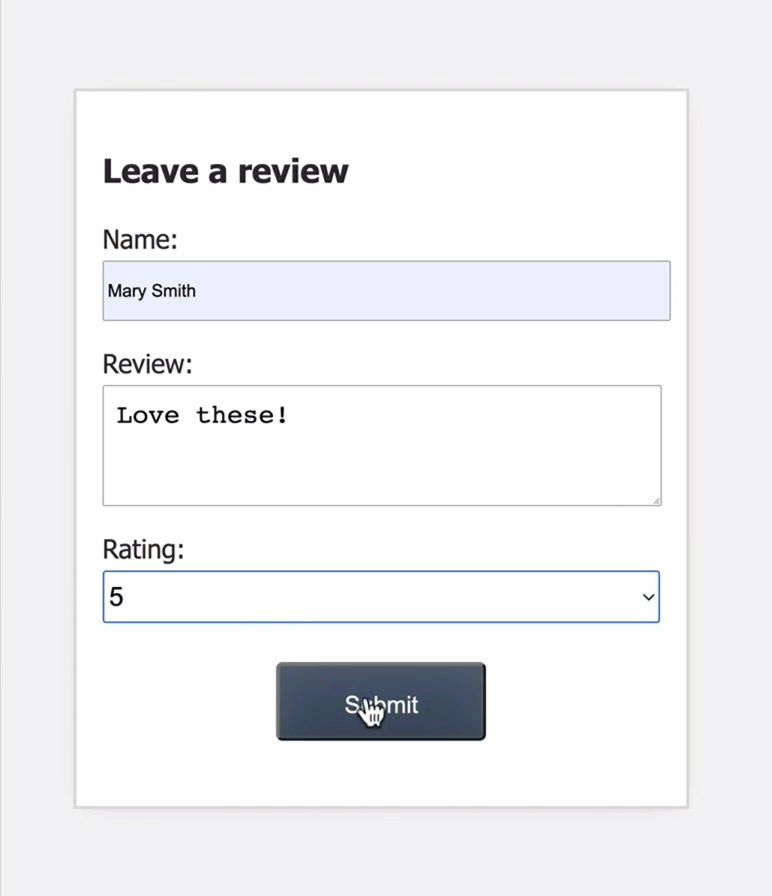\n\nIt looks like it's working... except when we click the submit button, we're emitting the event, but we haven't listened for it anywhere. Like we learned in the previous lesson, we need to listen for the `review-submitted` event in the parent scope (in `product-display`). \n\nWhen the event is \"heard\", we'll add the `productReview` payload to the `product-display` component's data. \n\n---\n\n### Adding product reviews\n\nWe'll add the event listener here on the `review-form`, where it's being used:\n\n📄**components/ProductDisplay.js**\n\n```html\ntemplate: \n \n `<div class=\"product-display\">\n <div class=\"product-container\">\n ...\n </div>\n <review-form @review-submitted=\"addReview\"></review-form>\n </div>`\n
}
)\n```\n\nWhen the event happens, we'll trigger a new `addReview()` method. This will add product reviews to our `product-display` component, which means that component needs a new `reviews` array in its data.\n\n📄**components/ProductDisplay.js**\n\n```javascript\n...\ndata() {
\n return {
\n ...\n reviews: []\n
}
\n
}
\n...\n```\n\nNow let's flesh out the `addReview()` method:\n\n📄**components/ProductDisplay.js**\n\n```javascript\n...\ndata() {
\n return {
\n ...\n reviews: []\n
}
\n
}
,\nmethods: {
\n ...\n addReview(review) {
\n this.reviews.push(review)\n
}
\n
}
,\n...\n```\n\nAs you can see, it which takes in the `review` that we got from the `review-submitted` event payload, and pushes it into the `reviews` array. \n\n---\n\n## Displaying the reviews\n\nNow that we've implemented the ability to add reviews, we need to be displaying those reviews. Let's create a new component to do that. That component will be called `review-list`, which we'll scaffold out like this:\n\n📄**components/ReviewList.js**\n\n```javascript\napp.component('review-list', {
\n props: {
\n reviews: {
\n type: Array,\n required: true\n
}
\n
}
,\n template:\n \n `\n <div class=\"review-container\">\n <h3>Reviews:</h3>\n <ul>\n <li v-for=\"(review, index) in reviews\" :key=\"index\">\n {
{
review.name
}
}
gave this {
{
review.rating
}
}
stars\n <br/>\n \"{
{
review.review
}
}
\"\n <br/>\n </li>\n </ul>\n </div>\n`\n
}
)\n```\n\nIt will have a prop so that it can receive the `reviews` and print them out in the template using `v-for`, including the `index`, so that we can bind the `:key` attribute to it.\n\nNow we can import this component inside **index.html**:\n\n📄**index.html**\n\n```html\n\n...\n<script src=\"./components/ReviewList.js\"></script>\n...\n```\n\nThen add it within `product-display`, right above the `review-form`:\n\n📄**components/ProductDisplay.js**\n\n```javascript\ntemplate: \n \n `<div class=\"product-display\">\n <div class=\"product-container\">\n ...\n </div>\n <review-list :reviews=\"reviews\"></review-list>\n <review-form @review submitted=\"addReview\"></review-form>\n </div>`\n
}
)\n```\n\nNotice how we've added `:reviews=\"reviews\"` so we can pass the `reviews` that live on `product-display` into the `review-list`.\n\nChecking this out in the browser, we'll add a new review, click submit, and see the review is being displayed.\n\n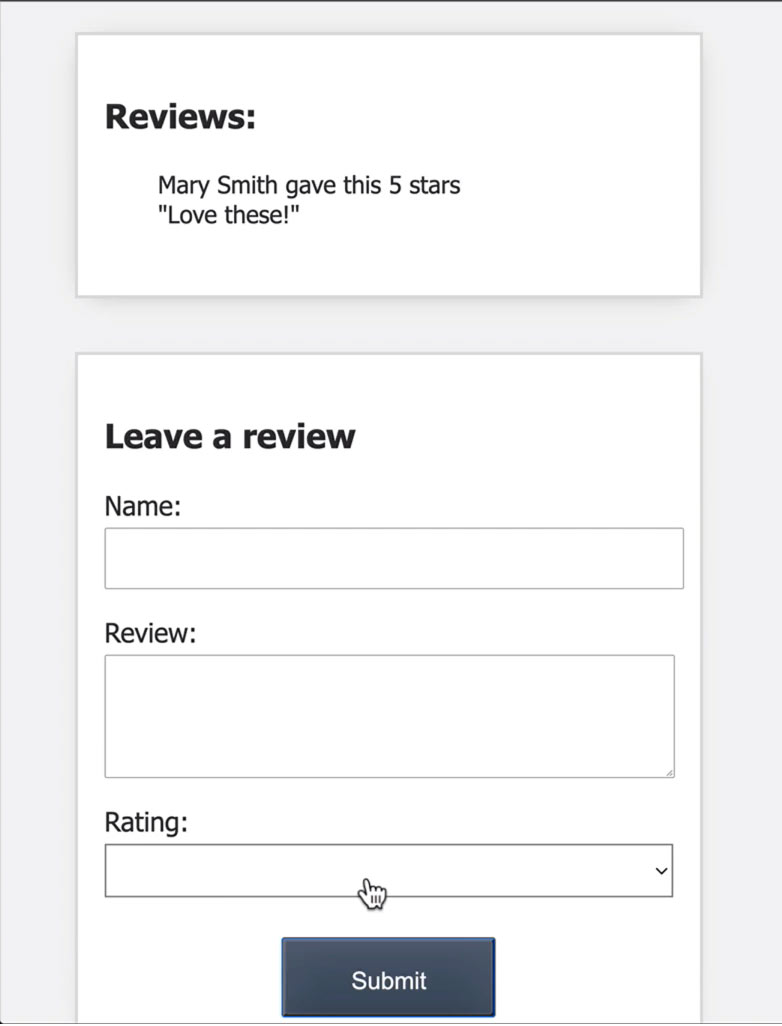\n\nSo far so good, but when we refresh (and there are no reviews) we still see an empty box because the `review-list` component is still being rendered with no reviews to print out. Let's fix that, and only render that component when we have `reviews` to display. \n\n📄**components/ProductDisplay.js**\n\n```javascript\ntemplate: \n \n `<div class=\"product-display\">\n ...\n <review-list v-if=\"reviews.length\" :reviews=\"reviews\"></review-list>\n ...\n </div>`\n
}
)\n```\n\nIn other words, if the `reviews` array is empty, we will not show the `review-list` component. \n\nWith a refresh, it looks like it's working, and the component only shows up after we've added a review. \n\n---\n\n## Basic Form Validation\n\nTo finish out this lesson, we're going to add some very basic validation to our `review-form`.\n\n📄**components/ReviewForm.js**\n\n```javascript\nmethods: {
\n onSubmit() {
\n if (this.name === '' || this.review === '' || this.rating === null) {
\n alert('Review is incomplete. Please fill out every field.')\n return\n
}
\n ...\n
}
\n
}
\n```\n\nBefore we create a `productReview`, we'll check if `this.name` or `this.review` or `this.rating` are empty. If any of these things are the case, we will show an `alert`, which says: 'Review is incomplete. Please fill out every field.' And then `return` out of the method. \n\nThis is an overly simplified method of form validation. If you're interested in learning more production-level form validation practices, check out our lessons on Vuelidate in our <a href=\"https://www.vuemastery.com/courses/next-level-vue/form-validation-with-vuelidate\" target=\"_blank\">Next-Level Vue</a> course.\n\n---\n\n## Congratulations!\n\nYou've made it to the end of the Intro to Vue 3 course and completed your first step on your path to Vue Mastery. To continue learning, I invite you to check out our <a href=\"https://www.vuemastery.com/courses\" target=\"_blank\">library of Vue.js courses</a>, which cover all the topics you'll need to succeed as a Vue developer. \n\n---\n\n## Coding Challenge\n\nFor your final coding challenge:\n\n**Add a question to the `review-form`: 'Would you recommend this product? '**\n\n**Record and emit the response, and display it within `review-list`**\n\nAs a reminder, if you're coding along with our repo, you can check out `L11-end` <a href=\"https://github.com/Code-Pop/Intro-to-Vue-3/tree/L11-end\" target=\"_blank\">branch</a>.",duration:"00:08:22",author:I,date:K,status:J,free:G,lock:F,twitterImage:[{
__meta__:{
createdBy:c,createdDate:aE
}
,contentType:E,file:aF,folderId:aG,id:aH,sizes:[{
height:a,path:d,quality:b,width:e
}
,{
height:a,path:f,quality:b,width:g
}
,{
height:a,path:h,quality:b,width:i
}
,{
height:a,path:j,quality:b,width:k
}
,{
height:a,path:l,quality:b,width:m
}
,{
height:a,path:n,quality:b,width:o
}
,{
height:a,path:p,quality:b,width:q
}
,{
height:a,path:r,quality:b,width:s
}
,{
height:a,path:t,quality:b,width:u
}
,{
height:a,path:v,quality:b,width:w
}
,{
height:a,path:x,quality:b,width:y
}
,{
height:a,path:z,quality:b,width:A
}
,{
height:a,path:B,quality:b,width:C
}
],type:D,url:aI
}
],facebookImage:[{
__meta__:{
createdBy:c,createdDate:aE
}
,contentType:E,file:aF,folderId:aG,id:aH,sizes:[{
height:a,path:d,quality:b,width:e
}
,{
height:a,path:f,quality:b,width:g
}
,{
height:a,path:h,quality:b,width:i
}
,{
height:a,path:j,quality:b,width:k
}
,{
height:a,path:l,quality:b,width:m
}
,{
height:a,path:n,quality:b,width:o
}
,{
height:a,path:p,quality:b,width:q
}
,{
height:a,path:r,quality:b,width:s
}
,{
height:a,path:t,quality:b,width:u
}
,{
height:a,path:v,quality:b,width:w
}
,{
height:a,path:x,quality:b,width:y
}
,{
height:a,path:z,quality:b,width:A
}
,{
height:a,path:B,quality:b,width:C
}
],type:D,url:aI
}
],socialSharingDescription:"I'm learning about forms and v-model in a free course on @vuemastery",belongsToCourse:H
}
],title:aJ,image:[{
__meta__:{
createdBy:c,createdDate:"2021-01-13T03:33:43.241Z"
}
,contentType:aO,file:"intro_vue_3.png",folderId:1596475196457,id:1610508808401,sizes:[{
height:a,path:d,quality:b,width:e
}
,{
height:a,path:f,quality:b,width:g
}
,{
height:a,path:h,quality:b,width:i
}
,{
height:a,path:j,quality:b,width:k
}
,{
height:a,path:l,quality:b,width:m
}
,{
height:a,path:n,quality:b,width:o
}
,{
height:a,path:p,quality:b,width:q
}
,{
height:a,path:r,quality:b,width:s
}
,{
height:a,path:t,quality:b,width:u
}
,{
height:a,path:v,quality:b,width:w
}
,{
height:a,path:x,quality:b,width:y
}
,{
height:a,path:z,quality:b,width:A
}
,{
height:a,path:B,quality:b,width:C
}
],type:D,url:"https://storage.googleapis.com/vue-mastery.appspot.com/flamelink/media/intro_vue_3.png?GoogleAccessId=firebase-adminsdk-jyioc%40vue-mastery.iam.gserviceaccount.com&Expires=16725225600&Signature=KXK8a4cXfqaWWUCUiZHSoUXL0fjK0KmHJFU0pusDDWQgZBpxZFViAbIipKYncBqU%2BvChueK8eeXw%2B83ktgwwNDRrTsB5NoZpIPF5MaxcpRNYDutwlf%2BzT6LRNhmYLWTkSajBk4H%2BzUX9e08E%2BdxQuXZv22Fafz4bXCMmCVY4KpBfTs829twBnhZFNXzYtCEyDEjrc5e8qXVX60eqj%2BUcCbKjdNTOanQB5jno0t0Ig9DzSjQ9RXhenhx3S2eQ58VrXEU42IJYLBpe5HaVCxwWuLrUJVZTgVJePrFUEqf08f68roWZ1fQmm8MpNjtiP6alUTLvKdUM9cuNqpReTD55hQ%3D%3D"
}
,{
__meta__:{
createdBy:c,createdDate:"2022-05-15T19:45:42.900Z"
}
,contentType:aO,file:"intro-to-vue-3.png",folderId:1652278737228,id:1652643629978,sizes:[{
height:a,path:d,quality:b,width:e
}
,{
height:a,path:f,quality:b,width:g
}
,{
height:a,path:h,quality:b,width:i
}
,{
height:a,path:j,quality:b,width:k
}
,{
height:a,path:l,quality:b,width:m
}
,{
height:a,path:n,quality:b,width:o
}
,{
height:a,path:p,quality:b,width:q
}
,{
height:a,path:r,quality:b,width:s
}
,{
height:a,path:t,quality:b,width:u
}
,{
height:a,path:v,quality:b,width:w
}
,{
height:a,path:x,quality:b,width:y
}
,{
height:a,path:z,quality:b,width:A
}
,{
height:a,path:B,quality:b,width:C
}
],type:D,url:"https://storage.googleapis.com/vue-mastery.appspot.com/flamelink/media/intro-to-vue-3.png?GoogleAccessId=firebase-adminsdk-jyioc%40vue-mastery.iam.gserviceaccount.com&Expires=16725225600&Signature=p%2FTT%2FuJDgYm6g9wBOgqQTibnLpnYb%2BtwbH%2FWqS6O8J%2B1yJDOIrwtXSekqVxWUYC05ddQPOekr9%2FEaQa5b9mrkIDCPNaucpBu9x5x15xmbKL4AzhpeRn3Oce5LoWzjGYQvqwQHd4j4CC6P3xWBAog5ZjvcZKXurNgcTN3RSJ2itNHTTm6BksOXZnX0lCbGfID4Xux69lwLEQcx%2BEhk3KjgoQUpJwqOhckq5gjwgAwj9LO3t7LvBXBu93O%2Ft3NEOdDTpwldAlLgL%2BvYTQEmotEGFSK7rdUevvxch8I5AGDXRhYDmkHAJQzVhWPw6EOZBwInUuNze3P4I4UCraNE1Yahg%3D%3D"
}
],description:"Learn the fundamentals of Vue 3 in this course that starts with the very basics.",facebookImage:L,twitterImage:L,author:L,teachers:[{
id:1653428664892,firstName:"Adam",lastName:"Jahr",about:"Co-founder of Vue Mastery, Vue.js Community Partner, and JavaScript conference presenter.",image:[{
__meta__:{
createdBy:c,createdDate:"2022-05-24T22:33:32.928Z"
}
,contentType:E,file:"adam-jahr.jpg",folderId:1653431006510,id:1653431602583,sizes:[{
height:a,path:d,quality:b,width:e
}
,{
height:a,path:f,quality:b,width:g
}
,{
height:a,path:h,quality:b,width:i
}
,{
height:a,path:j,quality:b,width:k
}
,{
height:a,path:l,quality:b,width:m
}
,{
height:a,path:n,quality:b,width:o
}
,{
height:a,path:p,quality:b,width:q
}
,{
height:a,path:r,quality:b,width:s
}
,{
height:a,path:t,quality:b,width:u
}
,{
height:a,path:v,quality:b,width:w
}
,{
height:a,path:x,quality:b,width:y
}
,{
height:a,path:z,quality:b,width:A
}
,{
height:a,path:B,quality:b,width:C
}
],type:D,url:"https://storage.googleapis.com/vue-mastery.appspot.com/flamelink/media/adam-jahr.jpg?GoogleAccessId=firebase-adminsdk-jyioc%40vue-mastery.iam.gserviceaccount.com&Expires=16725225600&Signature=JM1VgCjOt%2B2kM0wxPRjgbbOZ0XWimAtNfWHh4F75maLhGm65L202sfKBk7MkgUlW4kopZDVgCYm7cFRjsax9oTxC7UFEoYpPVC23N7CqQ4voEVpD9nyjQFR2lCDesZhbPjN379gOPEhQBk9%2B9sbKltTh9vizVSnCy1Jp7tpOUMRUVC91JT2%2FKaL968BxuabokwFu9sYOB2qZ5LZLQQ54OxV8DrPciUJdy3zU9q9nMSB5auipH3daJaMe2k9YNI75vnIRAaGG4YJfCBB2pGOP%2FCN%2FsQVNkDDgKJvCa7tiZcCc90xZh2qo9tfLkUJXyWMgsW1UN77pG9eUawUl3NBrMA%3D%3D"
}
]
}
],parentId:aP,order:aP,label:"null",isPromoted:F,isDraft:F,isComingSoon:F,id:H,free:F,duration:"00:57:00",difficulty:"beginner",courseLabelsBar:aQ,courseDependencies:aQ,completable:G,teachersCourseInfo:L
}
}
]]
}
}
(9999,1,"dggLL26ybOgv15ss1woHSbmslDQ2","120_9999_100",120,"240_9999_100",240,"320_9999_100",320,"480_9999_100",480,"586_9999_100",586,"640_9999_100",640,"800_9999_100",800,"960_9999_100",960,"1024_9999_100",1024,"1280_9999_100",1280,"1600_9999_100",1600,"1920_9999_100",1920,"2840_9999_100",2840,"images","image/jpeg",false,true,1590162495205,"Adam Jahr","published","2020-08-03T00:00:00-07:00",void 0,1596475490368,"2020-08-03T19:07:14.370Z","Untitled 2.002.jpeg",1596479241540,1596481622889,"https://storage.googleapis.com/vue-mastery.appspot.com/flamelink/media/Untitled%202.002.jpeg?GoogleAccessId=firebase-adminsdk-jyioc%40vue-mastery.iam.gserviceaccount.com&Expires=16725225600&Signature=HavdC4D8cX1S9HNAQkGQFvYu1ayTfIiTPwrA3FvdWsagWY5S04YynXi%2FlBBqAZYQ261LKtd0Zmhb3JcRSloEBrXAtDkuEVzzfVl6md7yxLTS5QLEoYwZEZBdteFh1cad%2BpZF04odTXcOL7XFu%2Bzt54znqf8TYjEAor654f1FDmQf1OHhoOXdrkwFUMWSl0Znj3XhW6wmMcGTyOdyMEGYi4cnX5kNrzuvxERGYdOuprpVOQ5ZWSGwszCA0Yk7DrWPQ6GRHnKrXiEJ6eJL4iRO0d0EEprZs585Y3hvvR07lzWGDW9%2FfiXTdLHankIFOCbU%2Bx11Z21kJEeUP7bonBNtKg%3D%3D","2020-08-03T19:08:44.304Z","Untitled 2.003.jpeg",1596481092724,1596481713308,"https://storage.googleapis.com/vue-mastery.appspot.com/flamelink/media/Untitled%202.003.jpeg?GoogleAccessId=firebase-adminsdk-jyioc%40vue-mastery.iam.gserviceaccount.com&Expires=16725225600&Signature=FuDCg4mfoeYLxFn8WPLw6HBzgDVCL73wILkh1G9C98oGJwL3oMbbhHvukd3Nf3kvVuAmzgOvB5HcpCPicRg%2F3g3VQmzk7P3u2ChNd9TLCK0kaAH6Je1lUpw5h9uibEpowrFe6PID%2BHLsJ0%2FX0KJPaosw4zBczYoztdFPp%2F8Nc%2FSTRDVlACQlN4HwSzH96Itu9aokIdR676uhGgcLZT0e%2FBdgSZjsT4B32rUOqBNjQQ3SXNgSJ8f2za0DvJI%2FEBLFNi5Njyno7gcztEYYKwwWELkfnzCv7qycXIJ%2FSxkiV3vrucgZY00zSj1gcd7xdUY7j8uCJFA9BAyDskLM%2BAWLPA%3D%3D","2020-08-03T22:58:54.923Z","conditional_rendering.001.jpeg",1596495488802,1596495514584,"https://storage.googleapis.com/vue-mastery.appspot.com/flamelink/media/conditional_rendering.001.jpeg?GoogleAccessId=firebase-adminsdk-jyioc%40vue-mastery.iam.gserviceaccount.com&Expires=16725225600&Signature=dXXU6i%2BLc7a1xXgZZKLeeNt8BN2RReM8p2YFs4Ax9SBz6vW4%2Bz%2B95DuLhwjJG2jiTFGjN4mmmcVT6dNYgQOMcGiuKPUwQ7qHqPGO0J1PMO9H%2B3pAm%2BARMMYm3OJl04pJKRUSB%2Bzy9P05u3wM63fpV6YHBvObyN%2FPPLeQ78GyuaQzB0igmPiVd%2BebKHmCypDIn8GtAv24vkfnYaY8sNpQyeEhm%2BTR2LUoO1nWuVVR%2BendNaktDTIUhRVrecMlIJEX7KaLT67XFlgWn09R3EJxo86IPe%2B6i3ZQfz9BQQbRsFIrCjOxHe8h052roIqFViM9oSqn8%2F%2Bokg4tD%2Bzi5cmvzg%3D%3D","2020-08-03T23:29:09.097Z","list rendering.001.jpeg",1596497320288,1596497337212,"https://storage.googleapis.com/vue-mastery.appspot.com/flamelink/media/list%20rendering.001.jpeg?GoogleAccessId=firebase-adminsdk-jyioc%40vue-mastery.iam.gserviceaccount.com&Expires=16725225600&Signature=txyZr34RlMj4UFKuy31vhahJQkq%2BGxih7K7r4eEwj6NpN%2FJqZA4ECGxDRmeBVDFJm%2BMOgb%2FXUeeZRCYRXFgVhuNlT3wAlmnFZdDGsWJqxKgsxQvIrOtZB7VOSn6h%2Bowj6naUZpp%2BAmVE6j%2BNWXs5Q7c1XdOhF%2BcLE2pIA1rR9iP09uExiZtOs2%2FWj7%2BC0bHK8mwiMyRe3T0aysME7hXa6QJb2iaxxhrnKylVZ05hZjAKkbQIx%2FZwstbYoF8a0sGVglelKlfsSAj%2FYw2z4zArMlbEezV8EOqe%2FfQYEsVDsbBzmq3TX5FLUbbgDKiqMbrkgIFV%2Be2ympLIm6jxFcu54A%3D%3D","2020-08-04T01:45:23.326Z","event handling.001.jpeg",1596505488237,1596505508917,"https://storage.googleapis.com/vue-mastery.appspot.com/flamelink/media/event%20handling.001.jpeg?GoogleAccessId=firebase-adminsdk-jyioc%40vue-mastery.iam.gserviceaccount.com&Expires=16725225600&Signature=m4o2y7gF1PlIMaPRFP9hs76AHwoZDDz8xNoBH2QPVWpn7ZXfwp%2FxnulaiYafjkpH%2BoVtxJZNHRaUYgSnW80Gavb7rPT%2Foo58BMuDMiM2YCX3GyAYLRaOWVYoBuUvU42cnkN22b%2FTUxwvIaSkUubn1KbOdFld2l0%2FOJly2cVCohN0I9EF8PCViq7EHEZ3H0tbt%2FvPR3fuiuLSvDj1eWTHCo4Ps4SzVPsQOQcsiwLlbsJO2UuLpRgGZVUI2CujvAz8vFkyCDgDYNIGB8olPWKR091csMKToKZo8qAqIeRwH15ppPscClmz1L%2FOXueAo0ezX36h7Mr8URJ37Q%2BvU6M9mw%3D%3D","2020-08-04T15:09:18.344Z","class & style.001.jpeg",1596508281508,1596553747204,"https://storage.googleapis.com/vue-mastery.appspot.com/flamelink/media/class%20%26%20style.001.jpeg?GoogleAccessId=firebase-adminsdk-jyioc%40vue-mastery.iam.gserviceaccount.com&Expires=16725225600&Signature=dCnbGGepHE4qNjdhK1uvjKte897C4gqBr4tHpZDKCc90fAQD1q%2FmxYAA0aTwc%2FQ84gyB0aDl7qFpa4lMd6imFKuW2wf%2FgrPVcqEunBP2wcaGCZpMiwO7UqC2%2BXAStjX5pACpffBt%2BaWviSJB8OyZHZ6B2%2B9p2eBTzIItomQVbxqOc9HC8DzAos85wER8PW5wyF6GEzeeGwcTlq8%2F0hRoTdadvQ10hzp3%2FEvcd96X%2FvTUL7IQ16GXpkkCr6inWpYu47Foe%2B%2BLSx2beTTz35brn6fE4bvQvxDzKS0O7DvZekp0NhrKzprvQdJQYanN6ukAglR4RyOgESnFwWo7WDeUbw%3D%3D","2020-08-04T21:25:32.102Z","computed.001.jpeg",1596575709252,1596576320182,"https://storage.googleapis.com/vue-mastery.appspot.com/flamelink/media/computed.001.jpeg?GoogleAccessId=firebase-adminsdk-jyioc%40vue-mastery.iam.gserviceaccount.com&Expires=16725225600&Signature=HB%2FA%2FOigTofEKDOd%2FcaVZ7IHHkRn2AQJecpH9uJKArd30ECq%2FUFb7ftMiwxqT2Bk%2FGd6lugssjx8nbTFijsnArP4nU%2FkupXr%2FuPYz3cEYUTcFs29Cl9V%2Bnh3ImEHnt6E1gv1PZc4D0tXPdU5sQEVI1SWivV1VUJNjQB7k6PjP%2FIX8KULfC8bx52OrlzI3X28U%2FmFbXye0%2F3hKc5tPxzRZ0jP0096NK%2FTVxXlaPMC%2F0lBA3Xs6H%2FkogP%2FteieW1bkaTVtH0DakV5sjRvQMFqrAwiwIL%2BpbhDwAaObajPeX3CyBIi0S0LVIA5y86vm1tWDQeUG8LW4225t9ki4xCpwDQ%3D%3D","2020-08-04T22:24:48.848Z","components.001.jpeg",1596579857309,1596579876542,"https://storage.googleapis.com/vue-mastery.appspot.com/flamelink/media/components.001.jpeg?GoogleAccessId=firebase-adminsdk-jyioc%40vue-mastery.iam.gserviceaccount.com&Expires=16725225600&Signature=LYwDAK5jD%2BsYuOmJHBGUrURhI38VK08yH%2BmVTjPEw%2FU0oJzg6UJCaXCn5vUMx3JM7088mU9%2BsvVhylPTrl2GAv9yNURiz3yUmun4c1uZ3G0GlFtkBVhFXFA%2FTvGBnvrLVn%2BxeZj87mKSbBVZoKAyxRDuLUmXukLrC%2B9zmf3Q%2FN5cTimxQ%2BXbVHhVvFnBNqopj5Qwnw26cp%2B0siI6ZA6TBgdlzW%2Bl2ND4SeTM8aVLUB6VAsCOQPP6G87xxHtcPFuHsNqlq5epNOeh%2FOhyKk3jcP0tfJX0P3coHXPZf%2FY02mU70shFs7GHT%2FYSYsp34tuQYfbAu5EZNxRur4V9F9sW9A%3D%3D","2020-08-04T22:51:13.576Z","communicating events.001.jpeg",1596581436203,1596581462245,"https://storage.googleapis.com/vue-mastery.appspot.com/flamelink/media/communicating%20events.001.jpeg?GoogleAccessId=firebase-adminsdk-jyioc%40vue-mastery.iam.gserviceaccount.com&Expires=16725225600&Signature=Owa1rIa1BaJyCULDhFBUZdZlGxWJJwgXEBHJGMcckCbloYp5CAAhsiqO2yg%2BQ0X10lFmJV64KUfpsS0cx6HoFy7SzIujIKZC243kuVZnFW%2FTkLiYvxslbmT11hlgFxU7GPTLqlxVPc%2FHbhhiGDMgRr86KlSac4lKujtKMZzUnPA%2BZm17XdmP3W1pg6ugxt4htzPY1wsU8hk43orOeofqKNSnw9VcnvgtKgywKXfl18SrWqgNDcPRP71l7cKvpp1UahdNgeoENIWHYFsDeOKrgbk2pBxDYsbCYGUD3ertsSqEroky%2B5y43aEf8hAi9ntXlPRzhPYez5dNP5QnWrq55g%3D%3D","2020-08-05T00:05:40.360Z","forms.001.jpeg",1596585904752,1596585925503,"https://storage.googleapis.com/vue-mastery.appspot.com/flamelink/media/forms.001.jpeg?GoogleAccessId=firebase-adminsdk-jyioc%40vue-mastery.iam.gserviceaccount.com&Expires=16725225600&Signature=JtPGF%2Fp7rpa3rVmNW%2Bm32J1xFOS86rfB8r0X5WSOD2uePPgSA%2B4yLgPK%2B132od9TfzWiJedg7Nx1zcXNlfvjVfws00P7gsMc3pwXXQL8OVf7%2FJyzrAbJ9HX7NjrWYMDPSspPvR6U4IymBCaZ%2B9crKn4WHw4FRhF6IhY22gkbSArGbGND559nrSDlLWI2cxnjCy%2B5qioaFMC%2FxyQPr3b665XXQjr2PkTIjjjJaaf9lT3tsAE7%2BIrc5QGYY7bvo3R4nnFkL3v0bODGUg1CkwCBHe%2B2g4b7ZHAhzmV%2F7xu0PU1Ok4Nd0I1GfJuO3K03Zr6H8qOwSwFoWHJMBhdOarxV9Q%3D%3D","Intro to Vue 3","2020-08-03T19:04:44.508Z","Untitled 2.001.jpeg",1596481469529,"https://storage.googleapis.com/vue-mastery.appspot.com/flamelink/media/Untitled%202.001.jpeg?GoogleAccessId=firebase-adminsdk-jyioc%40vue-mastery.iam.gserviceaccount.com&Expires=16725225600&Signature=tHqJfimp6px7h5LGGFFoE9ld7kckHqE%2F0OpZZOmk7tKL5HcVOtciR%2Fj0KkMpyllmkx%2BjRoGrvPVK4f%2B52UFwrNKigkxCfH9aLwGjf3eQUrSTmSWf9U6kN7zvyhEP47QOC%2BHBv%2FNEv77j0uoxeCOWO0fvGq2WxHPerC%2BERb164jKV2rZ7F%2FOkDMfWXFFKpj7qRuLLFFGp3pD4u95A5%2FJc6Co%2B1D%2B6yry%2BHzyK6ktahoLojAe%2FOb1nQwrIaFKw%2BtML7C46Ju%2BBcRn8GyDMJAWekFcCV7%2B1Cp22N4H1utUBL61NmQq6MDOBiO0cAki5LnWT8dtNBvvpETVrF2jZ5DE4wA%3D%3D","image/png",0,"")));
© 2023 Quttera Ltd. All rights reserved.